
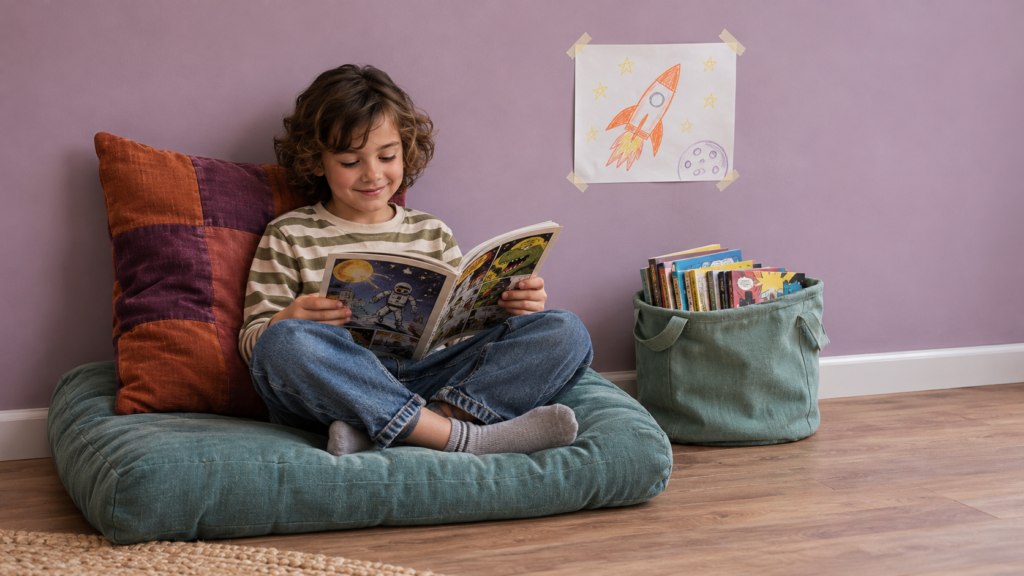
A reading nook for kids can be as simple as a floor cushion, a basket of favorite books, and a corner your child gets to help set up.
Creating a reading nook your child can make their own is less about buying a mountain of décor and more about giving them some say in the space. A favorite pillow, a basket of comics, a drawing taped to the wall, and a place to settle in can be plenty. The goal is a nook that fits your home, your child’s age, and the wonderfully imperfect reality of family life.
Quick Overview
Start with a cushion and a low basket. Let your child pick a few books or comics, choose a pillow they already like, and decide which drawing to display. Those three choices can turn an ordinary corner into a spot they’ll want to come back to.
What You’ll Need
- A small available area, such as a room corner, wall space, open closet nook, or unused section of a living room
- A comfortable seating option, such as a floor cushion, small chair, soft rug, pillows, or a child-sized seat
- A small selection of books, comics, magazines, or other reading materials your child enjoys
- Simple book storage, such as a low basket, crate, book ledge, or shelf
- A lamp or existing nearby lighting if the space needs more light
- Optional personal touches, such as a blanket, artwork, name sign, stuffed animal, or small basket
- Furniture-anchoring hardware and the manufacturer’s instructions, if you’re using a bookcase or substantial shelf
Before You Begin
Start by thinking about how the nook will actually be used. A child who likes to sprawl on the floor may not need a chair. A child who reads before bed may benefit from a nook in their bedroom, while a younger child might use a reading spot more often in a shared living area where an adult is nearby.
Measure the available space before moving furniture around. You don’t need a perfectly planned layout, but it helps to know whether the nook can comfortably hold a seat and book storage without blocking a walkway, closet door, vent, or exit.
Safety matters more than the “cozy” factor. If you use a bookcase or tall storage unit, follow the furniture maker’s instructions and anchor it properly. The U.S. Consumer Product Safety Commission recommends anchoring bookcases and other substantial furniture, since children may pull on, climb, or bump into it. Keep heavier books and baskets on lower shelves.
A nook near a window can be pleasant, but the setup needs an extra safety check. Keep furniture away from window-covering cords, and remember that screens don’t prevent falls. The CPSC recommends cordless window coverings because they eliminate the strangulation hazard posed by window-covering cords. If you have corded coverings, follow the agency’s guidance for securing cords and keeping furniture away from them. Also make sure the nook doesn’t interfere with a usable escape route or smoke alarms, especially in a bedroom.
Step-by-Step Instructions
Step 1: Choose a Spot That Supports Reading
Look for a small area that feels relatively calm without being too isolated for your household. A corner of a bedroom, a landing, the end of a hallway, or part of the living room can all work. The best location is often the one your child can use consistently, not the one with the most dramatic natural light.
Consider your child’s age and needs. Younger children may use the nook mostly for looking at picture books or reading with an adult, so a shared area can be practical. Older children may appreciate a little privacy, as long as the location remains safe and accessible.
Before moving on, check that the space doesn’t create a tripping hazard, block a doorway, cover a floor vent, or crowd a window. Small spaces can still feel cozy; they just need clear boundaries.
Step 2: Clear the Area and Define Its Purpose
Remove items that don’t belong in the nook before adding storage or decorations. This isn’t a demand for a spotless house. It’s simply easier for a child to choose a book and settle down when the area isn’t also holding laundry, random cables, sports equipment, and that mysterious pile of things nobody claims.
Decide what belongs in the nook. In most cases, keep it simple: reading materials, one or two comfort items, and perhaps a small container for bookmarks or other supplies. Toys can certainly be nearby, but if every toy lives in the nook, books may become the furniture’s least-used residents.
A rug, painter’s-tape boundary, small mat, or low shelf can help define the area without requiring a renovation. In a rental or shared room, this can make a reading nook feel distinct while keeping the setup easy to change later.
Step 3: Add a Comfortable Place to Sit
Choose seating based on how your child naturally reads. Some children like a small chair with back support. Others are happiest leaning against pillows on the floor. A washable rug with a cushion may be enough, especially in a tight room where a chair would become one more object to navigate around.
Use what is already comfortable and appropriate for your household before shopping for something new. A spare pillow, folded quilt, floor cushion, or compact chair can work beautifully. If you add a blanket, choose one that can be washed easily and doesn’t create a bulky pile on the floor.
Be thoughtful about bean bag chairs, particularly for younger children. The CPSC warns that bean bags with accessible zippers can pose suffocation and choking hazards if children open them and release the foam beads. Avoid chairs with loose seams, leaking filling, or zippers a child can open, and check the recall status before using a secondhand or existing bean bag.
Step 4: Keep Books Easy to See and Reach
Make books visible and easy to reach. A low basket, front-facing display, shallow crate, or bottom shelf can help a child browse without navigating a tall bookcase packed spine-to-spine.
Include a manageable number of books rather than every book your child owns. A smaller rotating selection keeps the nook from becoming cluttered and gives overlooked books another turn in the spotlight. Add the kinds of reading materials your child genuinely likes, including comics, magazines, joke books, graphic novels, fiction, nonfiction, and picture books. The American Academy of Pediatrics encourages parents to follow children’s reading interests and keep books accessible.
If you use a shelf or bookcase, place the heaviest books and bins low. Make sure your child doesn’t need to climb, stretch precariously, or pull down a stack to reach a favorite title.
Step 5: Add Lighting That Works for the Space
Look at the existing light at the time your child is most likely to use the nook. A corner that feels cheerful in the afternoon may be dim after dinner. If the area needs more light, add a lamp only if it can sit or mount securely and its cord can be kept out of the way.
Avoid placing lamps where they can be easily knocked over or where cords cross a walking path. In a shared room, a portable reading light may be more practical than brightening the entire space. Follow the manufacturer’s instructions for any lighting product, especially if it requires mounting or includes rechargeable components.
The goal isn’t to create a cinematic library scene. It’s to make the page easy to see and the space comfortable to use.
Step 6: Let Your Child Personalize the Nook
This is where the nook becomes theirs. Offer a few choices instead of handing over a blank check for decorative chaos—because children are creative, and sometimes creative means seven plush dinosaurs and a saucepan.
Your child might choose a few books for the current rotation, a pillow cover, a favorite blanket, artwork, a small sign, or one comfort item. If they want to display drawings, use removable adhesive products according to their instructions, particularly in rentals or on delicate walls.
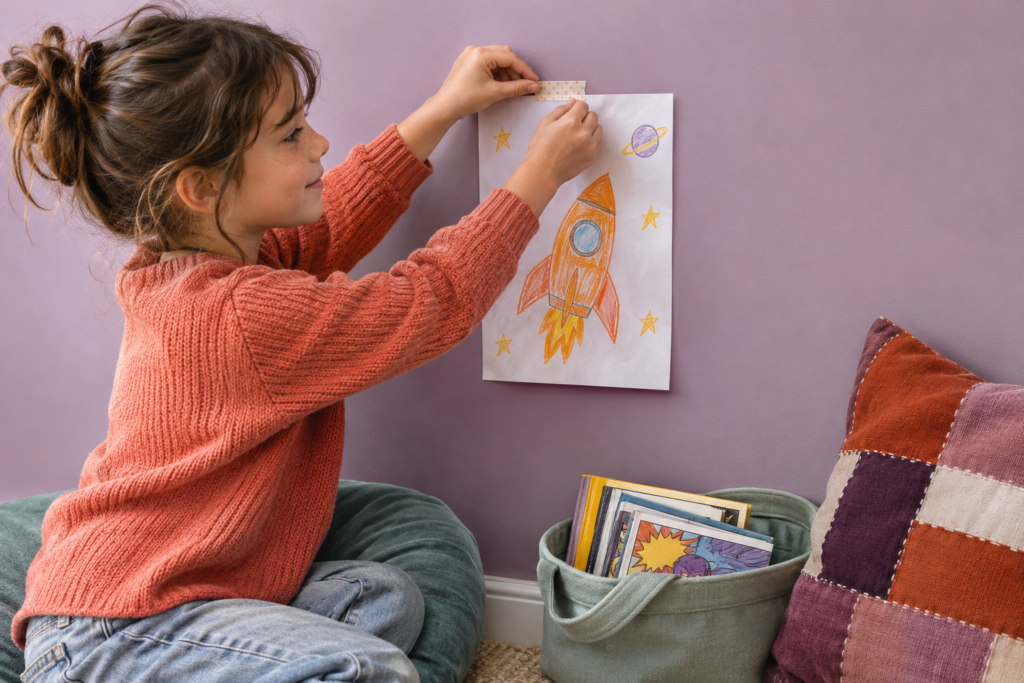
Giving your child a role in setting up the nook can also make it easier to maintain. They’ll know where things go because they helped decide what belongs there. Just keep the choices limited enough for the area to remain functional.
Step 7: Set Up Storage That Is Easy to Reset
Create a simple return-home system for books and comfort items. One basket for books, one bin for stuffed animals, and one hook or small container for a blanket may be all you need. More containers aren’t always better; too many categories can make cleanup feel like running a tiny retail stockroom.
Choose open storage for items your child uses regularly. Closed bins can be helpful for extra books or seasonal items, but everyday reading materials shouldn’t require a scavenger hunt. If the nook is in a shared area, a basket with handles can make it easy to move books out of the way when needed.
Check that the storage is stable, not overfilled, and appropriate for your child’s reach. A system works when it can be reset in a minute or two, not when it looks perfect for approximately nine minutes after a photo.
Step 8: Do a Final Safety and Comfort Check
Sit in the nook yourself if you can, and look at it from your child’s height. Are the books reachable? Is there anything sharp, unstable, or easy to trip over? Can your child get in and out of the space without climbing furniture?
Finally, invite your child to use the space. They may immediately curl up with a book, or they may need time before it becomes part of the routine. Both are normal.
Helpful Tips
- Rotate books every so often instead of buying more storage the moment the basket fills up.
- Keep a library tote near the nook if borrowing books is part of your family’s routine.
- Add a small bookmark container so unfinished books don’t become upside-down furniture accessories.
- Use washable covers, rugs, or blankets in spaces used by younger children, pets, or snack-loving readers.
- Make room for different reading formats. A comic book absolutely counts.
- If siblings share the nook, give each child a small basket or designated section rather than expecting one perfectly neutral setup.
- Let the nook evolve. A floor-cushion corner may later become a chair-and-shelf setup as your child grows.
Common Mistakes to Avoid
- Overfilling the space: Too many pillows, toys, and books can make a small nook harder to use. Start with the essentials and add only what earns its place.
- Choosing décor before function: A cute banner won’t fix uncomfortable seating or books stored too high to reach.
- Using unanchored tall furniture: Bookcases and substantial shelving units need proper anchoring when children may climb, pull, or lean on them.
- Putting seating too close to windows: Keep furniture away from window-covering cords and address window safety before creating a reading area there.
- Buying storage without editing first: Sort through damaged, outgrown, or unused items before adding bins and shelves.
- Making the nook too precious to use: A reading nook should be comfortable enough for everyday life, not a corner everyone is afraid to disturb.
Final Thoughts
A good children’s reading nook isn’t defined by a certain chair, color palette, or budget. It works because your child can reach the books, settle in comfortably, and recognize the space as one that belongs to them.
Start small, keep safety at the center, and let the nook change as your child’s interests do. A basket of well-loved books and a soft place to land can go a long way.
Frequently Asked Questions
Does a child’s reading nook need to be in their bedroom?
No. A bedroom can work well, but a living room corner, hallway alcove, or shared family space may be more practical, especially for younger children or smaller homes.
How many books should I keep in a reading nook?
Keep enough books to offer a choice without crowding the space. A smaller selection that you rotate is often easier for a child to browse and put away than an overflowing shelf.
What is the best seating for a child’s reading nook?
The best option is one your child finds comfortable and can use safely. A floor cushion, rug with pillows, small chair, or soft mat can all work, depending on the available space and your child’s preferences.
Can I create a reading nook in a rental?
Yes. Use movable furniture, baskets, rugs, removable wall displays, and freestanding seating. Avoid permanent changes unless your lease allows them, and anchor substantial furniture according to the manufacturer’s instructions.