
Everyday Living

baking projects for preschoolers
Everyday Living

Simple Baking Projects That Let Preschoolers Practice Pouring, Stirring, and Decorating

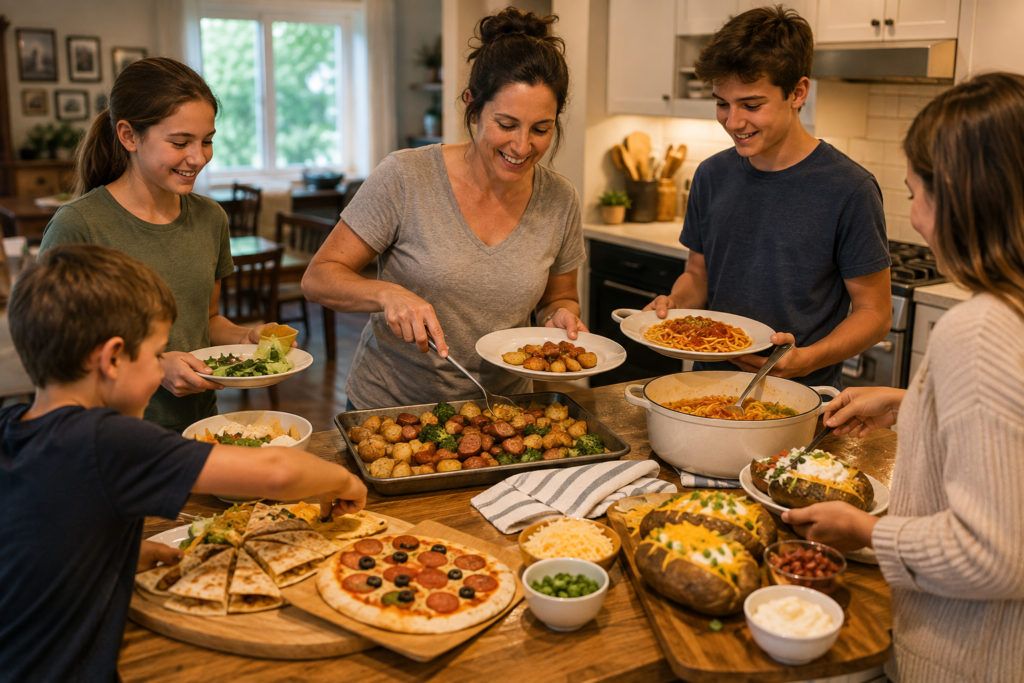
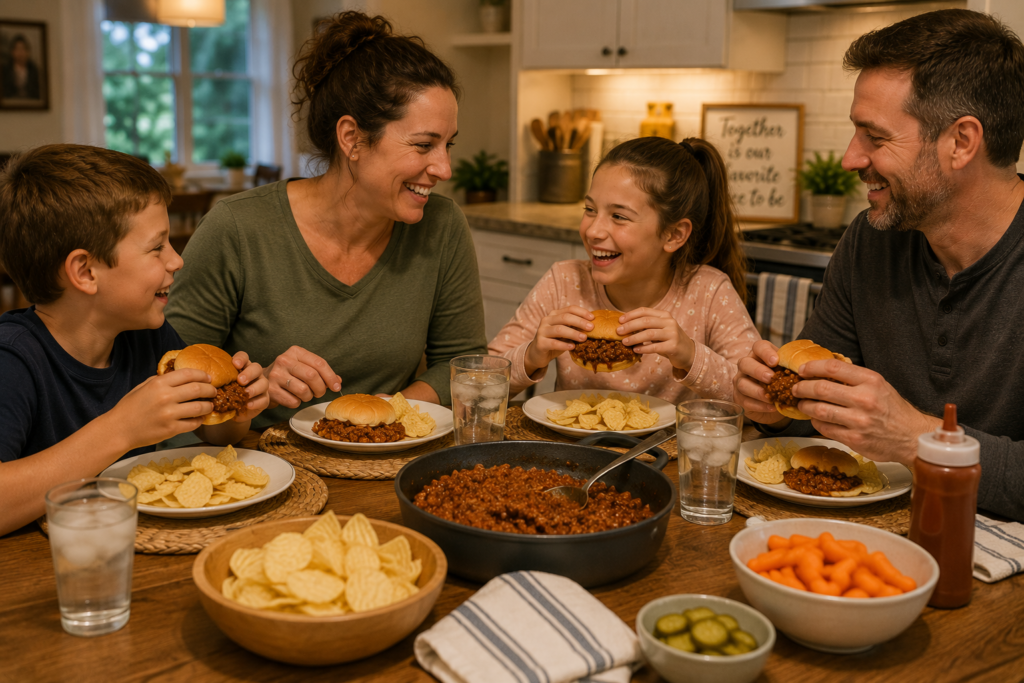
Baking with a preschooler is rarely a tidy, silent activity. There may be flour on the counter, one sprinkle in a sock, and a very serious debate over whether three blueberries count as “a lot.” But simple baking projects can give your child a real role in the kitchen without turning the afternoon into a complicated production.

The best baking projects for preschoolers keep the child-friendly jobs clear: pouring premeasured ingredients, stirring in a sturdy bowl, placing paper liners, spooning batter with help, and decorating treats after they’ve fully cooled. Adults handle the oven, hot pans, sharp tools, electric mixers, and anything involving hot sugar or glaze.

Along the way, baking creates natural moments to talk about measuring, counting, new words, and what happens when ingredients go into the oven. The goal isn’t a picture-perfect batch of cupcakes. It’s a shared kitchen activity with a snack at the end, which is honestly a pretty good deal.

Set Up the Kitchen for Fewer Spills and More Helpful Hands

A little setup makes preschool baking calmer for everyone involved. It also helps your child focus on one task at a time instead of trying to reach over a bowl, a bag of flour, and the family dog, who has suddenly developed a deep interest in pastry.

A child-height table is often the simplest workspace. If your child will stand at the counter, use a wide, secure learning tower or non-slip stool designed for children, with an adult remaining beside them. Place a damp kitchen towel or non-slip mat beneath a wide mixing bowl so it is less likely to slide while your child stirs. A larger bowl is usually more useful than a cute child-size one; it gives ingredients room to stay inside when the stirring gets enthusiastic.

Before calling your helper into the kitchen, measure ingredients into small cups or bowls. This lets them enjoy the satisfying pour without needing to manage a heavy flour canister or a full carton of milk. Small prep bowls, measuring cups with handles, a silicone spatula, and a large spoon are the essentials. A child-size apron, silicone baking mat, or squeeze bottle for frosting can be handy, but they are optional conveniences—not requirements for a happy baking day.

Keep the project short enough to suit the moment. One bowl, one pan, and one decorating step is plenty. A boxed mix can be a perfectly practical choice, especially if the point is participation rather than making every ingredient from scratch.

Before beginning, build in a simple routine: wash hands with soap and water for at least 20 seconds. Wash them again after handling raw eggs, and clean utensils and surfaces that touched raw egg before using them for anything else. The USDA’s food-safety guidance on cleanliness in the kitchen is worth keeping in mind, particularly when little hands are involved.

Banana Muffins Make Pouring and Stirring Feel Manageable

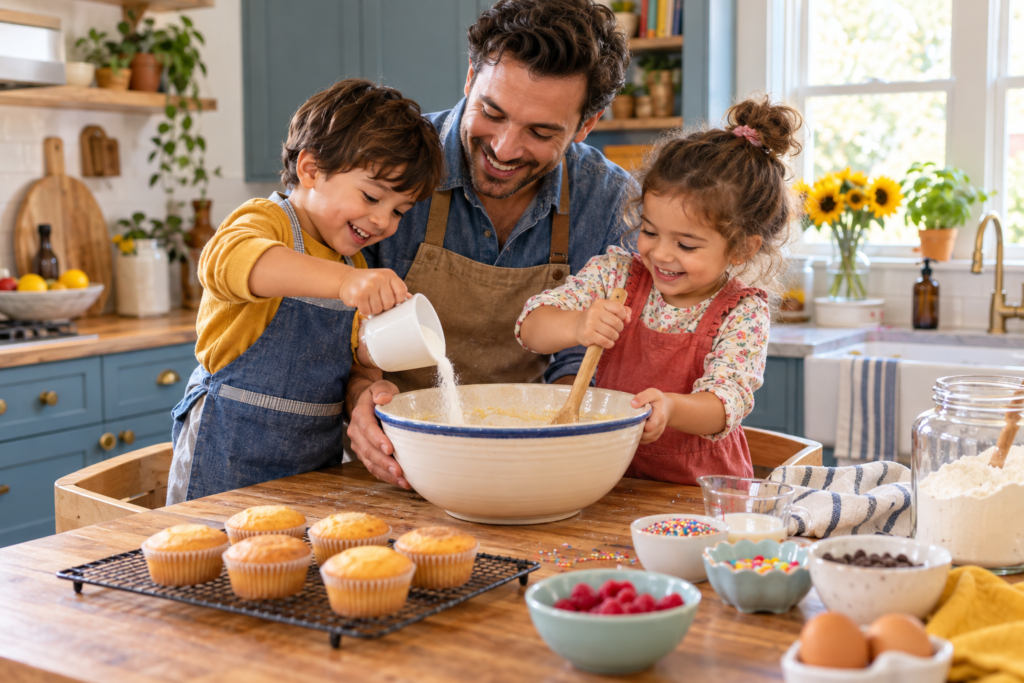
Banana muffins are a friendly first project because many recipes come together in one bowl and bake in individual portions. They also don’t need frosting to feel finished, which means less cleanup when you’re short on time.
baking projects for preschoolers

An adult can mash ripe bananas ahead of time, measure the ingredients, and prepare the muffin tin. Your preschooler can then help with several low-risk steps:

  • Pour premeasured dry ingredients into the bowl
  • Add mashed banana and other measured ingredients
  • Stir with a large spoon or silicone spatula
  • Place paper liners into the muffin pan
  • Sprinkle a small amount of oats, cinnamon sugar, or finely chopped soft fruit on top, if the recipe allows

Give your child a simple instruction such as, “Stir until the white flour mostly disappears.” There is no need to demand perfectly smooth batter. In fact, stopping before the batter is overmixed is often a better outcome than turning stirring into a 10-minute upper-body workout.

The adult should fill the muffin cups or closely guide the spooning if you want your child to participate. Once the pan is ready, the adult should carry it to the oven and handle it while it’s hot. Let the baked muffins cool before serving or storing.

Place cooled muffins in an airtight container. If they won’t be eaten within a couple of days, freezing some can prevent the familiar “Why did we make 12?” situation. Separate layers with parchment or wax paper to avoid a sticky pileup.

No-Fuss Cookies Give Kids a Clear Decorating Job

Cookies can be especially satisfying for preschoolers because the transformation is easy to see: dough goes in, cookies come out, decorations happen. For a low-stress version, use a simple drop-cookie recipe, refrigerated dough, or a mix that does not require complicated shaping.

Preschoolers can pour measured ingredients into the bowl and help stir with a sturdy spoon. Once the raw dough is ready, the adult can portion it onto the lined baking sheet. Save the child’s biggest job for after the cookies have baked and cooled: decorating. Wash hands after handling the raw dough, and remind your child that tasting waits until the cookies are baked.

The baking stage belongs entirely to the adult. Keep children away from the open oven, hot baking sheets, and dangling appliance cords. The American Academy of Pediatrics recommends assigning kitchen tasks based on a child’s abilities and keeping young children supervised around kitchen hazards. Its guidance on cooking with children is a useful reminder that helping does not need to include every step.

Once the cookies are fully cooled, decorating becomes the main event. Offer two or three choices rather than a full bakery-counter spread. For example, set out a small bowl of frosting, a few spoonfuls of sprinkles, and finely crushed freeze-dried fruit or cereal. A butter knife with a rounded edge can work for spreading soft frosting when an adult is nearby, though a small spoon or silicone spatula may be easier for many children.

Skip hard, round, gummy, or chewy candy decorations for younger preschoolers. The CDC identifies foods such as hard candy, jelly beans, gumdrops, caramels, and gummy candies as potential choking hazards for young children. Soft frosting, finely crushed toppings, and sprinkles used lightly are better options. You can review the CDC’s choking-hazard guidance when planning toppings.

Cupcake Decorating Lets Preschoolers Be the Finishing Crew

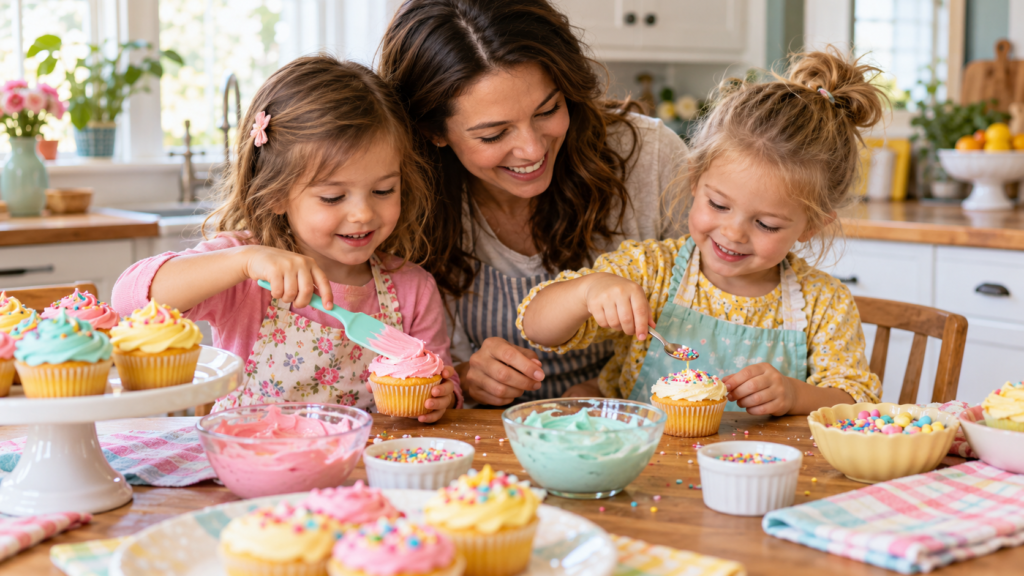
Cupcakes offer the most obvious decorating payoff, but they work best when you separate baking day from decorating day—or at least take a generous cooling break between the two. Hot cupcakes and frosting are a slippery, melty mess, and nobody needs that kind of drama before lunch.
baking projects for preschoolers

Bake the cupcakes yourself or let your child help with the low-risk mixing and pouring steps, then handle the oven and hot pan yourself. Allow the cupcakes to cool completely before decorating. You can store unfrosted cupcakes in an airtight container if you plan to decorate them later. This approach can make the activity more realistic for a busy afternoon: the baking happens earlier, while the decorating happens when your child is ready to help.

For preschool-friendly decorating, keep it simple:

  • Spread frosting with a small spoon or blunt spatula
  • Add sprinkles by pinching them between fingers
  • Press small pieces of soft fruit onto the frosting
  • Use a squeeze bottle of frosting with adult help
  • Arrange a few mini chocolate chips or finely crushed cookie crumbs on top

A piping bag can be fun, but it is not essential. It also tends to create impressive frosting piles in one spot, which is charming once and less charming on the fourth cupcake. A spoon works just fine.

If you use store-bought frosting, mixes, or toppings, check the label each time you buy them. The FDA notes that the full ingredient list matters for identifying major allergens because a separate “Contains” statement is not required on every package. For a child with a diagnosed food allergy, follow the family’s established medical or allergy plan rather than improvising substitutions. The FDA’s food-allergy label guidance can help you know what to look for.

Fruit Crisp Is a Good Choice for Gentle Mixing and Topping

A fruit crisp is less about precise decorating and more about pouring, stirring, and scattering. It is a nice option when you want a warm baked dessert without frosting, piping bags, or a countertop that looks like a sprinkle factory afterward.

The adult can wash and cut the fruit, since knives are not a preschool task. Apples, berries, peaches, or another fruit suitable for your recipe can work. Your child can help pour the prepared fruit into a baking dish and stir together an oat topping in a bowl.

The topping is often where preschoolers can have the most fun. Premeasure oats, flour, sugar, and spices into separate small containers, then let your child pour them in. If the recipe uses softened butter, an adult can add the softened butter, then the child can use a sturdy fork or pastry blender with close supervision. Because the topping contains raw flour, keep little hands out of the mixture and wash hands and surfaces after preparation.

Your preschooler can scatter the crumble topping over the fruit while you make sure the dish goes into and comes out of the oven. Let the crisp cool before serving; fruit fillings hold heat longer than they look like they should. It is one of those kitchen facts that feels mildly rude but is useful to remember.

Store leftover crisp in a covered container in the refrigerator. Reheat only the portion you plan to serve, then let it cool to a comfortable eating temperature before offering it to your child.

Keep Raw Batter Off the Menu

It can be tempting to treat batter tasting as the traditional reward for helping bake. For preschoolers, it is better to make the finished treat the reward instead.

Raw flour is not typically treated to kill germs, and raw batter can also contain uncooked eggs. FoodSafety.gov advises against eating raw dough or batter, and children under 5 are among the groups at higher risk from foodborne illness. A cheerful “We taste after it’s baked” rule keeps the message simple and consistent.

If your child wants a kitchen job while waiting for the oven timer, try one of these instead: wipe the table with a damp cloth, count cupcake liners, choose a serving plate, or help put unopened ingredients away. They still get to be part of the process without hovering near a hot oven door.

Final Thoughts

The most successful baking projects with preschoolers are usually the ones that leave room for small imperfections. A lopsided muffin, uneven frosting, or extremely sprinkle-heavy cookie still counts as a finished project—and often becomes the one your child is most proud to serve.

Keep the tasks appropriate for your child’s abilities, supervise closely, and handle the heat, sharp tools, appliances, and hot pans yourself. Choose recipes with a few clear jobs your child can genuinely do. That is enough for a sweet, useful afternoon in the kitchen.
You Might Also Enjoy

Preschool Snack-Making Activity
Everyday Living

How to Set Up a Preschool Snack-Making Activity With Simple Kitchen Tools

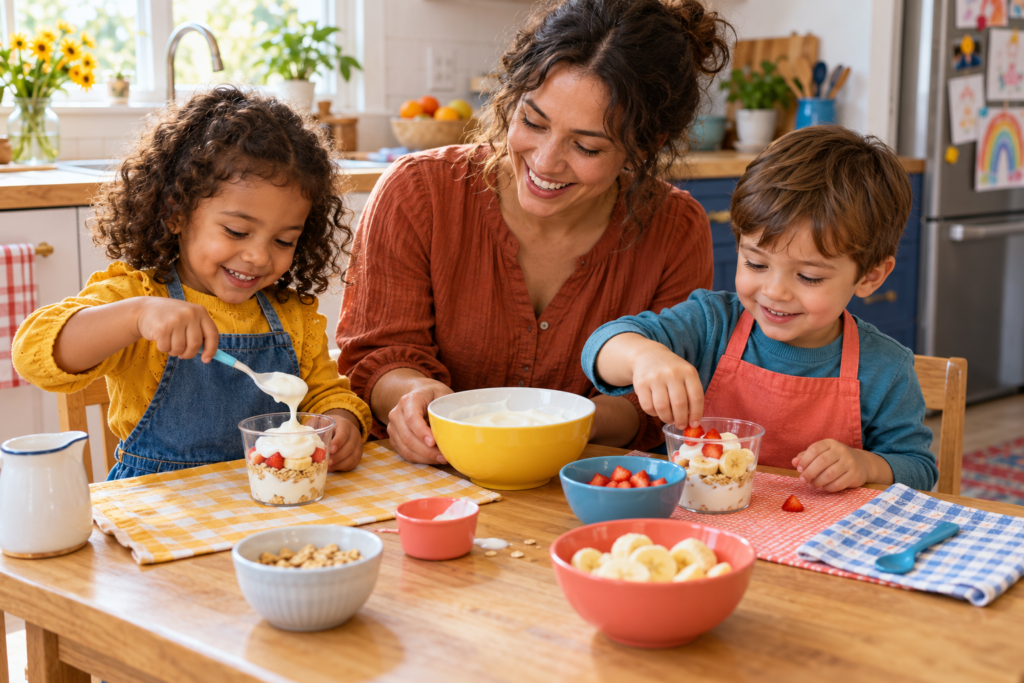
A preschool snack-making activity gives young children a real role in the kitchen without turning your counter into a tiny cooking competition. With a few simple tools and no-cook ingredients, you can create a hands-on routine where children scoop, pour, stir, count, and assemble a snack they’re excited to eat.

The key is keeping the setup small, safe, and manageable. This guide is for parents, caregivers, and early-childhood educators planning an adult-supervised activity with ready-to-eat foods. It is not the time to introduce heat, raw animal foods, or complicated recipes. Think simple bowls, small portions, and plenty of nearby grown-up help.

Quick Overview

A preschool snack-making activity is a simple way to involve children in food preparation while practicing everyday skills. They can help measure yogurt, add soft fruit, stir ingredients, choose toppings, and carry their finished snack to the table.

The best activities use three or four familiar components rather than a sprawling ingredient bar that looks charming for five minutes and then becomes a cereal-and-berry crime scene. Choose foods that are ready to eat, easy to portion, and appropriate for the children participating. A yogurt-and-fruit cup, soft fruit mix, or cracker-and-spread plate can work well when prepared with food safety and choking prevention in mind.

What You’ll Need

Keep the tool list basic. Most kitchens already have what you need.

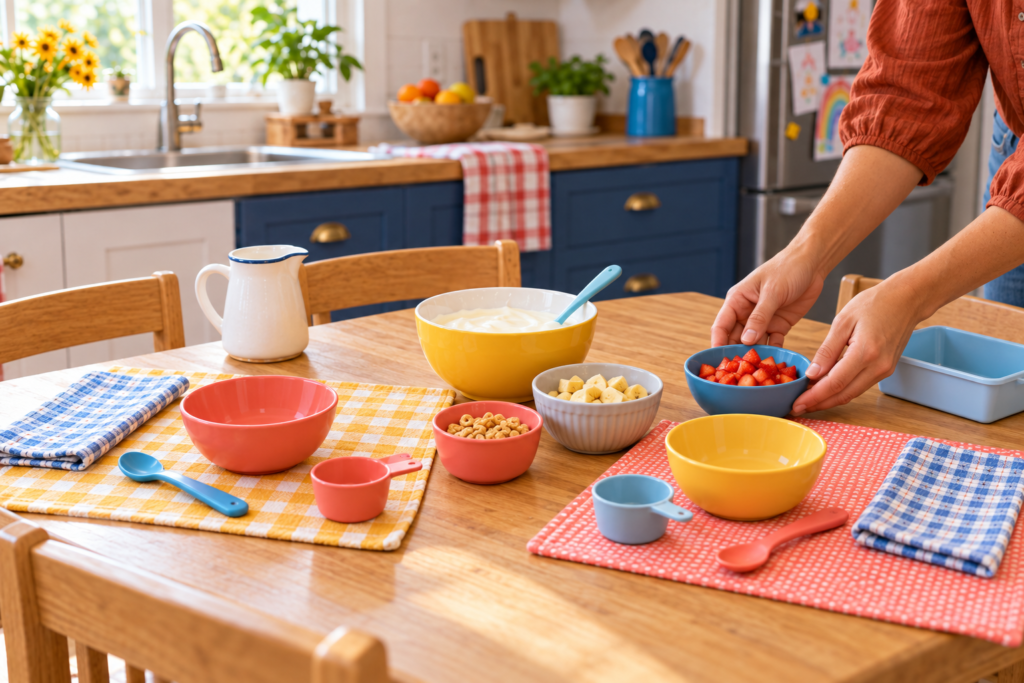
  • Clean bowls, one per child or small group
  • Child-size spoons for scooping and stirring
  • Small cups or a small pitcher for pouring
  • Measuring cups or measuring spoons
  • A clean cutting board for adult prep
  • Napkins or washable placemats
  • Ready-to-eat snack ingredients
  • A refrigerator for perishable ingredients
  • Soap, warm water, and clean towels for handwashing and cleanup
  • Ingredient labels or allergy information, especially for group settings

An optional plastic or nylon knife may be used to cut very soft foods, such as banana or ripe avocado, with direct adult supervision. These tools are not universally safe simply because they are marketed for children, so consider the child’s age, coordination, and the food being cut. An adult should handle firmer produce, round foods, package opening, and all sharp knife work.

Before You Begin

Start by choosing one snack with a short ingredient list. For example, you might set out plain or flavored yogurt, soft cut fruit, and a cereal topping. Another easy option is a fruit cup with banana slices, appropriately prepared berries, and a spoonful of yogurt. The goal is not to create a restaurant-style parfait. It is to give preschoolers clear, achievable jobs.

Check allergies and dietary needs before buying or setting out ingredients. If you are working with a group, confirm each child’s food plan in advance, read package labels every time you purchase an ingredient, and prevent food sharing. The CDC notes that hand sanitizer does not effectively remove food allergens, so wash hands and food-contact surfaces with soap and water. For a child with a known allergy, follow that child’s written care or emergency plan and the instructions provided by the family and program staff.

Wash hands with warm, soapy water for at least 20 seconds before preparing food and eating. Clean bowls, utensils, cups, and cutting boards before use. Fresh produce should be rinsed under cold running water, not washed with soap or detergent. The USDA also recommends washing cutting boards with hot, soapy water after use.

Plan the snack around choking prevention, too. Children should sit while they eat and remain supervised. Modify foods that can be difficult for young children to chew safely. Cut grapes and cherry tomatoes lengthwise into quarters, then cut them into smaller pieces as needed for the child’s age and chewing ability. Leave nuts, popcorn, hard or sticky candy, raw carrot sticks, apple chunks, chunks of cheese or meat, and spoonfuls of nut butter out of this activity. The American Academy of Pediatrics advises preparing food for young children in pieces no larger than one-half inch.

How to Set Up a Preschool Snack-Making Activity

Step 1: Choose one simple, no-cook snack

Pick a snack with three or four components at most. A good beginner format is a base, a fruit or vegetable, and one optional topping.

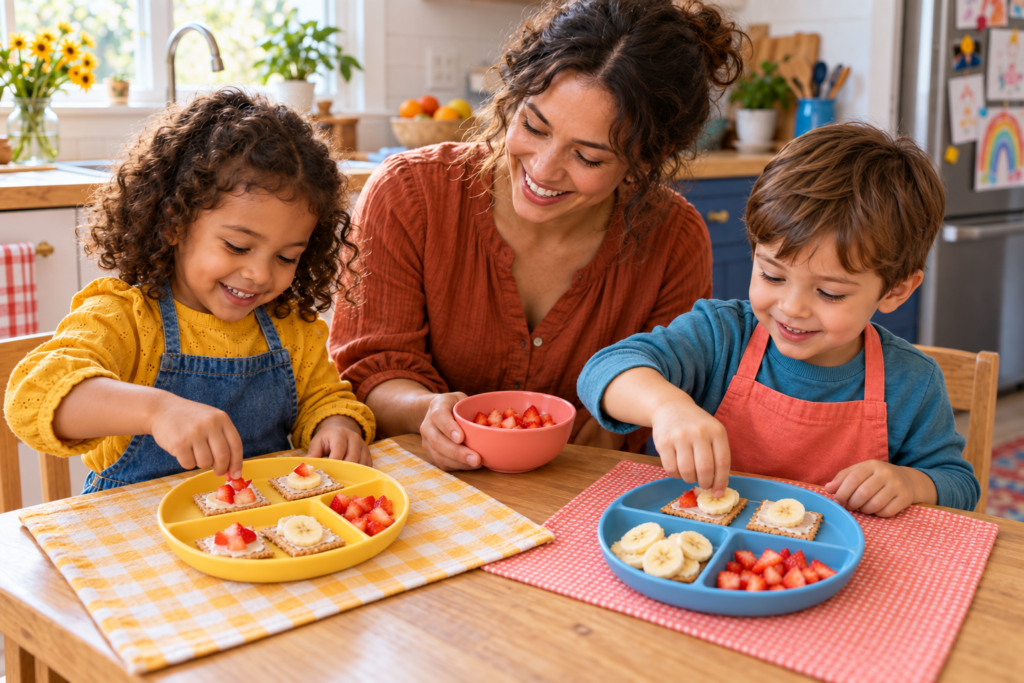
For instance, a yogurt snack cup could include yogurt, soft fruit, and a small amount of cereal. A fruit-and-cracker plate could include soft fruit pieces, crackers, and a thin layer of an allergy-appropriate spread applied by an adult..

Avoid recipes that require cooking, blending, baking, raw eggs, raw meat, or complicated assembly. Preschoolers get more from a short activity they can understand than from a recipe with 12 steps and a waiting period longer than their attention span.

Preschool Snack-Making Activity

Step 2: Prepare ingredients before children arrive

Do the higher-risk work first. Wash produce under cold running water, dry it if needed, and cut it into age-appropriate pieces. Open packages, portion ingredients into small containers, and return cold items to the refrigerator until you are ready to begin.

If grapes or cherry tomatoes are on the menu, cut them lengthwise into small pieces rather than serving them whole. Skip ingredients that are hard, round, sticky, or otherwise difficult for young children to manage safely. This is also the time to remove pits, peels, stems, tough skins, and packaging fragments.

Keeping prep separate from the child activity helps you stay focused once snack-making begins. No one needs to be hunting for a clean spoon while a preschooler enthusiastically attempts to pour an entire carton of yogurt into one bowl.

Step 3: Set up a small, clean workstation

Choose a table, island, or counter where children can stand or sit comfortably with close adult supervision. An unoccupied kitchen is not a safe place for young children, so stay present throughout the activity and keep sharp tools, hot appliances, and cleaning products out of reach.

Give each child or small group a bowl, spoon, napkin, and access to only the ingredients they need. A small pitcher or cup makes pouring more manageable than a full-size container. Measuring cups are useful not because the snack demands precision, but because they naturally encourage counting, comparing, and taking turns.

For groups, create separate workstations for a few children each rather than using one large shared table. Fewer hands reaching across the ingredients makes the activity calmer, cleaner, and easier to supervise.

Preschool Snack-Making Activity

Step 4: Wash hands and explain the snack jobs

Before touching food, guide children through handwashing with warm water and soap. Make it part of the routine rather than an interruption. Once their hands are clean, briefly explain what everyone will do: scoop, pour, stir, choose, and eat while seated.

Keep instructions concrete. Instead of saying, “Use a reasonable amount,” show children which spoon or cup to use and where the ingredient goes. You might say, “One scoop of yogurt goes in your bowl,” or, “Choose three pieces of banana.” Preschoolers respond well when a task has a clear beginning and end.

This is also a good time to explain that ingredients stay in their designated containers and that everyone eats their own snack. Those boundaries matter even more when allergies or dietary restrictions are involved.

Step 5: Let children complete age-appropriate tasks

Offer jobs that build independence without creating unnecessary risk. Preschoolers can often scoop soft ingredients, pour a small amount from a child-size cup, stir, count pieces, and choose between two safe toppings. With support, they may also serve themselves from a small pitcher or bowl.

Stay close enough to guide movement and prevent overpouring, but allow children to do as much as they reasonably can. A slightly uneven scoop is not a problem. Neither is a banana slice that lands beside the bowl. The point is participation, not snack perfection.

If you use an optional plastic or nylon knife, reserve it for soft food and supervise directly. A child might gently cut a banana segment or a piece of ripe avocado, but an adult should take over if the food slides, requires force, or causes frustration.

Step 6: Serve and eat the snack seated

Once the snack is assembled, move children to a table or eating area. They should sit while eating, with an adult present throughout the meal. Keep the pace relaxed; preschoolers may be proud of what they made and want to point out every single blueberry. Fair enough.

Encourage children to use a spoon or their fingers as appropriate for the food. Avoid rushing them or making tasting a requirement. The activity can still be successful if a child only handles, smells, or takes a tiny taste of a new ingredient.

Step 7: Clean up and store leftovers safely

Clear food from the workspace as soon as the activity is over. Wash bowls, utensils, cups, and cutting boards with hot, soapy water. Clean the table or counter, and help children wash their hands again if needed.

Refrigerate perishable leftovers promptly. FoodSafety.gov advises refrigerating perishable foods within two hours at room temperature, or within one hour when temperatures are above 90°F. Do not save food from individual bowls that children have already eaten from; saliva and warm room temperatures are not a great leftover strategy.

Helpful Tips

  • Keep ingredient choices limited. Two or three options feel empowering without becoming overwhelming.
  • Use clear bowls or small containers so children can see what they are choosing.
  • Portion toppings in advance. A small cup of cereal or fruit is easier to manage than a family-size package.
  • Put cold ingredients out last, especially yogurt, cheese, or cut fruit.
  • Choose washable placemats or a tray if you want a defined work area and easier cleanup.
  • Let children help clean up by carrying napkins to the trash, placing spoons in a dish bin, or wiping a small section of the table with guidance.
  • Use the activity to practice simple words and concepts: full, empty, more, less, one, two, stir, and scoop.
  • If you are in a child-care setting, check your facility’s food-service, licensing, and allergy procedures before planning the activity. Local requirements may add rules beyond general guidance.

Common Mistakes to Avoid

  • Choosing too many ingredients: A large topping bar can lead to confusion, waste, and too much waiting. Stick with a simple snack formula.
  • Using foods with choking risks without modifying them: Do not serve whole grapes, whole cherry tomatoes, nuts, popcorn, or hard chunks of raw produce to preschoolers.
  • Setting out large containers: Full yogurt tubs, juice bottles, and cereal boxes are difficult for small hands to control. Transfer small amounts to child-manageable containers.
  • Treating hand sanitizer as a substitute for handwashing: Soap and water are especially important when food allergens may be involved.
  • Leaving children to work independently in the kitchen: Preschool snack preparation should always be directly supervised by an adult.
  • Making cutting the main event: Most children can have a satisfying role through scooping, stirring, pouring, and assembling. Knife work is optional, not essential.
  • Saving food that has already been served or eaten from: Keep untouched ingredients separate and refrigerate them promptly. Discard individual leftovers that children have eaten from.

Final Thoughts

The best preschool snack-making activity is usually the simplest one: a few safe ingredients, a clean workspace, and jobs children can genuinely do. When the setup matches their abilities, children get the satisfying experience of helping without introducing unnecessary kitchen hazards.

Keep supervision close, make safety decisions before the food comes out, and let a little mess be part of the learning. A crooked spoonful of yogurt still counts as snack-time magic when a preschooler made it themselves.

Frequently Asked Questions

Can preschoolers use real kitchen tools?

Preschoolers can use simple tools such as spoons, small cups, measuring cups, and bowls with direct adult supervision. Sharp knives, hot appliances, blenders, and other higher-risk equipment should remain adult-only.

What is an easy first snack-making activity for preschoolers?

A yogurt-and-soft-fruit cup is a practical first option. Children can scoop yogurt, add pre-cut soft fruit, stir, and choose a small topping while an adult handles washing, cutting, and refrigeration.

How do I make snack-making safer for a group of children?

Collect allergy information in advance, read ingredient labels, prevent food sharing, use clean equipment, and set up small, supervised workstations. Follow any child-care or school food-service rules that apply to your setting.

Can I prepare ingredients ahead of time?

Yes. Adults can wash and cut produce, portion ingredients, and set out tools before the activity begins. Keep perishable foods refrigerated until the activity starts, and return untouched leftovers to the refrigerator promptly.

You Might Also Enjoy

Walking Workouts vs. Beginner Yoga
Everyday Living

Walking Workouts vs. Beginner Yoga: Which Gentle Exercise Fits Your Routine?

Walking workouts and beginner yoga are both approachable ways to add more movement to your week without signing up for a boot camp or buying a closetful of gear. The better fit depends on what you want from that time: a clearly aerobic session, a calming indoor practice, help with flexibility and balance, or simply something you’ll realistically do when the day gets busy.

The comparison is less about finding a universal winner and more about matching the exercise to your routine. Brisk walking offers a straightforward route to moderate-intensity aerobic activity, while beginner yoga provides a slower, more varied practice that may emphasize movement quality, balance, and flexibility. Both can be useful. Neither has to become a personality trait.

Walking Workouts vs. Beginner Yoga: Comparison Overview

Walking workouts and beginner yoga often appeal to the same person: someone looking for gentle exercise that feels manageable rather than punishing. Both can be adapted for short sessions, require relatively little equipment, and can work at home or near home. They also let you start slowly instead of trying to “catch up” to a fitness routine overnight.

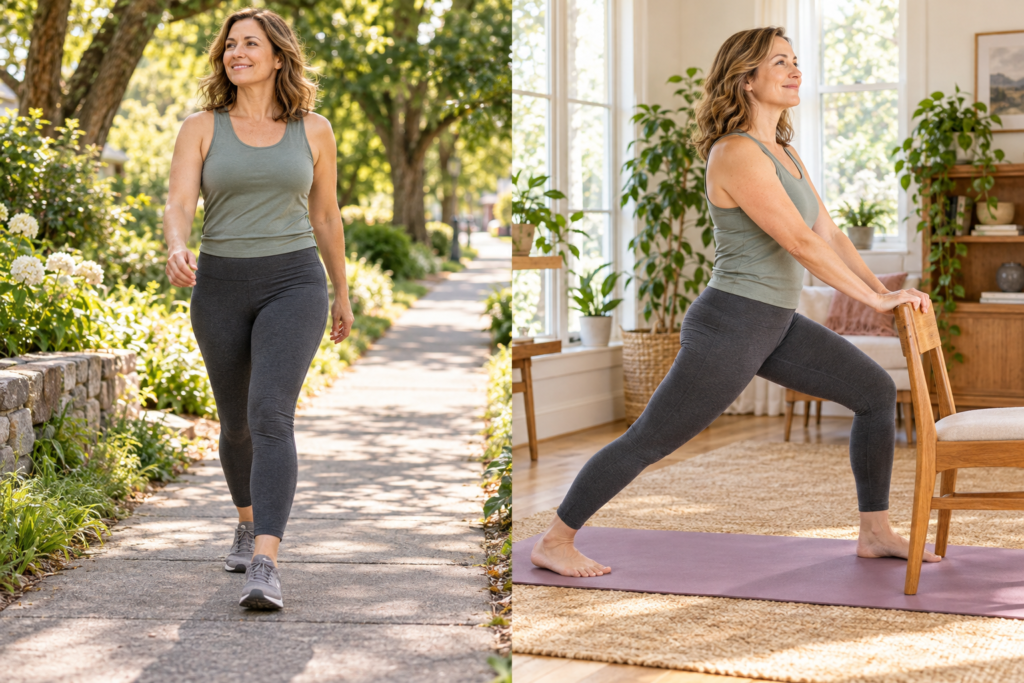
The key difference is the kind of movement each option prioritizes. A brisk walk is a recognized form of moderate aerobic activity, especially when you can talk but not sing comfortably. Beginner yoga varies widely by class and style; it may be very gentle, more active, or focused mainly on poses and breathing. That variety is useful, but it means yoga should not automatically be treated as equivalent to a cardio workout.

Side-by-Side Comparison

CriteriaWalking WorkoutsBeginner Yoga
Main movement focusSteady, repetitive movement that can build aerobic activity when paced brisklyPoses, transitions, breathing, flexibility, balance, and body awareness
Cardio potentialBrisk walking is a standard example of moderate-intensity aerobic activityVaries substantially by style; gentle classes may not provide the same aerobic challenge as brisk walking
Typical settingOutdoors, on a treadmill, or indoors with a walking routineIndoors at home, in a studio, or in a quiet open space
Equipment needsSupportive shoes and weather-appropriate clothing for outdoor walksA nonslip mat is helpful; a sturdy chair, wall, or supportive props can assist with modifications
Balance and flexibility focusInvolves balance and mobility but does not naturally include dedicated flexibility or balance practiceOften includes balance-focused poses and flexibility work
Scheduling flexibilityEasy to divide into short walks or fit between errands and appointmentsCan be brief, but a session may feel more practical when you have uninterrupted floor space and time
Common limitationsWeather, route safety, uneven surfaces, traffic, and poor lightingPose modifications, wrist or knee comfort, and finding a beginner-appropriate class or routine

Key Differences

Aerobic Activity and Intensity

Walking has the clearer advantage if your goal is to build moderate-intensity aerobic minutes. The CDC lists brisk walking as moderate activity and suggests a simple intensity check: During moderate exercise, you can talk but not sing. That pace differs from person to person, so there is no need to chase someone else down the sidewalk like you’re late for a train.

Yoga’s aerobic effect depends on the style and pace. More active forms can reach moderate intensity, but a gentle beginner practice may focus on slower movements, stretches, and rest periods. That does not make it less worthwhile; it simply serves a different purpose.

Balance, Flexibility, and Body Awareness

Beginner yoga usually gives more direct attention to balance, flexibility, posture, and controlled movement. The National Institute on Aging includes yoga among activities that can incorporate balance exercise, which can be especially relevant for older adults. A thoughtful class may also introduce modifications that make poses more accessible.

Walking involves balance too, particularly on uneven ground or hills, but it is not designed around balance practice. If you want dedicated time to work on standing steadily, moving through a fuller range of motion, and noticing how your body feels, yoga is often the more natural fit.

Convenience and Environment

Walking can be the easier choice when you have 10 spare minutes and a safe place to move. You can walk outside, use indoor hallways, or follow an indoor walking routine when the weather turns dramatic. No floor setup is required, and you do not have to rearrange the furniture just to exercise.

Yoga is often more convenient when outdoor conditions are unpleasant or local walking routes do not feel safe. It does require enough clear floor space to extend your arms and lie down comfortably. That can be a living room corner, bedroom, or even a cleared patch beside the bed—though moving the laundry pile first may improve the mood.

Safety Considerations

Neither activity is automatically risk-free. Outdoor walking brings practical concerns, including uneven pavement, traffic, low visibility, weather, and footwear. The National Institute on Aging recommends sturdy shoes, awareness of walking surfaces, and adjustments for poor conditions. Indoor walking or yoga can be sensible alternatives when the route is icy, poorly lit, or simply not a place where you feel comfortable.

Yoga can involve strains or sprains, especially when beginners force a pose or follow an instructor whose pace does not suit them. The National Center for Complementary and Integrative Health advises beginners to avoid extreme poses and forceful breathing. People with balance problems, pain, recent injuries, or certain health conditions may need individualized guidance and modifications.

Structure Versus Variety

Walking is pleasantly simple. Pick a route, choose a pace, and go. That repeatability can make it easier to build a routine, track time, or add movement around daily obligations. The downside is that some people find it monotonous, particularly if every walk follows the same loop past the same three barking dogs.

Beginner yoga usually offers more variety within one session. A routine might include standing poses, seated movement, balance work, and relaxation. That variety can keep things interesting, but it may feel less straightforward if you prefer a clear, no-decisions-needed workout.

How Each Exercise Fits Into Everyday Life

For Short Movement Breaks

Walking is usually the more practical option for short breaks. A quick walk before work, after lunch, or between household tasks can fit into your day without much preparation. Short sessions can still contribute to your overall activity, particularly when longer workouts are hard to schedule.

Yoga can work in short blocks too, but a five-minute practice may feel more purposeful when it has a clear focus, such as gentle standing movements or a few supported poses. It is less ideal if you need to be out the door in six minutes and are still looking for your mat.

For Indoor Routines

Beginner yoga has an advantage for reliable indoor exercise. It does not depend on daylight, sidewalk conditions, or the forecast. A mat can help with grip and comfort, but a stable, clear, nonslip surface matters most.

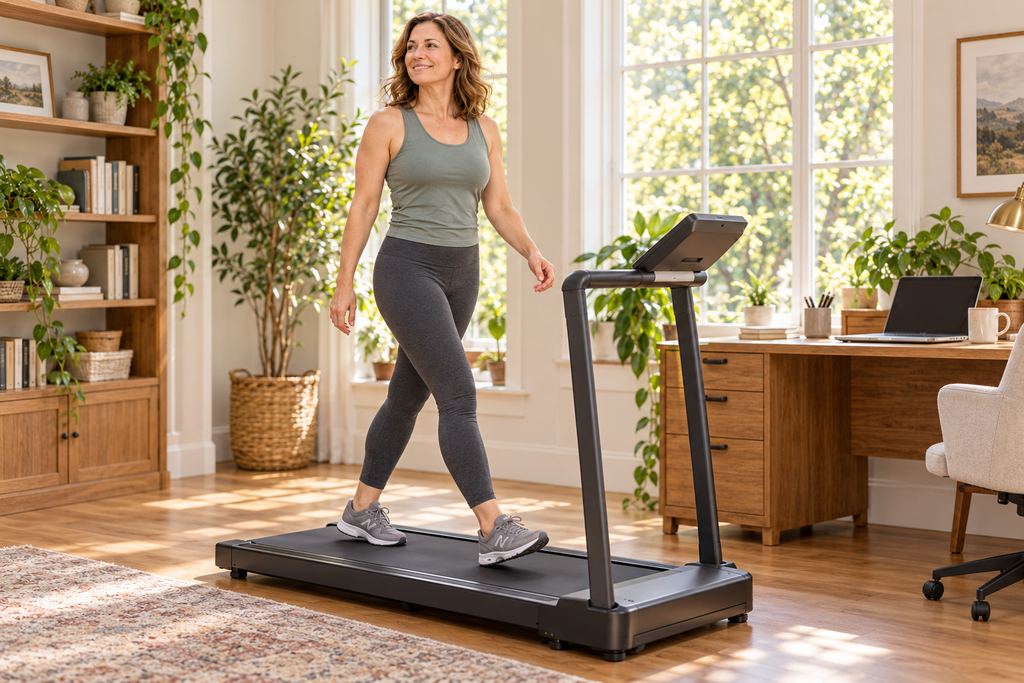
Indoor walking is also an option, especially with a hallway, open room, or guided routine. It may feel less engaging in a small space, but it can be a practical substitute for outdoor walking when conditions are unsafe or uncomfortable.

For Building a Well-Rounded Routine

Walking is particularly useful for the aerobic portion of an activity plan. Federal guidance recommends that adults aim for 150 to 300 minutes of moderate aerobic activity each week, along with muscle-strengthening activity on two days. Walking can help with the aerobic side, but it does not automatically cover strengthening or dedicated balance work.

Yoga can complement walking by adding balance and flexibility, although it should not be assumed to meet every exercise need either. A gentle practice may not provide substantial aerobic or muscle-strengthening activity. Combining the two can make sense: walks for steady movement and yoga sessions for a slower, more varied change of pace.

For Beginners Who Need Modifications

A walking workout is easy to scale by changing the route, duration, pace, or number of breaks. Flat, well-lit paths are generally easier starting points than steep trails or cracked sidewalks. Supportive footwear matters more than fancy workout clothing.

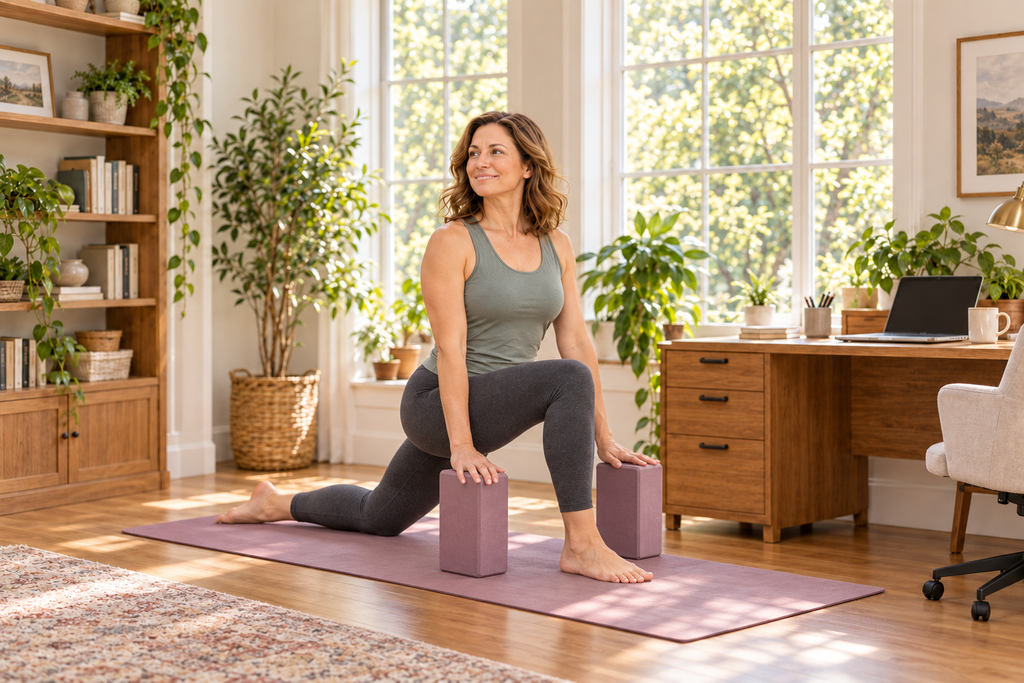
Yoga can be highly adaptable, but beginners benefit from clear instructions and permission to modify. A chair, wall, or other sturdy support can help with balance work. If a movement causes pain, dizziness, or substantial discomfort, stop rather than trying to earn points for determination. If you have a chronic condition, a history of falls, or new symptoms, seek individualized advice from a clinician or physical therapist.

Equipment and Practical Upkeep

Walking has almost no equipment maintenance beyond keeping your shoes clean, dry, supportive, and appropriate for the conditions. Shoes wear down over time, especially with frequent use on hard surfaces. Route “maintenance” is more about planning: Check the weather, choose safe paths, and avoid treating poor lighting or icy pavement as a character-building opportunity.

Yoga equipment is similarly low-maintenance. Clean and dry your mat according to its care instructions to help preserve its surface and grip. Mats can lose traction or begin to flake with use, while blocks, straps, and bolsters are optional rather than essential. A simple mat rolls up for storage, but even that may be more gear than you want to manage in a small space.

Cost and Overall Value

Walking can be the lower-cost starting point if you already own comfortable, supportive shoes and have access to a safe place to walk. There is no required membership, mat, or special setup. Investing in suitable walking shoes may make sense if you plan to walk regularly, need more support, or often cover longer distances, but the activity itself does not demand expensive extras.

Beginner yoga can also be inexpensive, particularly with a basic mat and free or low-cost guided routines. Paying for an in-person beginner class may be valuable when you want instruction on positioning, pacing, and modifications. If you prefer quiet exercise at home and will use the mat regularly, that modest investment can be practical. If floor space is scarce and your routine is inconsistent, walking may offer better value.

Who Should Choose Each Option

Choose Walking Workouts if Your Main Goal Is Aerobic Activity

Brisk walking is the better starting point if you want a clear path toward moderate-intensity aerobic exercise. It is simple to understand, easy to adjust, and can be divided into shorter sessions throughout the day. Choose a pace that feels challenging but still allows conversation.

Choose Beginner Yoga if You Want an Indoor, Slower-Paced Practice

Yoga may fit better if you prefer to move indoors, want a quieter routine, or feel drawn to balance and flexibility work. Look for classes or videos clearly labeled for beginners, and favor instructors who demonstrate modifications rather than treating every pose as a test.

Choose Walking if You Need Maximum Scheduling Flexibility

For unpredictable days, walking is often easier to repeat consistently. A short walk can happen before an appointment, during a break, or while running an errand. It asks very little of your home setup and does not require a dedicated block of floor time.

Choose Beginner Yoga if Balance Is a Priority

Yoga is often the stronger fit when you want deliberate balance-focused movement alongside flexibility and controlled transitions. Use a wall, chair, or other sturdy support if you feel unsteady. For ongoing balance concerns or a history of falls, individualized professional guidance is the safer place to start.

Final Verdict

Walking workouts are the more direct choice if you want moderate aerobic activity, especially when you can maintain a brisk, sustainable pace. They are flexible, low-fuss, and easy to fit into a crowded day. Their main drawbacks are environmental: weather, route safety, uneven ground, and the fact that walking alone does not cover every type of exercise.

Beginner yoga is the better match when you value an indoor routine with more emphasis on balance, flexibility, and a slower pace. It can be a useful complement to walking, not necessarily a replacement for it. Choose walking when cardio and convenience lead the list; choose yoga when controlled movement and indoor comfort matter more. If both sound appealing, alternating them may be the most realistic answer.

Frequently Asked Questions

Is walking or beginner yoga better for cardio?

Brisk walking is the clearer cardio choice because it is recognized as moderate-intensity aerobic activity. Gentle yoga may not raise your effort level to the same degree, though more active yoga styles can be more aerobically demanding.

Can beginner yoga help with balance?

It can be part of balance-focused activity because many yoga practices include standing poses and controlled transitions. Use modifications or sturdy support if you feel unsteady.

Does an easy walk count as exercise?

An easy walk is still movement, but it may not reach moderate intensity. For moderate effort, the CDC’s practical guide is being able to talk but not sing.

Do I need a yoga mat to start beginner yoga?

A mat is helpful for comfort and grip, but it is not mandatory. A clear, stable, nonslip surface is the more important starting point.

Can I combine walking workouts and beginner yoga?

Yes. Walking can support aerobic activity, while yoga can add variety, balance, and flexibility work. Together, they can create a more rounded routine than relying on either one alone.

You Might Also Enjoy

Gentle Fitness Routine
Everyday Living

How to Start a Gentle Fitness Routine When You Have Not Exercised in a While

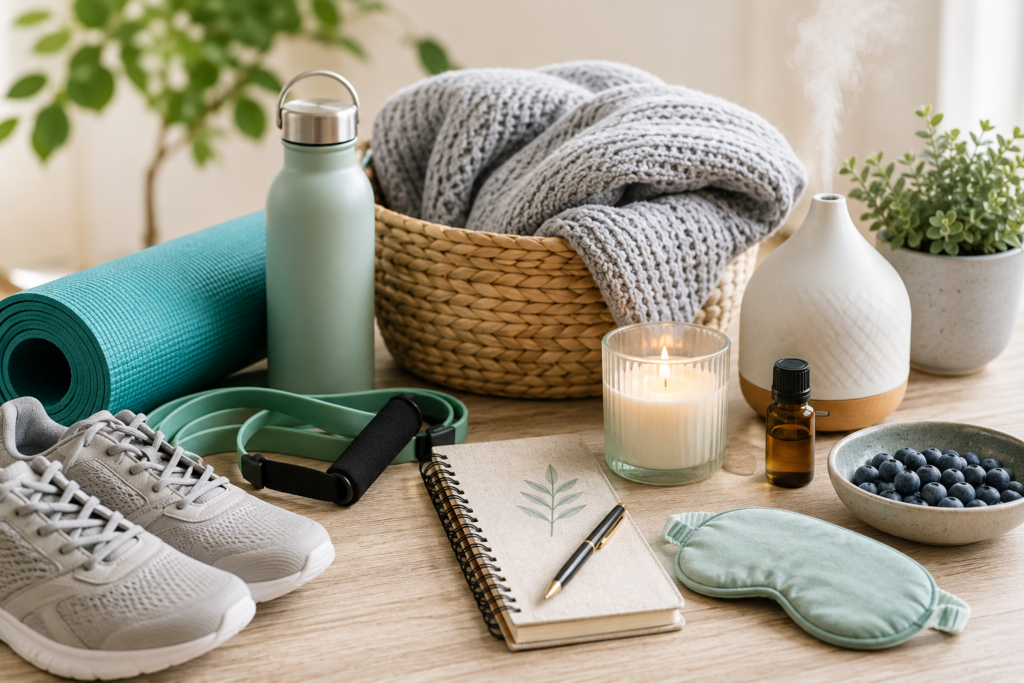
Starting a gentle fitness routine after time away does not require a dramatic reset, matching workout sets, or a sudden interest in burpees. The most useful place to begin is smaller: a comfortable type of movement, a realistic window in your week, and a pace that lets you finish feeling capable rather than wiped out.

This guide can help you return to regular movement without treating exercise like an all-or-nothing challenge. It takes a gradual, everyday approach, whether walking, cycling, moving to music, or doing simple strength exercises at home sounds most appealing. If you have a medical condition, are recovering from an injury or surgery, are pregnant or postpartum, or have concerns about starting activity, get individualized guidance from a qualified clinician or physical therapist first.

Quick Overview

A gentle fitness routine is less about finding the “best” workout and more about making movement fit your current comfort, ability, schedule, and surroundings. You will learn how to choose an activity, set a deliberately modest starting point, monitor your effort, and build consistency before asking more from yourself.

Federal physical activity guidance recommends starting with small amounts and building gradually when you have been inactive. As one example, it suggests 5 to 15 minutes of walking per session, 2 to 3 times per week.. The longer-term guideline for adults is 150 to 300 minutes of moderate aerobic activity weekly, plus muscle-strengthening activity on at least 2 days a week—but that is a destination, not a first-week assignment. Any amount of activity is better than none, and smaller chunks count.

What You’ll Need

  • Comfortable clothing that lets you move easily
  • Shoes appropriate for your chosen activity, if needed
  • A safe place to move, such as a clear room, sidewalk, park, pool, gym, or stationary bike
  • A simple way to track sessions, such as a calendar, notes app, or paper checklist
  • Water nearby if it is warm, you will be out for a while, or it simply makes the routine more comfortable
  • Optional basic strength equipment, such as a sturdy chair, resistance band, or light household item you can hold comfortably

Before You Begin

Gentle Fitness Routine

Start by choosing a form of movement that seems tolerable—or maybe even pleasant. “Enjoyable” can be a high bar on a busy Tuesday, so aim for something you do not dread. A walk around the block, a few minutes on a stationary bike, gentle dancing in the living room, water-based movement, or chair-based exercises can all be reasonable options. Walking is popular because it is simple, but it is not a requirement.

Give your starting routine an honest place in your schedule. A short session after lunch, before dinner, or while listening to a favorite podcast is often easier to repeat than a grand plan that depends on a perfect free hour appearing from the mist. The CDC also suggests choosing activities, places, and times you like, scheduling them, and involving another person if encouragement helps. Those practical details can make getting started more manageable.

Pay attention to safety before you begin. Choose a clear route or space, check the weather and lighting if you will be outdoors, and make sure any chair or equipment feels stable. Stop activity and seek prompt medical help for pain, tightness, or pressure in your chest, neck, shoulder, or arm; extreme shortness of breath; dizziness; or feeling sick. Ongoing pain in your joints, feet, ankles, or legs is also a reason to get professional advice before continuing or changing your routine. NIDDK provides additional guidance on warning signs during activity.

Step-by-Step Instructions

Step 1: Pick one realistic activity

Choose one activity for your first couple of weeks rather than trying to assemble a full fitness personality overnight. The best option is one that works with your mobility, location, budget, and preferences.

For example, you might take a short walk, pedal a stationary bike, use a community pool if you already have access, follow a gentle movement video, or do a few chair-supported strength exercises. If leaving home creates too many hurdles, an indoor option may be easier to maintain. If being indoors makes you stare at the laundry instead, a walk outside may be the better fit.

Before moving on, make sure your choice is simple enough to repeat without needing special arrangements every time.

Step 2: Set a small first-session goal

Keep the first goal intentionally modest. If you have not exercised in a while, 5 to 15 minutes of light or light-to-moderate movement, 2 or 3 times a week, is a supported starting range. You are not trying to prove anything on day one. You are testing what feels manageable now.

Set a timer if that helps you avoid either cutting the session short out of uncertainty or going far beyond what feels comfortable because the music got good. When the time is up, slow down for a moment and notice how you feel. Finishing with a sense that you could do this again is useful information.

Step 3: Keep the effort comfortably manageable

Use the talk test to judge your pace. During moderate activity, you can generally talk but not sing. Since fitness levels differ, an activity that is moderate for one person may feel vigorous for another. Light activity is a perfectly valid place to start.

For a walk, this may mean strolling at a pace where you feel warmer and more alert but can still carry on a conversation. For cycling, it may mean easy pedaling without straining to keep up with a machine’s preset program. Ignore the temptation to treat breathlessness, soreness, or exhaustion as proof that the session “counted.” They are not required admission tickets.

Step 4: Repeat your routine before adding more

Do the same short routine for a while before increasing anything. Consistency gives you a clearer picture of whether the activity fits your life and how your body responds to it. It also reduces the classic beginner mistake of starting with a burst of enthusiasm and then avoiding the whole thing for two weeks.

Once your current routine feels comfortable and repeatable, add a few minutes to a session or add another day. Federal guidance recommends increasing duration and frequency before increasing intensity. There is no universal pace of progression, so let comfort, recovery, schedule, and practical reality guide your next adjustment.

Step 5: Add a gentle strength session when ready

After your movement routine feels steadier, consider adding simple muscle-strengthening activity. For someone restarting, beginning with one light- or moderate-effort session a week can be a reasonable introduction before working toward the general guideline of strength activity on at least two days each week.

Keep it basic. You might use a sturdy chair for sit-to-stands, do wall push-ups, practice standing leg exercises while holding a counter for support, or use a resistance band according to its instructions. Focus on controlled movement and stable positioning, not on adding lots of repetitions or heavy resistance. If an exercise causes pain or feels unsafe, stop and choose another option or seek qualified guidance.

Step 6: Make the routine easier to remember

Attach your activity to something already happening in your day. A short walk after your morning coffee, a few minutes of cycling before your evening show, or light movement during a regular break can reduce the need to negotiate with yourself every time.

Put sessions on your calendar as appointments with yourself, but keep the plan flexible. If rain, childcare, work, fatigue, or a very ordinary bad day gets in the way, swap in an indoor option or reschedule the session. Missing one planned day is not a reason to abandon the week. It is just a missed day.

Step 7: Track consistency, not perfection

Keep a simple record of what you did: the activity, approximate duration, and how it felt. A note such as “Walked 10 minutes; pace felt easy” is enough. Tracking can help you spot what works without turning every movement session into a performance review.

Avoid making the routine depend on calorie totals, weight changes, or a streak that can never be broken. Those measures can distract from the practical goal: building a movement habit that fits your life. A routine with short, regular sessions is often more useful than an ambitious plan that only happens when conditions are suspiciously ideal.

Helpful Tips

Gentle Fitness Routine
  • Lay out shoes or comfortable clothes ahead of time if mornings tend to feel rushed.
  • Choose a route with a natural turnaround point, such as a mailbox, corner, or park bench, so you do not need to guess how far to go.
  • Keep an indoor backup ready for bad weather or low-energy days, such as gentle marching in place, chair movements, or a short beginner video.
  • Invite a friend, neighbor, or family member along if company makes movement feel easier or more enjoyable.
  • Use music, an audiobook, or a podcast if it makes the time pass more pleasantly. Just keep outdoor volume low enough to stay aware of traffic and your surroundings.
  • Let the activity match the day. A slower, shorter session still counts as following through.
  • Review your routine every couple of weeks. If it feels consistently manageable, add a little time or an extra session rather than changing everything at once.

Common Mistakes to Avoid

  • Starting with an intense workout plan. A demanding routine may sound motivating, but it can be uncomfortable, impractical, or hard to repeat after a long break. Begin with a pace and duration that feel manageable.
  • Copying someone else’s routine exactly. Their schedule, experience, access to equipment, and comfort level may be very different from yours. Build around what works in your actual life.
  • Increasing time, frequency, and intensity all at once. Make one change at a time, usually adding duration or another day before making the activity harder.
  • Treating soreness or pain as a sign to push harder. Discomfort that concerns you is a cue to pause, not a motivational slogan. Seek professional advice for persistent pain or concerning symptoms.
  • Waiting for the perfect time or outfit. Comfortable basics and a safe place to move are enough to begin. Coordinated activewear can remain an optional subplot.
  • Forgetting to plan for obstacles. A backup indoor routine or alternate time slot makes it easier to continue when weather or schedules change.

Final Thoughts

A gentle fitness routine works best when it feels like a realistic part of your week, not a punishment for having a week. Begin with a manageable amount, repeat what works, and let your routine grow at a pace that still feels sustainable.

The goal is not to impress anyone with a dramatic first session. It is to create a steady relationship with movement that you can return to, even after busy seasons, holidays, bad weather, and all the other things life cheerfully throws onto the calendar.

Frequently Asked Questions

Is walking enough to start a fitness routine?

Yes. Walking can be a practical starting activity because you can adjust the pace and duration to your comfort level. If walking does not suit your preferences or abilities, options such as stationary cycling, water-based movement, chair exercises, or gentle dancing can also work.

How many days a week should I exercise when starting again?

A manageable starting point can be 2 or 3 days a week with short sessions, such as 5 to 15 minutes. Repeat that schedule until it feels comfortable, then gradually add time or another day if you want to.

Should I start with cardio or strength exercises?

Either can be a reasonable starting point, but beginning with one simple movement routine may feel less overwhelming. Once that habit is established, you can add light strength work, starting as gently as needed.

When should I talk with a clinician before exercising?

Talk with a clinician for personalized guidance if you have a chronic condition or significant medical concern, are managing a disability, or are recovering from an injury or surgery. The CDC also advises inactive people to consult a clinician before beginning vigorous-intensity activity, especially if they have a disability or are overweight.

You Might Also Enjoy

Low-Impact Movement Breaks
Everyday Living

7 Low-Impact Movement Breaks to Try During a Work-From-Home Day

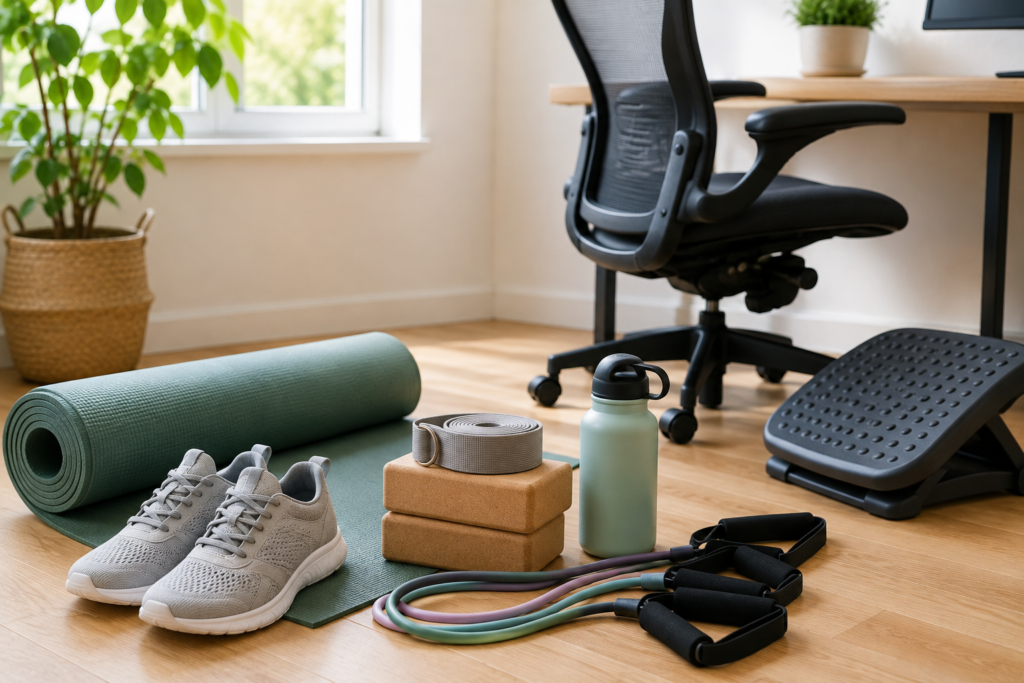
A work-from-home day can make it surprisingly easy to stay in one position for far too long. One minute you’re answering an email; the next, you’ve been folded over a laptop like a question mark for half the morning.

Low-impact movement breaks offer a simple way to interrupt that static routine. They don’t replace regular exercise, and they aren’t meant to push through pain. They’re just brief, gentle chances to stand up, change position, and move within a comfortable range before your next meeting notification appears.

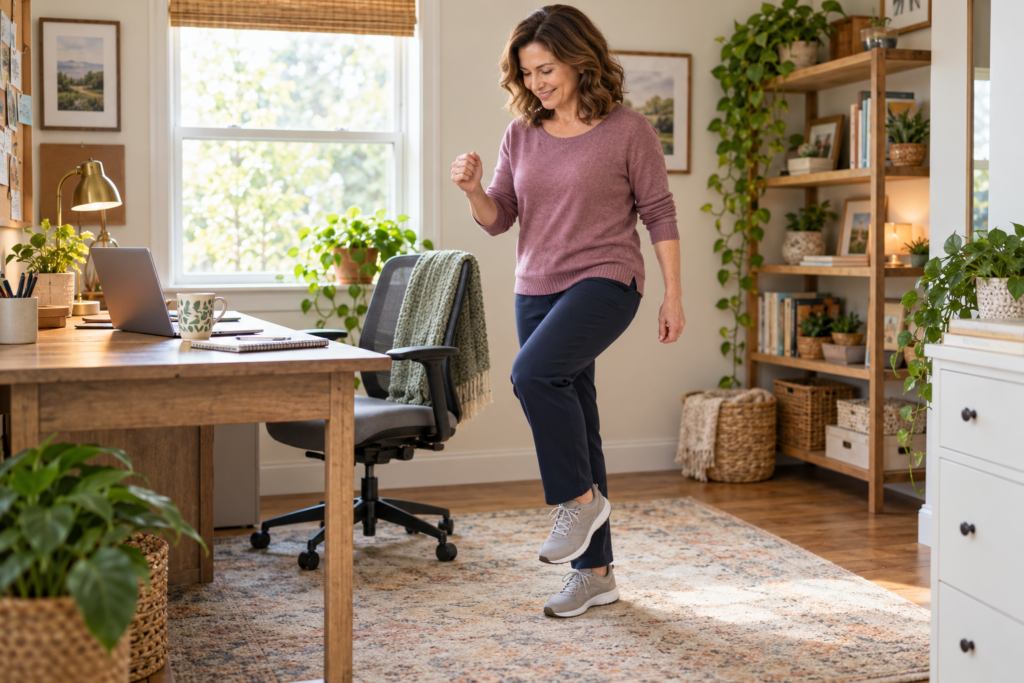
1. March in Place

Marching in place is about as straightforward as a work-from-home movement break gets: Stand beside your desk, lift one foot at a time, and keep the pace comfortable. There’s no need for special shoes, a yoga mat, or the kind of workout outfit that makes you wonder whether laundry day has gotten out of hand.

This is a practical choice when you need to step away from a screen but don’t have time to leave the room. Let your arms swing naturally if that feels good, or keep a hand near a desk or sturdy chair for extra balance support. Smaller steps count, especially if you’re just getting started or working in a tight office corner.

The CDC includes marching in place among its simple workplace activity-break options. Try it briefly between tasks, then switch to another gentle move rather than treating it like a formal workout. The point is to break up a long period of sitting, not to turn your Tuesday spreadsheet into a boot camp.

If lifting your knees feels uncomfortable, keep the movement low and easy. If you have balance concerns, a recent injury, or a health condition that affects activity, ask a health-care professional or qualified physical-activity specialist which options may be appropriate.

Why it stands out: Marching in place gives you an easy, whole-body change of pace without requiring much space, equipment, or a complicated routine.

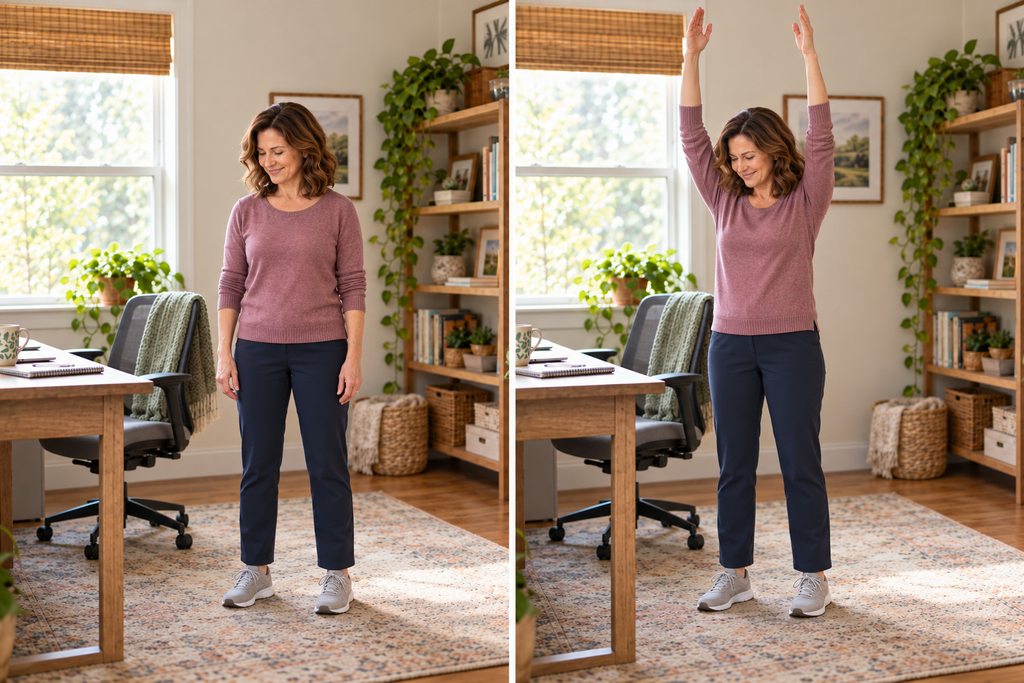
2. Reach Both Arms Up and Down

A simple overhead reach can be a welcome change after typing, scrolling, or leaning toward a screen. Stand tall or sit securely in a supportive chair, then slowly lift both arms overhead as far as is comfortable before lowering them again. Keep the motion relaxed—this is not the moment to audition for the ceiling fan.

Try pairing the movement with an unhurried breath: Breathe in as your arms rise and out as they lower. If raising both arms overhead isn’t comfortable, lift them only partway, reach one arm at a time, or skip the move.

This break is handy during a mouse- and keyboard-heavy workday because it changes your upper-body position without demanding much space or setup. You can do several comfortable repetitions while a document loads, before joining a video call, or during a quick break from computer tasks.

OSHA encourages workers to avoid holding static computer postures for too long by periodically standing, stretching, or walking. A reach-and-lower sequence is one small way to make that shift without rearranging your workspace.

Why it stands out: It provides a gentle change of position for an upper body that has spent too long hovering over a keyboard.

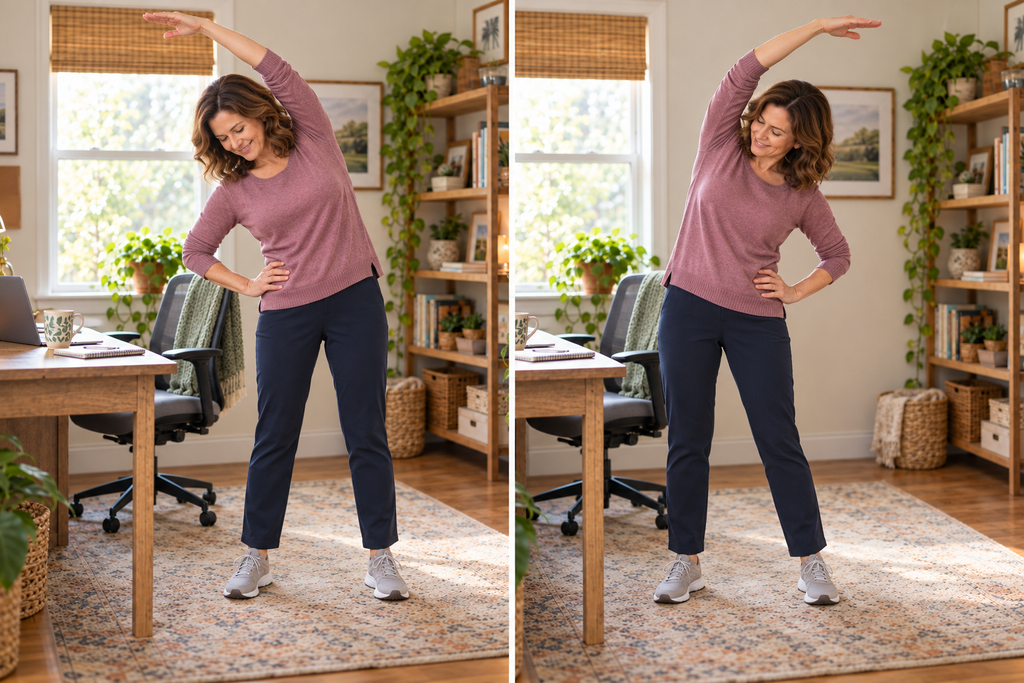
3. Gently Lean Side to Side

For this low-impact movement break, stand with your feet comfortably apart and lift one arm overhead if that feels good. Lean gently to the opposite side, return to center, and repeat on the other side. Keep the motion small and controlled; a comfortable side bend is plenty.

You don’t need to force a deep stretch. Think of this as a change of position rather than a contest with your range of motion. Keep your shoulders relaxed, avoid twisting, and skip the overhead arm if it causes discomfort. Placing one hand on a desk for light support can make the movement feel steadier.

Side-to-side leans fit naturally into a short sequence with arm reaches and shoulder rolls. The CDC’s workplace activity-break guide suggests periodically changing simple movements during a brief activity segment, so your break can stay varied without becoming a whole production.

This move may not suit everyone. If you have back, shoulder, balance, or mobility concerns, reduce the range, perform it seated if appropriate for you, or choose a different movement. Stop if anything hurts.

Why it stands out: The side bend changes your usual forward-facing desk position with a calm, adaptable motion.

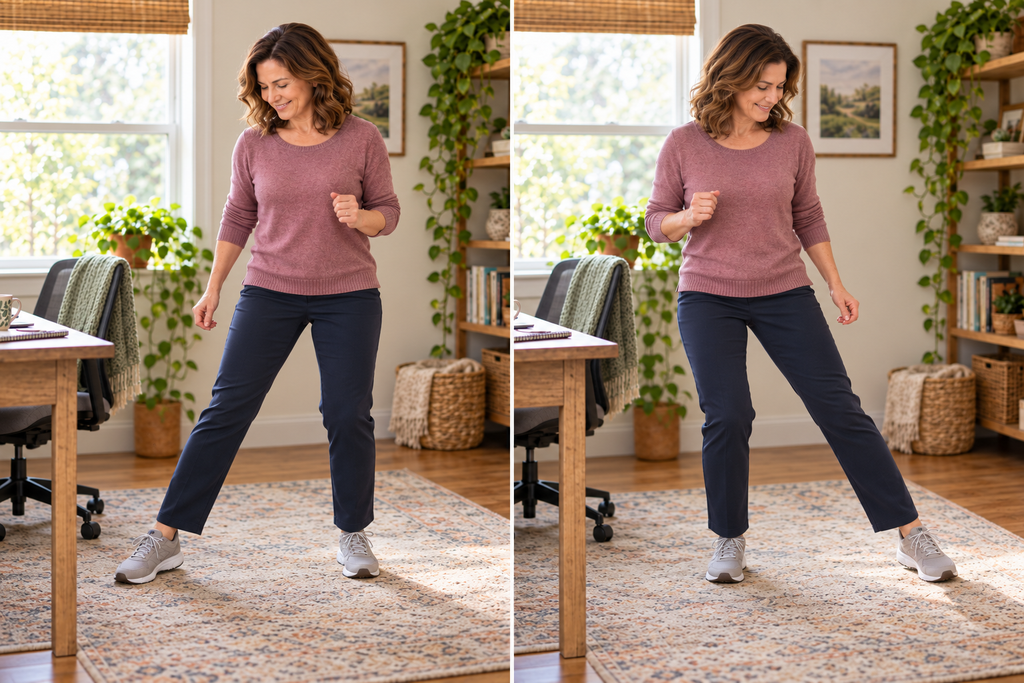
4. Step Side to Side

Side steps are a useful choice when marching in place starts to feel repetitive. Take one easy step to the right, bring the other foot in, and then reverse direction. Keep your knees soft, your steps modest, and your movements controlled enough that you could still answer a coworker’s message without accidentally launching your water bottle.

This movement needs only a small, clear patch of floor. Before starting, move charging cords, bags, pet toys, and suspiciously placed coffee mugs out of the way. Socks on a slick floor can also make a casual movement break more adventurous than necessary, so use a secure surface and stable footwear if needed.

You can step side to side at a gentle pace beside your desk, kitchen counter, or sturdy chair. If balance is a concern, keep one hand near a stable surface rather than trying to power through. There’s no prize for making a low-impact break high drama.

Federal physical activity guidance encourages adults to move more and sit less, noting that even small amounts of activity can provide benefits. These brief breaks don’t need to replace your planned walk, workout, or other activity; they simply add movement between long stretches of computer work.

Why it stands out: Side steps add variety while still fitting into a small home-office space.

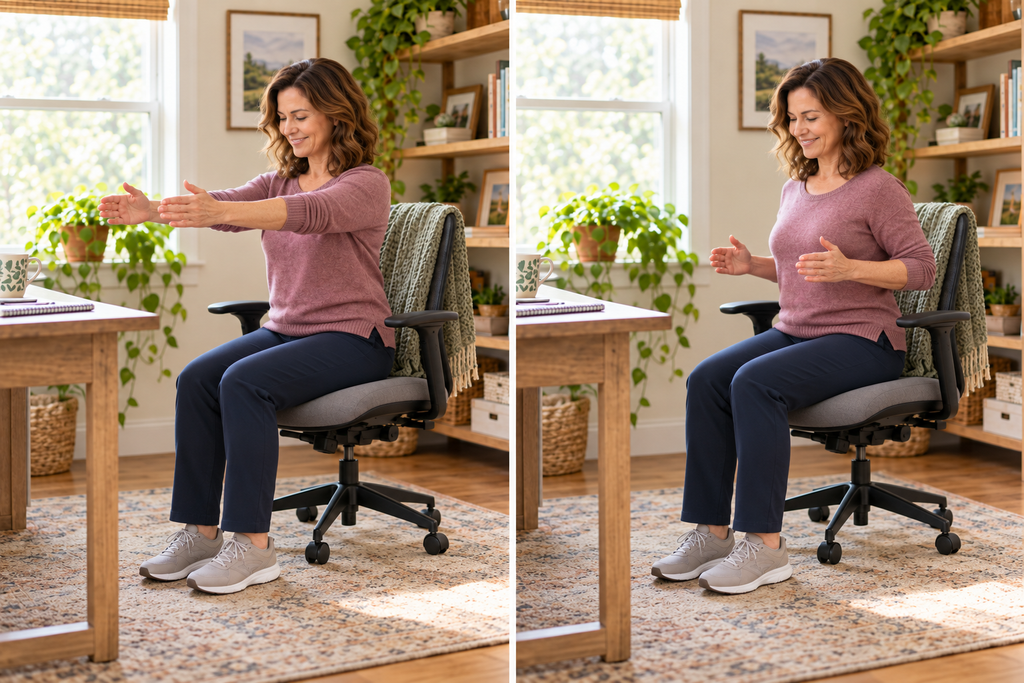
5. Press Arms Forward, Then Draw Elbows Back

This move is simple but satisfying after a long spell of typing. Stand or sit upright, extend your arms forward at a comfortable height, and then draw your elbows gently toward your sides. Think of opening and closing the space across your chest and upper back rather than yanking your elbows behind you.

Keep your shoulders down instead of letting them creep toward your ears. Use a slow, controlled rhythm, and perform the movement with your elbows bent from the start if straightening your arms doesn’t feel comfortable.

It’s a useful desk-adjacent option because you can do it without getting on the floor, changing clothes, or finding a quiet corner of the house. That matters when your schedule is packed and the kitchen table is also serving as your office, mail station, and mysterious crumb collection zone.

Like the other ideas here, this is a gentle activity break—not a treatment for pain or an instant posture fix. If you have persistent discomfort, numbness, weakness, or other concerning symptoms, speak with a health-care professional rather than relying on desk movements alone.

Why it stands out: The forward-and-back arm motion is easy to control and works well in the limited space around a desk chair.

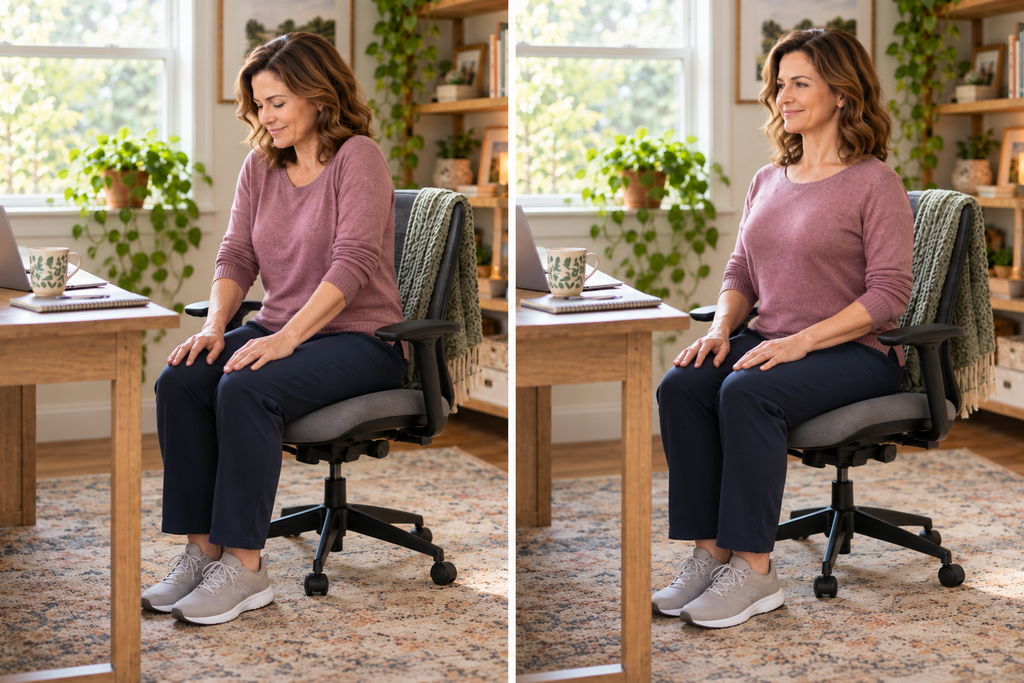
6. Roll the Shoulders Forward and Backward

Shoulder rolls may look almost too simple to bother with, but that’s exactly why they’re useful during a busy day. You can do them seated or standing: Slowly lift your shoulders, roll them back and down, and then reverse direction if that feels comfortable.

Keep the circles gentle. Large, forceful rolls aren’t necessary, and neither is holding your breath while you do them. A few slow repetitions provide a quick change from staying in the same computer-working position, especially when you’ve been focused enough to forget your shoulders exist.

This is also one of the most discreet movement breaks available. It works while you’re waiting for a video call to begin, reading a long email, or pausing between tasks. No equipment is needed, which makes it realistic for small-space workers and anyone who doesn’t want a home office that resembles a fitness-equipment aisle.

OSHA’s computer workstation guidance recommends frequent short breaks from computer tasks to look away, stretch, stand, or walk. Shoulder rolls can be one easy part of that broader habit of changing position periodically.

Why it stands out: Shoulder rolls are a no-space, no-equipment option you can do almost anywhere without significantly interrupting your day.

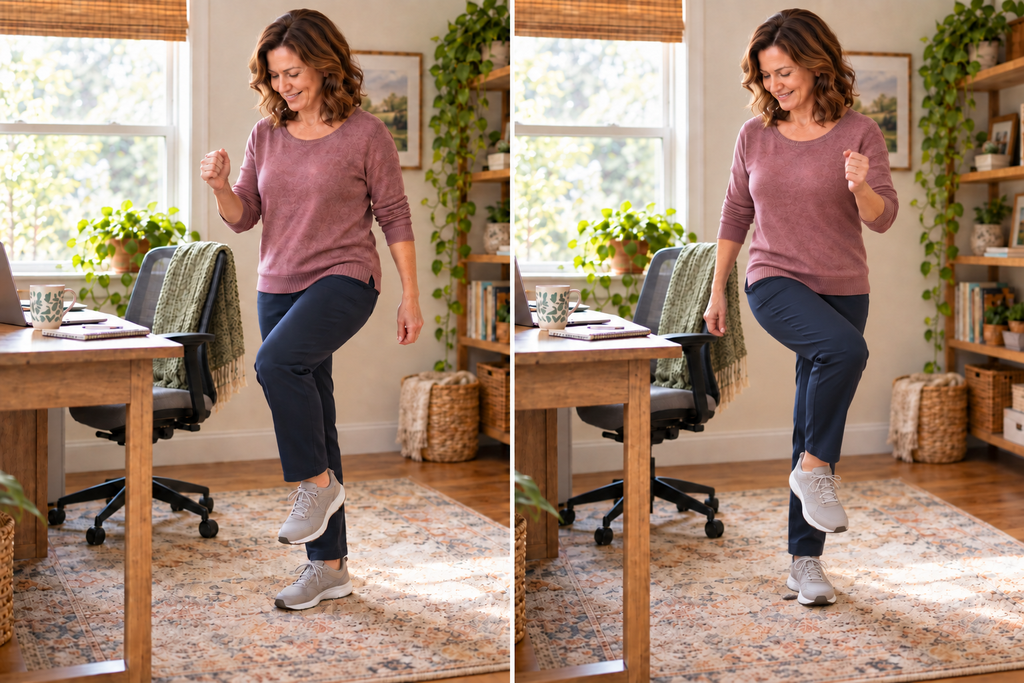
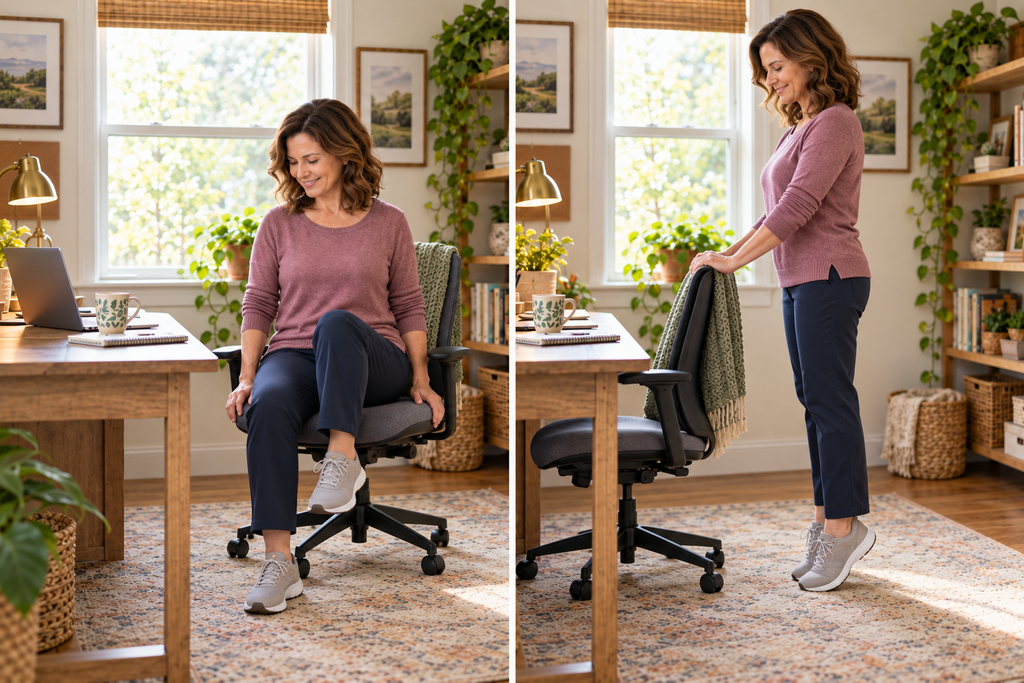
7. Alternate Knee Lifts or Rise Onto Toes and Return to Heels

This final movement break gives you two flexible options. For alternating knee lifts, stand near a stable desk or chair and slowly raise one knee at a time to a comfortable height. For toe rises, gently lift your heels so you’re standing on the balls of your feet, then lower them with control.

Knee lifts can be a natural next step after marching in place, while toe rises may feel more manageable if you want to remain mostly in one spot. Neither movement needs to be big. A small, steady range is often the right call, particularly if you’re easing into more frequent movement breaks.

Balance matters here. Use a sturdy surface for support if needed, keep the area around your feet clear, and avoid rushing. If you feel unsteady, choose a seated arm movement instead. Adapting a movement is not “doing it wrong”; it’s simply making the break work for your body and home setup.

The CDC advises starting at a lower intensity and building gradually. That’s a sensible approach for low-impact movement at home, where the goal isn’t to finish a call sweaty and wondering why you made this harder than it needed to be.

Why it stands out: These two options let you choose between a gentle balance-focused move and a simple lower-leg movement without needing extra gear.

Final Thoughts

The best work-from-home movement break is usually the one you’ll actually take. Start with one or two comfortable moves between tasks, then build a small rotation that fits your schedule, space, and mobility. Even a brief pause can help break up a long stretch in one static computer posture.

For broader activity goals, the U.S. physical activity guidelines recommend 150 to 300 minutes of moderate-intensity aerobic activity each week, plus muscle-strengthening activity on two days. These quick breaks can contribute to a more active day, but stretching alone does not count as moderate- or vigorous-intensity aerobic activity. Keep the movements gentle, adapt as needed, and stop if anything hurts.

You Might Also Enjoy

Natural Body Wash
Everyday Living

Simple Recipes for Natural Body Wash

Making your own natural body wash can be a simple way to streamline your shower routine, especially if you prefer a short ingredient list and want to avoid heavily fragranced products. The key is keeping the project genuinely simple. A body wash does not need five oils, three extracts, and a tiny jar that will sit in the bathroom for six months collecting suspicious droplets.

The safest approach to DIY body wash is to make small, single-use batches. Once water, plant-based ingredients, or anything from the kitchen enters the mix, the formula can support microbial growth unless it contains a properly chosen preservative. That is why these recipes are designed to be mixed in a small bowl or cup right before use rather than stored in a pretty pump bottle indefinitely.

Affiliate disclosure: This article contains affiliate links. If you make a purchase through one of these links, I may earn a commission at no additional cost to you. As an Amazon Associate, I earn from qualifying purchases.

Start With a Simple, Skin-Friendly Setup

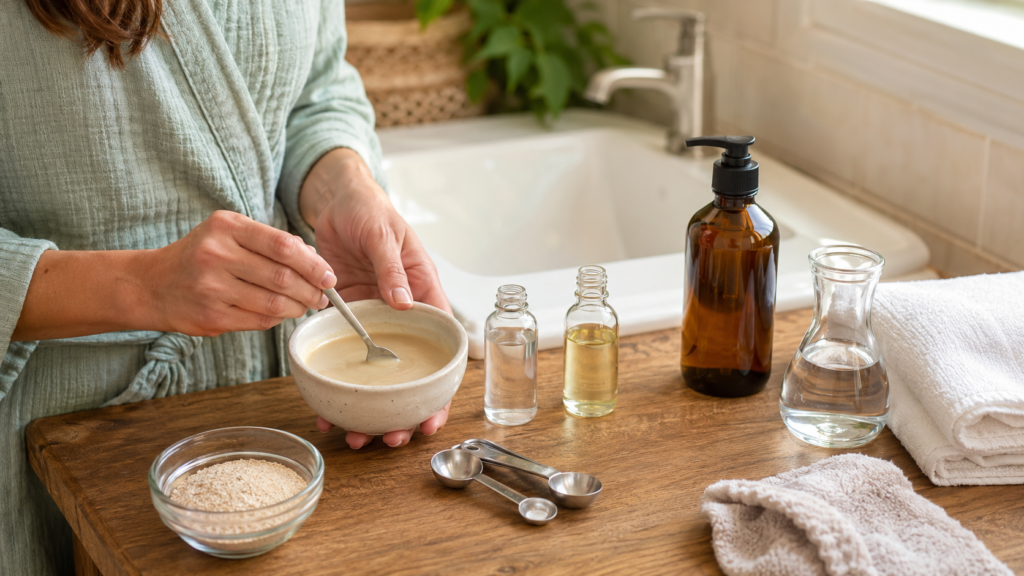
For basic natural body wash recipes, you do not need specialty equipment. A clean small bowl or cup, a spoon, and measuring spoons are enough.

The most useful base ingredient is unscented liquid castile soap. It creates lather, rinses away more easily than straight oils, and is widely available in grocery stores, pharmacies, and online. Because castile soap is concentrated, a little goes a long way.

A few practical ingredients can also add comfort or texture:

  • Vegetable glycerin: Helps the wash feel less squeaky and adds a little slip.
  • Finely ground colloidal oatmeal: Adds a soft, creamy feel, though it works best in a single-use mixture.
  • Plain sunflower or jojoba oil: Useful in small amounts for a richer feel, particularly if your skin tends to feel dry after showering.
  • Distilled water: A better choice than tap water when diluting soap, although it does not make homemade body wash shelf-stable.

Natural does not automatically mean gentle for everyone. Fragrance oils, essential oils, citrus extracts, and even some botanical ingredients can irritate sensitive skin. An unscented body wash may sound less exciting, but your skin is unlikely to complain about the lack of a “rainforest sunrise” scent.

A Basic Unscented Natural Body Wash

This is the most practical recipe if you want a straightforward cleanser with no added fragrance. It makes enough for one shower, so there is no need to worry about storage.

What you need

  • 2 tablespoons unscented liquid castile soap
  • 2 tablespoons distilled water
  • 1 teaspoon vegetable glycerin

How to make it

Combine the castile soap, distilled water, and glycerin in a clean cup or small bowl. Stir gently rather than whisking aggressively; otherwise, you will create plenty of foam before the mixture reaches the shower.

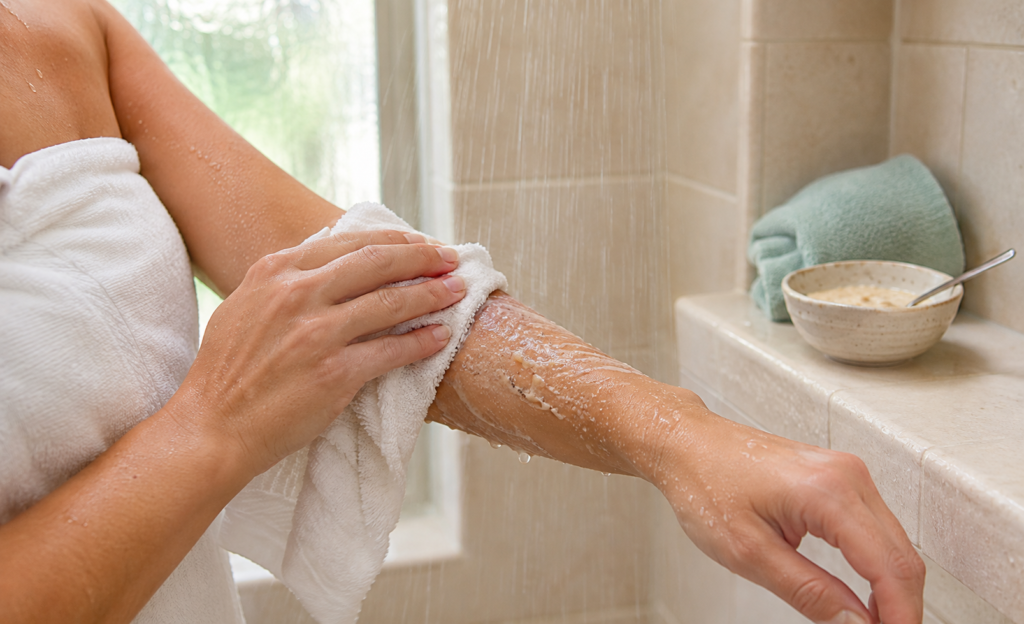
Pour a small amount onto a wet washcloth, shower puff, or your hands, then work it over damp skin and rinse well. The mixture will be thinner than a store-bought gel body wash because commercial formulas often contain thickeners. That is normal. Keep the cup on a stable shower shelf rather than trying to balance it on the edge of the tub like a tiny science experiment.

The practical benefit here is control. You know exactly what is in the wash, and the simple mixture is easy to use and rinse away.

A Creamy Oat Body Wash for a Softer Feel

Natural Body Wash_oatmeal wash

If you enjoy a body wash with a little more cushion, finely ground oatmeal can give a basic soap mixture a creamier texture. Choose colloidal oatmeal if possible. It is ground much finer than ordinary breakfast oats and mixes more smoothly with water.

What you need

  • 2 tablespoons unscented liquid castile soap
  • 1 tablespoon finely ground colloidal oatmeal
  • 1 tablespoon distilled water
  • 1 teaspoon vegetable glycerin

How to make it

Mix the oatmeal and water first, stirring until the mixture looks mostly smooth. Add the castile soap and glycerin, then stir gently until combined.

Use this body wash right away. Apply it with your hands or a soft washcloth, then rinse thoroughly. Because oatmeal can settle and leave residue, avoid sending large clumps down the drain. A quick rinse of the shower floor is worth the extra minute, especially if your tub has a textured surface where powdery ingredients like to linger.

This recipe is best if you prefer a creamy, low-lather cleanser. It is not the best choice if you want lots of bubbles or a very fast, no-fuss shower. In that case, the basic unscented version will be easier to use and clean up.

A Light Oil-Enhanced Body Wash

Natural Body Wash_oil enhanced

A little oil can make homemade body wash feel richer, but more is not necessarily better. Too much may leave a slippery shower floor and make the wash difficult to rinse away. Keep the amount modest and use the mixture immediately.

What you need

  • 2 tablespoons unscented liquid castile soap
  • 1 tablespoon distilled water
  • 1 teaspoon jojoba oil or sunflower oil
  • 1 teaspoon vegetable glycerin

How to make it

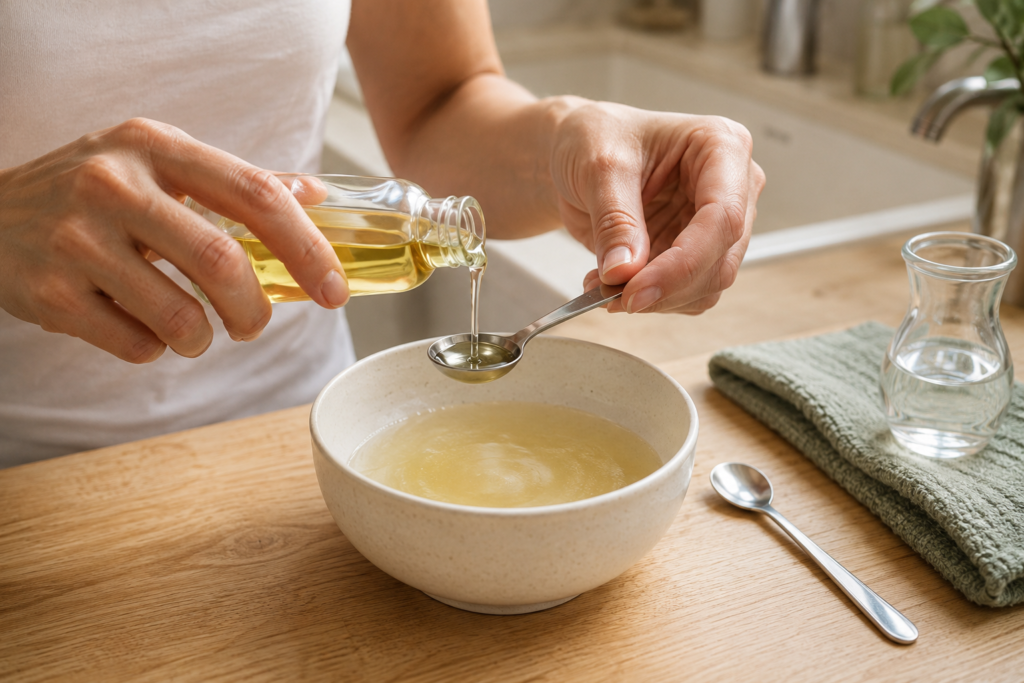
Add everything to a small cup and stir just before stepping into the shower. The oil may separate from the soap mixture—that is expected. Give it another quick stir or swirl before applying.

Use a washcloth or your hands to spread the mixture over wet skin, then rinse well. Rinse the tub or shower floor afterward to remove any remaining oil. This matters. A relaxing shower is great; an unexpectedly slick bathtub is not.

Jojoba oil is often chosen because it has a lighter feel, while sunflower oil is an accessible pantry option. If you use a kitchen oil, make sure it is fresh and properly stored. Oils can turn rancid over time, and a body wash is not where you want to discover that fact.

Keep Fragrance Optional

It can be tempting to add essential oils to every homemade body-care recipe, but they are entirely optional. Essential oils are concentrated plant extracts, not harmless drops of perfume, and they can cause irritation or allergic reactions.

Bramble Berry Oatmeal Milk Honey Fragrance Oil

For these simple body wash recipes, leaving essential oils out is the safest and easiest choice. They may not disperse evenly in a homemade mixture, which can expose your skin to concentrated droplets. Avoid applying essential oils to broken, freshly shaved, or irritated skin. Some citrus oils can also increase sensitivity to sunlight, depending on the oil and how it was processed.

An unscented formula lets your regular lotion, deodorant, or perfume do the heavy lifting on scent. You can also make your shower more pleasant with a clean towel, soft lighting, or music—no need to turn your soap recipe into a chemistry lab.

What Not to Add to Homemade Body Wash

Some popular DIY ingredients look appealing online but are not especially practical in body wash. Fresh fruit, milk, coconut milk, herbal tea, fresh aloe gel, and diluted honey can make a formula more difficult to preserve and clean up. When left in a warm, humid bathroom, mixtures containing these ingredients may spoil or support microbial growth.

Skip coarse sugar, coffee grounds, and large pieces of dried herbs, too. They can be abrasive, make a mess in the shower, and create drain cleanup you did not ask for.

If you want exfoliation, it is usually easier to use a separate washcloth, soft body brush, or gentle exfoliating glove occasionally, depending on what feels comfortable for your skin. That keeps your daily body wash simple and your shower drain less dramatic.

Storage, Cleanup, and Basic Safety

The easiest storage rule is this: make only what you plan to use that day. Small, single-use batches reduce contamination risk and waste while keeping the recipe manageable.

Do not store these water-based homemade body washes for weeks, even in a clean, capped container. Distilled water and clean equipment can reduce contamination, but they do not make an unpreserved formula shelf-stable. Discard any leftover mixture rather than saving it in the shower.

It is also smart to patch-test unfamiliar ingredients. Apply a small amount of the finished mixture to a limited area of skin, rinse it off, and pay attention to how your skin reacts. If it stings, burns, causes redness, or feels uncomfortable, stop using it.

Finally, liquid castile soap can be drying for some people, particularly in colder weather or after long, hot showers. If your skin feels tight afterward, use less soap, lower the water temperature, shorten your shower, or follow with a plain, fragrance-free moisturizer.

Final Thoughts

Simple natural body wash recipes work best when they stay simple: a soap base, a few optional additions, and a small batch mixed when you need it. There is no prize for creating a bathroom shelf full of half-used jars.

Start with the basic unscented version, then try adding oatmeal or a small amount of oil for a different texture. Homemade body wash should make your routine more pleasant—not give you another container to clean, store, and wonder about later.

You Might Also Enjoy

iconic scents
Everyday Living

Top 10 Iconic Scents on Amazon to Refresh Your Signature Scent

Iconic scents have a way of becoming part of our memories, but sometimes even a longtime favorite needs a refresh. A new signature scent can be a small but satisfying reset for the season ahead. Whether you’re preparing for holiday gatherings, refreshing your everyday routine, or looking for a gift that won’t become another thing to store in a closet, fragrance is a personal choice with plenty of room for fun.

Start by thinking about when and where you’ll wear it. Bright citrus scents can feel effortless during busy daytime plans, while warm vanilla, woods, and florals often suit cooler weather, dinners, and dressed-up occasions. Thankfully, there’s no rule saying one bottle has to do everything. That’s a lot of pressure for a little glass bottle.

Affiliate disclosure: This article contains affiliate links. If you make a purchase through one of these links, I may earn a commission at no additional cost to you. As an Amazon Associate I earn from qualifying purchases.


🔥 Top Picks

  • Best Overall: Dolce & Gabbana Light Blue Eau de Toilette
  • Best Budget: Calvin Klein CK One Eau de Toilette

1. Maison Margiela Replica By the Fireplace

👉 View on Amazon →

Maison Margiela Replica By the Fireplace is a cozy, smoky fragrance that evokes a chilly evening indoors. Its character is commonly associated with roasted chestnut, woods, vanilla, and soft smoke, making it a natural fit for fall, winter, holiday dinners, or any time you want something more layered than a simple sweet perfume.

This isn’t the quietest option on the list, so it may work best for evenings, date nights, or occasions when you won’t be sharing close quarters with someone who prefers unscented everything. A light application can go a long way, especially in warm rooms during crowded celebrations.

Why it stands out: It creates a distinctive warm-and-smoky mood without requiring candles, décor, or a full seasonal makeover.


2. Calvin Klein CK One Eau de Toilette

👉 View on Amazon →

Calvin Klein CK One remains an iconic choice if you like fresh, clean, uncomplicated fragrances. Its bright citrus-and-green profile feels casual and easy to wear, while its unisex appeal makes it especially useful for shared households or gift situations where you don’t know someone’s exact scent preferences.

It works well as an everyday reach-for bottle: after a shower, before errands, on a workday, or whenever you want to smell put together without seeming like you’re headed to a red-carpet event. Because fresh scents can wear more softly than richer perfumes, you may prefer it for daytime plans rather than long formal evenings.

Why it stands out: Its clean, versatile character makes it an approachable signature scent that’s often more budget-friendly than luxury options.


3. Vera Wang Princess Eau de Toilette

👉 View on Amazon →

Vera Wang Princess has remained popular thanks to a sweet, playful profile that feels youthful without belonging to any particular age group. Its fruity-floral, vanilla-leaning personality makes it a good match if you enjoy fragrances that feel cheerful, soft, and a little romantic.

Consider this one for casual holiday outings, brunches, birthday celebrations, or a low-pressure gift for someone who already likes sweeter perfumes. If rich gourmand scents tend to overwhelm you, start with a small amount. Sweet fragrances can become much more noticeable in heated indoor spaces.

Why it stands out: It offers a recognizable sweet scent profile that feels fun and polished rather than overly formal.


4. Elizabeth Taylor White Diamonds Eau de Toilette

👉 View on Amazon →

Elizabeth Taylor White Diamonds is a true classic for anyone drawn to bold, traditional floral fragrances. It has a dressed-up presence that feels at home during formal gatherings, evening celebrations, or occasions when a favorite sweater and simple dinner need a little extra sparkle.

This scent has more old-school glamour than many modern, airy florals—and that’s exactly the point. It may appeal to you if you enjoy a noticeable perfume trail or associate fragrance with special occasions and family celebrations. Because it has a fuller floral character, a light hand can help it feel elegant rather than overpowering.

Why it stands out: Its unmistakably classic floral style brings a sense of occasion to even a simple night out.


5. Dolce & Gabbana Light Blue Eau de Toilette

👉 View on Amazon →

Dolce & Gabbana Light Blue is known for a crisp, sunny style built around citrus, fruit, and fresh woody notes. It can be a welcome change when colder months, heavy holiday meals, and packed calendars leave you craving something lighter and more open. Think less “cozy blanket” and more “fresh air through an open window.”

Its bright profile makes it especially useful for daytime wear, travel, warm-weather trips, and gatherings where you want a scent that feels clean without being overly soapy. It can also be a strong choice if you’re building a small fragrance wardrobe instead of relying on one intense perfume for every occasion.

Why it stands out: Its fresh, bright character works across many settings, from everyday errands to celebratory plans.


6. Ariana Grande Cloud Eau de Parfum

👉 View on Amazon →

Ariana Grande Cloud is a widely recognized modern fragrance with a sweet, creamy, airy feel. It often appeals to people who enjoy warm gourmand-style scents but want something with a soft, cloudlike quality rather than a straight-up bakery effect. It can feel especially fitting during cooler months, movie nights, casual parties, and gift exchanges with friends.

Because fragrance is personal, this is a better gift for someone whose tastes you already know. Sweet, musky, and creamy scents can be comforting to one person and too much for another. If it’s for you, it may become a go-to for evenings when you want a little cozy confidence without putting on a whole production.

Why it stands out: It blends sweetness and softness in a way that feels current, comforting, and easy to recognize.


7. Britney Spears Fantasy Eau de Parfum

👉 View on Amazon →

Britney Spears Fantasy has been a pop-culture fragrance favorite for years, and its candy-sweet, fruity character is a big part of the appeal. This is a scent for anyone who enjoys fragrance with personality. It doesn’t pretend to be minimal, mysterious, or quietly expensive. It’s fun, nostalgic, and happy to arrive wearing pink.

Fantasy can work nicely for informal celebrations, festive outings, and days when you want a scent that feels playful instead of serious. It may also suit a fragrance collector who enjoys revisiting nostalgic favorites. If you prefer crisp citrus, dry woods, or subtle skin scents, however, you may want something less sugary.

Why it stands out: It delivers a joyful, recognizable sweet-fragrance experience with a strong dose of nostalgia.


8. Davidoff Cool Water Eau de Toilette

👉 View on Amazon →

Davidoff Cool Water is an enduring fresh fragrance associated with aquatic, aromatic, and clean notes. It has long been a popular choice for anyone who wants a straightforward everyday scent, particularly if rich vanilla and heavy florals aren’t your thing. Its clean profile can feel refreshing after a long travel day, before a family gathering, or during the transition from one season to the next.

Although it’s often marketed toward men, fragrance doesn’t need to follow a label if the scent works for you. This is also a practical option for a partner, teen, or relative who prefers classic, uncomplicated grooming staples over trend-driven products.

Why it stands out: Its fresh aquatic style offers a familiar, no-fuss option for daily use and easy gifting.


9. Lancôme La Vie Est Belle Eau de Parfum

👉 View on Amazon →

Lancôme La Vie Est Belle is a rich, sweet floral fragrance with a polished, celebratory feel. It tends to appeal to people who want their perfume to be noticeable and luxurious, especially at dinners, weddings, seasonal parties, or evenings when getting dressed is part of the fun. A little black dress isn’t required, but it wouldn’t argue with one.

This is a more expressive choice than a light citrus spray, so you may want to save it for occasions when you want your fragrance to make an impression. If you’re buying it as a gift, it helps to know that the recipient enjoys sweeter floral scents rather than assuming any popular perfume will suit everyone.

Why it stands out: Its fuller floral sweetness gives special occasions a more glamorous, finished feeling.


10. Ralph Lauren Polo Blue Eau de Toilette

👉 View on Amazon →

Ralph Lauren Polo Blue is a classic fresh fragrance that balances a clean, outdoorsy feel with a polished edge. It can suit work events, family celebrations, dinner reservations, or gift-giving moments when you want something dependable but not overly formal. Its style is commonly associated with fresh melon, citrus, herbs, and woods, creating an easygoing scent that still feels intentional.

This is a useful option if you want one fragrance that can move between daytime and evening without much thought. It may not satisfy someone looking for something unusual or artistic, but that reliability is exactly why many people keep a classic scent in rotation.

Why it stands out: It delivers a versatile fresh-and-woodsy profile that feels appropriate for many everyday and seasonal occasions.


Final Thoughts

Refreshing your signature scent doesn’t mean replacing everything you own or buying a bottle for every mood. One well-chosen fragrance can add a little ritual to the season, whether you’re heading to a gathering, wrapping a thoughtful gift, or simply trying to make an ordinary Tuesday feel less ordinary.

Start with the scent family you naturally gravitate toward: fresh citrus, soft florals, cozy vanilla, smoky woods, or something sweet and nostalgic. If you’re gifting fragrance, consider the recipient’s existing preferences and keep it low-pressure. Store bottles away from direct light and heat so they’re ready for the next occasion—no elaborate fragrance shelf required.

You Might Also Enjoy

popular personalized items cover
Everyday Living

10 Popular Personalized Items on Amazon That Make Great Gifts

Personalized items solve a gift-shopping problem that never really goes away: how do you give something thoughtful without buying another candle that may or may not become bathroom décor?

The most popular personalized items on Amazon are useful enough to fit into everyday life yet specific enough to feel chosen for one person. That balance matters. A name printed on a random object is a novelty; an item that suits someone’s hobbies, home, memories, or routine is more likely to last.

This list focuses on customizable products with a clear purpose, along with the practical details worth considering before you upload a photo, type a name, and hope autocorrect behaves itself.

Affiliate disclosure: This article contains affiliate links. If you make a purchase through one of these links, I may earn a commission at no additional cost to you. As an Amazon Associate I earn from qualifying purchases.


🔥 Top Picks

  • Best Overall: Personalized Engraved Cutting Board
  • Best for Kids: Personalized Name Puzzle

1. Personalized Engraved Cutting Board

👉 View on Amazon →

A personalized engraved cutting board can be either genuinely useful or strictly decorative, depending on the design and the recipient. Many options allow you to add a family name, a couple’s names, an established date, or a short message, making this an easy choice for weddings, housewarmings, anniversaries, and holidays.

Its appeal is simple: it feels personal without being overly sentimental, and it suits people who enjoy cooking, hosting, or simply having a kitchen that looks a little more put together than it did on Tuesday morning. A board can be displayed on a counter or used to serve bread, cheese, and snacks.

The trade-off is that deeply engraved boards may not be ideal for heavy chopping. If the recipient cooks often, look for a design that keeps the personalization on one side and leaves the reverse side available for food prep. Wood also needs occasional care, so this is better for someone comfortable with hand-washing and maintenance.

Why it stands out: It combines a practical kitchen staple with personalization suited to many milestones.


2. Custom Photo Blanket

👉 View on Amazon →

Custom photo blankets turn a favorite memory into something that can be used regularly. Depending on the listing, you may be able to upload one image, create a collage, or add names and text alongside the photos. They work especially well for grandparents, long-distance family members, pet lovers, and couples celebrating an anniversary.

The emotional value is the main draw. A blanket featuring a well-chosen family photo or a collection of pet pictures can be far more meaningful than a generic throw. It also avoids the “where am I supposed to put this?” problem that comes with many sentimental gifts.

Still, the result depends heavily on the image you provide. Low-resolution, dark, blurry, or heavily cropped photos may not reproduce clearly. Before ordering, use a bright, high-quality image and check the preview carefully. A photo blanket is best for cozy display and light everyday use, though it may not suit someone who prefers minimal décor.

Why it stands out: It turns a personal photo into a comfort item instead of another keepsake that sits in a drawer.


3. Personalized Name Puzzle

👉 View on Amazon →

A personalized name puzzle is a classic choice for babies, toddlers, and young children, particularly when you want a gift that feels more considered than another stuffed animal. These puzzles typically feature large letters spelling a child’s first name, often with colorful pieces that can be removed and placed back into the board.

For younger children, the appeal is partly educational and partly personal. Seeing their own name on a toy can make letter recognition more engaging, while chunky pieces may be easier for small hands to handle. The puzzle can also double as nursery décor when it is not being used for play.

This is one item where age appropriateness matters more than cuteness. Small pieces can be unsuitable for very young children, and decorative versions may not be designed for regular play. Check the seller’s age guidance, materials information, and letter layout before purchasing. Unusually spelled or longer names may also affect the final size and design.

Why it stands out: It gives children something made specifically for them while offering a simple, hands-on activity.


4. Custom Pet Portrait

👉 View on Amazon →

For many people, a personalized pet item is not a novelty gift. It is a very direct route to their heart. Custom pet portraits come in a range of styles, from artwork with a traditional painted look to playful digital designs that place a dog or cat in a slightly ridiculous royal outfit. There is apparently no shortage of pets ready to be declared monarchs.

A portrait works well for pet parents, new adopters, families mourning a beloved animal, or anyone whose camera roll is approximately 80 percent fur. It can be displayed as wall art, given as a memorial gift, or used to make a home feel more personal.

The biggest consideration is the source photo. A clear image with good lighting and an unobstructed view of the pet’s face will give the artist or printing process more to work with. Be realistic about style, too: a whimsical cartoon portrait suits some households, while a more restrained illustration may better fit others.

Why it stands out: It celebrates a pet’s personality in a way that feels more intentional than a standard framed photo.


5. Personalized Engraved Tumbler

👉 View on Amazon →

A personalized tumbler takes an everyday item and makes it easier to keep track of in busy homes, offices, gyms, and carpools. You can often customize one with a first name, initials, monogram, short phrase, or simple design. That makes tumblers useful gifts for teachers, coworkers, bridesmaids, graduates, and anyone who has watched a water bottle migrate to someone else’s desk.

Unlike many customized gifts, a tumbler has a clear role in daily life. It can be used for coffee, water, tea, or other drinks, depending on the style selected. Personalization can also make a group gift feel less generic when several people receive matching items with individual names.

The limitation is that customization does not automatically make a tumbler well made. Look beyond the engraving options and consider the lid style, cleaning requirements, capacity, and whether the recipient tends to carry drinks in a bag. A fancy cup with a leaky lid is still just a small indoor flood.

Why it stands out: It adds a personal touch to something many people already use every day.


6. Personalized Leather Journal

👉 View on Amazon →

A personalized leather journal is a thoughtful option for writers, students, travelers, artists, list-makers, and people who still prefer putting pen to paper. Customization may include a name, initials, date, short quote, or small symbol on the cover, giving a straightforward notebook more of a keepsake feel.

This gift has broad appeal because it does not assume a particular hobby. One person may use it for travel notes, another for prayer or reflection, and another for meeting notes, grocery lists, or the novel they have been threatening to start for six years. The journal adapts to the person rather than demanding a new identity from them.

Pay attention to the details that affect usability, including the page style, binding, cover material, and overall size. A compact journal is easy to carry but offers less writing room, while a larger one may be better kept on a desk. Also check whether the cover is genuine leather, synthetic leather, or another material. Initials tend to be the safest customization choice if you are unsure of someone’s preferred wording.

Why it stands out: It feels personal while leaving the recipient room to make it entirely their own.


7. Personalized Family Doormat

👉 View on Amazon →

A personalized family doormat offers an easy way to add character to an entryway. Common designs include family names, first names, seasonal greetings, house numbers, and pet-themed messages. It can make a practical housewarming gift, especially for new homeowners or couples moving into their first shared space.

The best part is that it is visible and functional. Unlike a personalized ornament or decorative sign, a doormat has a job. It can help catch everyday dirt at the door while giving visitors a small glimpse of the people who live inside.

That said, exterior conditions matter. A doormat exposed to direct rain, snow, intense sun, or constant foot traffic may show wear faster than one placed in a covered entryway. It is also worth checking the dimensions before ordering; a mat that looks substantial online can feel surprisingly small in front of a wide door.

Why it stands out: It personalizes a home in a low-pressure, useful way that does not require redecorating the whole place.


8. Personalized Recipe Box

👉 View on Amazon →

A personalized recipe box is particularly meaningful for anyone who cooks from handwritten cards, family recipes, or loose scraps of paper that have been living in a kitchen drawer since the early 2000s. You can often add a first name, family name, or phrase such as “Grandma’s Recipes” to the lid.

This item works well as a wedding, Mother’s Day, holiday, or memorial gift because recipes often carry stories with them. A box can become a place to gather favorite meals, passed-down dishes, and the one cookie recipe everyone insists must appear at every gathering.

Its usefulness depends partly on what comes with it. Some versions include blank cards and dividers; others are simply decorative storage boxes. If the recipient exclusively uses a digital recipe app, this may feel more sentimental than practical. For a home cook who values handwritten notes and family traditions, however, it can be a quietly lasting gift.

Why it stands out: It gives treasured recipes a dedicated home instead of leaving them scattered among cookbooks and kitchen drawers.


9. Monogrammed Tote Bag

👉 View on Amazon →

A monogrammed tote bag is a straightforward personalized item that can fit many routines. It may be used for groceries, work essentials, library books, weekend trips, kids’ activities, or the endless collection of things that somehow must leave the house with you all at once.

Personalization usually comes in the form of initials, a name, or a monogram, keeping the look relatively versatile. It is a sensible gift for teachers, students, new moms, bridesmaids, travelers, or anyone who appreciates an extra bag that is not a flimsy promotional tote from an event nobody remembers attending.

The main things to consider are capacity and material. A canvas-style tote may be sturdy but can become heavy when packed. A lightweight option is easier to carry but may not hold up to regular hauling. Think about how the recipient would actually use it rather than choosing based on the fanciest monogram placement.

Why it stands out: It delivers personalization without sacrificing the flexibility of a genuinely useful everyday bag.


10. Personalized Name Necklace

👉 View on Amazon →

A personalized name necklace is simple, wearable, and easy to tailor to the person receiving it. Options may feature a first name, initials, children’s names, a meaningful date, or a short word. It can work as a birthday gift, graduation present, Mother’s Day choice, or small gesture for someone who likes understated jewelry.

This type of piece is best for someone who already wears necklaces regularly. A name necklace can feel more personal than a standard accessory, but it does not need to announce a major life event to everyone in the grocery store. Initials or a meaningful word can provide a subtler option.

Jewelry is highly personal, so check the recipient’s preferred metal tone and chain length if possible. Some people love visible name jewelry; others may find it too specific for their style. If you are uncertain, a minimal initial pendant is often a safer alternative to a larger script-name design.

Why it stands out: It creates a small, wearable keepsake that can feel personal without being overly elaborate.


Final Thoughts

The most worthwhile personalized Amazon items are not necessarily those with the biggest customization menus. They connect a name, memory, hobby, or household detail to something the recipient will genuinely enjoy using or seeing.

Before ordering, consider the person’s routine and taste, along with the practical details of the product itself. Check the spelling, image quality, materials, dimensions, care instructions, and customization preview. That little bit of attention can make the difference between a meaningful gift and a very personalized object that quietly disappears into a closet.


You Might Also Enjoy

cheap dinner ideas
Everyday Living

15 Cheap Dinner Ideas for Nights When Everybody Is Hungry and You’re Tired

There is a very specific kind of panic that happens around 5:00 p.m.

Everybody is hungry.

You forgot to thaw the chicken.

Someone asks, “What’s for dinner?”

And apparently “I don’t know, but please stop asking me” is not considered a meal.

This is not the night for a beautiful recipe involving twelve spices and something that needs to marinate for four hours.

You need cheap. You need easy. And ideally, you need something everybody will actually eat.

These are those dinners.

1. Loaded Baked Potatoes

A baked potato ranks #1 on the easy and cheap dinner ideas list. It is basically a blank canvas for whatever happens to be lurking in your refrigerator.

Bake or microwave large potatoes, split them open, and start piling.

Try:

  • Shredded cheese
  • Leftover chili
  • Broccoli
  • Bacon bits
  • Sour cream
  • Green onions
  • Leftover taco meat
  • Rotisserie chicken

Set everything on the counter and let everybody build their own.

Suddenly leftovers aren’t leftovers.

They’re a potato bar.

Marketing matters. 😂

2. Breakfast for Dinner

cheap dinner ideas_breakfast foods

There is absolutely no rule saying pancakes have to be eaten before noon.

Scrambled eggs, toast and fruit make dinner.

So do pancakes and sausage.

So does an omelet filled with the vegetables and cheese you need to use before they become a science experiment.

Eggs can still be an economical protein compared with many meats, and breakfast foods tend to be quick.

Bonus: children are frequently delighted by the apparent lawlessness of eating pancakes at 6:30 p.m.

3. Chicken Quesadillas

Tortillas + cheese + something else = dinner.

That something else might be leftover chicken, black beans, taco meat, corn, peppers or absolutely nothing because cheese quesadillas are allowed to exist.

Cook them in a skillet until the tortillas are crisp and the cheese melts.

Serve with salsa, sour cream, guacamole or whatever you’ve got.

Cut them into triangles and somehow they become 34% more exciting.

I don’t make the rules.

4. Spaghetti and Garlic Bread

We do not need to reinvent dinner every night.

A box of spaghetti, a jar of sauce and garlic bread have rescued hungry families for generations.

Brown some ground beef or Italian sausage if you have it. Toss in frozen meatballs. Add mushrooms or vegetables.

Or don’t.

Some nights the sophisticated culinary technique is:

Open jar. Pour sauce. Feed people.

That counts.

5. Taco Rice Bowls

This is especially useful when you don’t have enough taco meat to make a full dinner for everybody.

Rice stretches it.

Start with rice and add whatever you’ve got:

  • Seasoned ground beef or chicken
  • Black or pinto beans
  • Corn
  • Cheese
  • Salsa
  • Lettuce
  • Tomatoes
  • Sour cream
  • Crushed tortilla chips

Everybody builds a bowl, which means the person who hates tomatoes doesn’t have to conduct a forensic investigation of dinner before eating it.

6. Rotisserie Chicken Wraps

A rotisserie chicken is one of my favorite “I am technically cooking because food is appearing on plates” shortcuts.

Pull off the meat and stuff it into tortillas with lettuce, cheese, tomato and whatever sauce or dressing your family likes.

Ranch? Fine.

BBQ sauce? Absolutely.

Buffalo sauce? Go for it.

You can also serve the chicken with bagged salad, microwave rice, frozen vegetables or rolls and call dinner finished.

Nobody needs to know how little effort occurred behind the scenes.

7. Grilled Cheese and Tomato Soup

Sometimes cheap dinner doesn’t need creativity.

It needs melted cheese.

Make grilled cheese sandwiches, heat tomato soup and move on with your evening.

Want to make the sandwiches a little more interesting? Add sliced tomato, bacon, ham or a different cheese.

Want to make absolutely nothing more interesting because you’re exhausted?

Don’t.

That’s the beauty of grilled cheese.

8. Sheet-Pan Sausage, Potatoes and Vegetables

This one requires a little chopping, but after that the oven takes over.

Cut smoked sausage and potatoes into bite-size pieces, add an inexpensive vegetable such as broccoli, carrots, peppers or green beans, toss everything with oil and seasonings, and roast until the potatoes are tender and everything gets those lovely browned edges.

Line the pan first if you’d like cleanup to involve approximately zero emotional growth.

9. Sloppy Joes

cheap dinner ideas_sloppy joes

Ground beef, buns and a simple Sloppy Joe sauce can feed a family without much fuss.

You can use canned sauce or make a quick version with pantry ingredients you already have.

Serve them with chips, carrot sticks, frozen fries, fruit—whatever is easiest.

This is not the evening we’re carving radishes into roses.

10. Personal Tortilla Pizzas

No pizza dough.

No waiting for anything to rise.

Put tortillas on a baking sheet, spread on pizza sauce, add mozzarella and let everybody choose toppings.

Pepperoni.

Mushrooms.

Peppers.

Leftover chicken.

Pineapple, if your household enjoys starting arguments. 😂

Bake until the cheese is bubbly and the tortilla edges are crisp.

They’re fast, inexpensive and particularly good for using tiny amounts of leftovers that aren’t enough to make another meal.

11. Chicken Alfredo the Easy Way

We’re not making fresh pasta in Tuscany tonight.

Cook pasta. Add Alfredo sauce. Toss in cooked chicken.

Done.

Frozen broccoli or peas can stretch the meal and add something green without creating another pan.

A rotisserie chicken works beautifully here, too.

Add garlic bread if you’ve got it and suddenly dinner looks much more planned than it was.

We will accept the compliment.

12. Use-What-You’ve-Got Fried Rice

This is what leftover rice was waiting for.

Cold cooked rice works particularly well. Toss it into a hot skillet with a little oil, scrambled egg and whatever vegetables are available.

Frozen peas and carrots?

Perfect.

Leftover chicken?

In it goes.

Half an onion?

Congratulations. It has a purpose.

Add soy sauce and other seasonings you enjoy.

The entire point is not going to the grocery store for seven ingredients so you can make a meal designed to use leftovers.

13. Loaded Nachos

Spread tortilla chips across a sheet pan.

Add beans, taco meat if you have it, and plenty of shredded cheese.

Bake until everything is hot and melty.

Then add salsa, lettuce, tomato, jalapeños, sour cream, avocado or whatever your household will eat.

Put the pan in the middle of the table.

Dinner has arrived.

Will there be crumbs?

Yes.

We can’t solve everything.

14. Chicken and Rice Skillet

Chicken and rice is inexpensive, filling and flexible enough to handle whatever flavor direction you’re in the mood for.

Use bite-size pieces of chicken so they cook quickly, then combine them with rice, broth and simple seasonings.

Depending on the recipe and cooking method, you can add frozen vegetables and turn the whole thing into a one-pan meal.

This is also a great category for leftovers because chicken and rice reheats well for tomorrow’s lunch.

Future You appreciates this sort of planning.

15. The “Snack Plate Counts as Dinner” Dinner

I am ending with this one because somebody needs permission.

You don’t always have to cook.

Put out:

  • Cheese
  • Crackers
  • Deli meat
  • Fruit
  • Raw vegetables
  • Hummus
  • Hard-boiled eggs
  • Nuts
  • Pickles
  • Whatever else is already in the refrigerator

Call it a snack plate, grazing board, mini charcuterie board or Thursday.

People eat.

You don’t cook.

The refrigerator gets cleaned out.

Everybody wins.

Make Tired-Night Dinners Easier Before You’re Tired

The worst time to invent an easy dinner is when you’re already hungry and exhausted.

Keep a handful of rescue foods around that your family actually eats.

Maybe that’s tortillas, pasta, jarred sauce, canned beans, shredded cheese, frozen vegetables, rice, soup or sandwich ingredients.

Your list doesn’t need to resemble anybody else’s.

The goal is simply to have two or three meals you can make without thinking very hard.

Because sometimes the difference between spending $12 on an easy dinner at home and $60 on takeout is just knowing what you can throw together in twenty minutes.

Final Thoughts

Feeding a family doesn’t require producing an impressive dinner every night.

Some nights you’ll cook something wonderful from scratch.

Other nights you’ll put quesadillas on paper plates and consider yourself victorious.

Both nights everybody gets fed.

That’s the point.

Keep a few cheap dinner ideas in your back pocket, stock the ingredients your household reliably eats, and give yourself permission to take the easy route when you need it.

Dinner doesn’t have to be complicated to be good.

And on the nights when everybody is hungry and you’re tired?

Easy tastes pretty darn good.

You Might Also Enjoy

You Could Also Try

Essential Health and Wellness Products
Everyday Living

Essential Health and Wellness Products for Everyday Use

Everyday health and wellness often hinge on simple, manageable habits supported by thoughtful product choices. With so many options available, selecting wellness products that genuinely enhance comfort, promote healthy routines, and fit seamlessly into daily life can feel overwhelming. However, integrating essential health and wellness products doesn’t need to be complicated or expensive. Instead, focusing on practical, widely accessible items can support wellbeing in approachable, realistic ways.

This article explores a variety of health and wellness products designed for everyday use, emphasizing comfort, routine support, and emotional wellbeing. These products aim to complement daily habits without demanding major lifestyle overhauls or unrealistic expectations. By choosing items that encourage movement, rest, personal care, and stress reduction, readers may find helpful tools to support their overall wellness journey in a balanced and manageable way.

Affiliate disclosure: This article contains affiliate links. If you make a purchase through one of these links, I may earn a commission at no additional cost to you. As an Amazon Associate, I earn from qualifying purchases.

Products That Support Comfortable Movement and Activity

Essential Health and Wellness Products

Staying active doesn’t have to mean intense workouts or an expensive gym membership. Products that encourage gentle activity or improve comfort during movement can make staying active more enjoyable and accessible.

  • Supportive Footwear: Quality shoes designed for walking or light exercise can reduce discomfort and encourage consistent movement. Look for options with good arch support and cushioning tailored to daily activities.
  • Yoga Mats and Props: A comfortable yoga mat paired with props such as blocks or straps can make stretching and gentle movement routines more inviting. These tools can help with balance, flexibility, and relaxation practices at home.
  • Resistance Bands: Lightweight and portable, resistance bands offer a versatile way to incorporate strength training and mobility exercises without bulky equipment. They fit easily into a home routine and can be adjusted to different fitness levels.
  • Ergonomic Desk Accessories: For those spending time seated, ergonomic chairs or footrests can promote better posture and reduce strain, supporting physical comfort throughout the day.

These products prioritize comfort and accessibility, recognizing that small steps toward movement can add up to meaningful benefits without pressure for perfection or intensity.

Essentials for Restful Sleep and Relaxation

Essential Health and Wellness Products

Rest is a fundamental pillar of wellness, supporting emotional balance and physical recovery. Products that enhance sleep quality or create calming environments may help establish peaceful nightly routines.

  • Weighted Blankets: Some people find the gentle pressure of a weighted blanket comforting and relaxing. Research into their effect on sleep is still developing, so think of one as a comfort item rather than a treatment for sleep problems.
  • White Noise Machines or Apps: Creating consistent background sound can mask disruptive noises and support uninterrupted sleep. These devices and apps are easily customizable to personal preferences.
  • Blackout Curtains: Blocking outside light helps maintain a dark, sleep-friendly environment, which is important for regulating natural sleep cycles.
  • Aromatherapy Diffusers: If you enjoy fragrance, a diffuser can help create a pleasant atmosphere as part of your evening routine. Essential oils aren’t appropriate for every household, however, particularly around some pets, so check safety guidance before using them.

While these items can support better rest, it’s important to approach sleep challenges with patience and seek professional advice if persistent difficulties arise.

Practical Tools for Stress Reduction and Emotional Wellbeing

Managing stress and fostering emotional wellness are vital parts of everyday health. Certain products can provide gentle support for mindfulness and relaxation practices.

  • Meditation Apps and Guided Audio: Technology offers accessible ways to explore mindfulness and breathing exercises. Many free or low-cost apps provide guided sessions suitable for beginners.
  • Journals and Gratitude Notebooks: Writing can be a helpful outlet for processing thoughts and emotions. Keeping a journal focused on gratitude or daily reflections encourages positive mental habits.
  • Comfort Items: Simple objects like soft blankets, stress balls, or calming teas can contribute to a sense of comfort and grounding during stressful moments.
  • Light Therapy Lamps: Light boxes are sometimes used for winter-pattern seasonal affective disorder (SAD), but they’re different from ordinary lamps and aren’t simply a general mood-boosting gadget. If you’re considering one for seasonal depression or another health concern, it’s a good idea to talk with a healthcare professional about whether it’s appropriate for you.

These tools are intended to support emotional balance and should be viewed as complements to professional mental health care when needed.

Personal Care Products That Encourage Consistent Routines

Some of the most useful wellness products are also the simplest—the things that make everyday routines a little easier or more enjoyable.

  • Gentle Skincare Products: Choosing mild cleansers and moisturizers suited to one’s skin type helps maintain skin health without irritation. Products with simple, natural ingredients are often preferred for sensitive skin.
  • Reusable Water Bottles: Staying hydrated is foundational for wellbeing. A well-designed reusable water bottle encourages regular water intake and supports environmentally conscious habits.
  • Compact Exercise Equipment: Small items like a jump rope or hand weights can be easily stored and used on the spot, encouraging movement without disrupting daily flow.

Incorporating these products into everyday routines can make wellness feel more achievable and less like an added task.

Final Thoughts

Finding essential health and wellness products for everyday use involves balancing practicality, comfort, and routine fit. By focusing on items that support gentle movement, restful sleep, stress reduction, and personal care, individuals can build a foundation for wellbeing that feels manageable and sustainable. These products serve as helpful tools rather than quick fixes, encouraging small but meaningful habits without pressure or guilt.

Wellness is deeply personal, and what works well for one person may differ for another. Exploring a few thoughtfully chosen products can create opportunities for positive changes that enhance daily life. Above all, maintaining flexibility and kindness toward oneself is key, recognizing that these supportive tools complement—not replace—professional care when needed.

You Might Also Enjoy

Personal Finance for Beginners
Everyday Living

Personal Finance for Beginners: A Guide to Managing Your Money Wisely

Learning personal finance for beginners can feel overwhelming when budgeting, saving, credit, debt, and investing all seem to come at you at once. Managing money wisely is a skill that benefits everyone, yet many beginners feel overwhelmed when starting their personal finance journey. From budgeting and saving to understanding credit and investing, the world of personal finance can seem complex and intimidating at first. However, with the right guidance and practical steps, managing your money can become a manageable, even enjoyable, part of everyday life.

This beginner’s guide breaks down personal finance into clear, approachable concepts. It will help readers gain confidence in making sound financial decisions, avoid common pitfalls, and build a solid foundation for future financial well-being. Whether someone is just starting to track their spending or looking to understand investments, this guide offers practical advice to get started on the right foot.

Quick Facts

  • Skill Level: Beginner
  • Time to Learn: A few weeks to grasp basics, ongoing practice for mastery
  • Difficulty: Moderate—requires attention and consistent effort
  • Best For: Individuals new to managing money and budgeting

Beginner Guide Overview

Personal finance involves managing income, expenses, savings, and investments to meet financial goals and secure a stable future. Beginners often find it confusing because it includes many terms and concepts that aren’t part of everyday conversation, such as credit scores, interest rates, and emergency funds. The lack of clear, simple instructions can make starting feel daunting.

This guide aims to demystify personal finance by explaining essential ideas in a straightforward way. Readers will learn how to create and maintain a budget, understand credit, save effectively, and begin planning for long-term financial goals. The goal is to provide a welcoming introduction that encourages practical action rather than perfection.

Understanding the Basics

What Is a Budget?

A budget is a plan for how to spend and save money each month. It helps track income and expenses so that spending stays within limits and savings goals are met. Creating a budget gives you control over your finances rather than letting bills and impulse purchases dictate your money flow.

Income vs. Expenses

Income is the money coming in, usually from a paycheck, side jobs, or other sources. Expenses are the costs of living—like rent, groceries, transportation, and entertainment. The key to good money management is making sure expenses don’t exceed income.

Saving and Emergency Funds

Saving means setting aside money regularly for future needs or unexpected costs. An emergency fund is a special savings account reserved for urgent expenses like medical bills or car repairs. The general rule of thumb is to save enough to cover three to six months of essential living expenses.

Credit and Debt

Credit allows borrowing money to buy things now and pay for them later, often with interest. Debt results when borrowed money isn’t paid back immediately. Understanding how credit works, including credit scores and interest rates, is important for avoiding costly mistakes and maintaining financial health.

Interest and Investment Basics

Interest is the cost of borrowing money or the earnings on saved or invested money. Investing involves putting money into assets like stocks or bonds to grow wealth over time. While investing carries risks, it can be a useful way to build financial security beyond simple savings.

How to Get Started

Step 1: Track Your Income and Expenses

Begin by recording all sources of income and every expense for at least a month. This helps reveal spending habits and areas where costs can be trimmed. Many apps or simple spreadsheets can assist with this step.

Step 2: Create a Realistic Budget

Using tracked data, list monthly income and categorize expenses (rent, food, entertainment, etc.). Allocate amounts to each category, prioritizing essentials and setting limits on discretionary spending. Include a savings goal in the budget.

Step 3: Build an Emergency Fund

Start saving a small amount regularly, aiming to build a fund that covers several months of essential expenses. Keep this money in an accessible, low-risk account, such as a savings account.

Step 4: Understand and Manage Credit

Check your credit reports regularly so you know what’s being reported and can watch for errors or unfamiliar accounts. The three nationwide credit reporting agencies are Equifax, Experian, and TransUnion, and the information in each report may differ because creditors don’t necessarily report to all three bureaus.

You can learn more about your credit directly through Equifax, Experian, and TransUnion. Pay bills on time, keep credit card balances manageable, and learn how the information in your credit reports can affect your credit history.

Want to check all three reports? You can request your reports from Equifax, Experian, and TransUnion through AnnualCreditReport.com, the official federally authorized site for free credit reports. Free reports are currently available weekly.

Step 5: Set Financial Goals

Identify short-term goals, such as paying off a credit card balance or saving for a vacation, and long-term goals, like buying a home or planning for retirement. Clear goals help maintain motivation and focus.

Step 6: Automate Savings and Bills

Automate transfers to savings and schedule bill payments to avoid late fees and build savings effortlessly. Automation adds convenience and consistency.

Step 7: Educate Yourself on Basic Investing

Once savings and debt are under control, explore beginner-friendly investment options such as index funds or employer-sponsored retirement plans. Understanding risks and benefits is essential before investing.

Step 8: Review and Adjust Regularly

Periodically review your budget and financial goals to adjust for changes in income, expenses, or priorities. Flexibility ensures the plan remains relevant and effective.

What Beginners Need

  • Budgeting Tool: A simple app or spreadsheet to track income and expenses efficiently.
  • Savings Account: A separate account for emergency funds to keep money accessible but distinct from daily spending.
  • Credit Report Access: The top three nationwide credit bureaus now allow consumers to check reports weekly through the official AnnualCreditReport service to monitor credit health and identify errors.
  • Basic Financial Literacy Resources: Books, websites, or courses explaining key concepts clearly.
  • Optional Upgrade: Financial Advisor Consultation: For personalized guidance once basic knowledge and planning are underway.
  • Optional Upgrade: Investment Platform Account: For beginners ready to start investing with low fees and easy-to-use interfaces.

Common Beginner Mistakes

  • Not Tracking Spending: Without awareness of where money goes, budgets can’t be effective. Regular tracking helps avoid overspending.
  • Ignoring Emergency Funds: Skipping this step leaves individuals vulnerable to unexpected expenses, which can lead to debt.
  • Relying Too Much on Credit: Overusing credit cards without paying balances in full incurs interest and can damage credit scores.
  • Setting Unrealistic Budgets: Budgets that are too strict or ignore lifestyle needs often fail. A balanced, flexible plan works better.
  • Neglecting to Review Finances: Financial situations change; failing to review budgets and goals can lead to missed opportunities or issues.
  • Jumping Into Investments Too Soon: Investing without sufficient savings or understanding can lead to losses and financial stress.

What to Expect

Learning personal finance is a gradual process that involves trial and error and adjustment. Initially, it may take time to develop the habit of tracking expenses and sticking to a budget. Progress often comes in small steps, such as paying off a credit card or growing savings month by month. Costs like emergency funds and debt repayment take priority before more complex investments.

Financial management requires consistent attention but doesn’t have to consume a large amount of time each day. Setting up automation and using tools can ease the workload. Results will vary based on income, expenses, and personal goals, so patience and persistence are key.

Where to Go From Here

After mastering the basics, beginners can explore more advanced financial topics like credit-building strategies, tax planning, or diversified investing. Learning about retirement accounts, insurance options, and estate planning can further enhance financial security. Developing skills in financial goal setting and adjustment over time supports long-term success.

Experimenting with different budgeting methods or financial apps might help find the best fit. Joining communities or forums focused on personal finance offers support and shared experiences. The journey continues beyond basics, with ever-improving knowledge and habits.

Frequently Asked Questions

Q: How much should I save each month?
A: There isn’t one savings percentage that works for everyone. Start with an amount that fits your budget—even if it’s small—and increase it when you’re able.

Q: What’s the difference between a credit score and a credit report?
A: A credit report is a detailed record of your credit history, while a credit score is a number summarizing that information to indicate creditworthiness.

Q: Is it okay to have some debt?
A: Yes, manageable debt like a mortgage or student loans can be part of financial planning, but high-interest debt should be minimized.

Q: How can I improve my credit score?
A: Pay bills on time, keep credit card balances low, avoid opening too many new accounts, and regularly check your credit report for errors.

Final Thoughts

Starting a personal finance journey can feel overwhelming, but breaking it down into clear, manageable steps makes it achievable. By understanding fundamental concepts like budgeting, saving, and credit, beginners can gain control over their money and build confidence. Consistency and realistic goal setting pave the way for financial stability and growth.

With a solid foundation in place, personal finance becomes less about stress and more about empowering choices. The key takeaway is that anyone can improve their financial health by taking small, informed actions regularly. This guide offers a friendly introduction to managing money wisely, setting readers on a path to a secure and rewarding financial future.

You Might Also Enjoy

Meal Prepping Guide
Everyday Living

Meal Prepping Guide: Easy Steps for Healthier Eating

Meal prepping can make a busy week a whole lot easier. Instead of figuring out what to cook every night when you’re already hungry and tired, you can have meals—or at least some of the ingredients—ready to go ahead of time.

If you’ve never tried meal prepping, though, the idea of cooking several days’ worth of food at once can sound like a project in itself. The good news is that it doesn’t have to mean spending your entire Sunday in the kitchen or lining your refrigerator with a week’s worth of identical meals.

The best way to start is small. A little planning, a few reliable containers, and an hour or two of prep can save time later in the week, help you use the groceries you buy, and make it easier to reach for a home-cooked meal when life gets busy.

Affiliate disclosure: This article contains affiliate links. If you make a purchase through one of these links, I may earn a commission at no additional cost to you. As an Amazon Associate, I earn from qualifying purchases.

Understanding Meal Prep and Its Benefits

Meal prep simply means getting some of your cooking done ahead of time. You might prepare complete meals that only need reheating, or you might wash and chop vegetables, cook a batch of rice, roast some chicken, or prepare other ingredients that can be used in different meals throughout the week.

There’s no single right way to do it.

For some people, meal prep means packing several lunches on Sunday night. For others, it’s having enough ingredients ready to throw together a quick dinner after work. Either approach can reduce the time and decision-making involved in getting food on the table.

Planning ahead can also help you make better use of your groceries. When you know what you’re going to cook, you’re less likely to buy ingredients without a plan for using them. Prepping those ingredients before they disappear into the back of the refrigerator can also help cut down on food waste.

And perhaps the biggest benefit? When you’re hungry and already have something ready to eat, dinner becomes a lot easier.

Getting Started: Essential Tools and Containers

You don’t need a collection of fancy kitchen gadgets to start meal prepping. A few basics will handle most of the work.

  • Quality Food Storage Containers: A good set of airtight containers makes storing individual meals and prepared ingredients much easier. Glass containers are durable and resist staining, while plastic containers are lighter and often easier to stack. Whatever you choose, check that they’re suitable for the refrigerator, freezer, microwave, or dishwasher based on how you plan to use them.
  • Sharp Chef’s Knife and Cutting Board: You’ll do plenty of chopping during meal prep, so a dependable knife and sturdy cutting board are worth having. A sharp knife also makes prep faster and easier than struggling with a dull one.
  • Measuring Tools: Measuring cups and spoons are handy for following recipes, making sauces, or portioning ingredients.
  • Slow Cooker or Instant Pot (Optional): If you like meals that can cook with minimal attention, a slow cooker or pressure cooker can do much of the work while you prepare other ingredients.
  • Mixing Bowls and Baking Sheets: Large bowls make it easier to toss and combine ingredients, while sheet pans are great for roasting vegetables, potatoes, and proteins in larger batches.

Start with what you already own before buying anything new. After you’ve meal prepped a few times, you’ll have a much better idea of which tools would actually make the process easier for you.

Planning Your Meals Without Making It Complicated

Good meal prep starts before you turn on the stove. Taking a few minutes to decide what you’ll actually eat during the week can save a lot of time—and prevent you from preparing food that nobody wants by Wednesday.

If you’re just getting started, keep it simple.

  • Start with 2 or 3 Days: You don’t have to prepare an entire week’s worth of meals. Try a few lunches or dinners first and see how it fits into your routine.
  • Choose Ingredients You Can Use More Than Once: Rice, quinoa, roasted vegetables, chicken, beans, tofu, and other basics can be combined in different ways, rather than locking you into the exact same meal every day.
  • Build Balanced Meals: Try combining a protein, carbohydrate, vegetables, and a source of healthy fat. It doesn’t need to be complicated or perfectly portioned to be useful.
  • Use Simple Meal Formulas: A grain or other base + protein + vegetables + sauce is an easy place to start. Change the sauce, seasoning, or toppings and the same basic ingredients can taste completely different.
  • Choose a Regular Prep Time: Find a block of time that works with your schedule. That might be Sunday afternoon, a weekday evening, or even two shorter prep sessions during the week.

Before making your shopping list, take a quick look through the refrigerator, freezer, and pantry. Building a few meals around ingredients you already have can save money and keep forgotten groceries from going to waste.

Step-by-Step Guide to Meal Prepping

Once you’ve decided what you’re making, working in a simple order keeps the kitchen from turning into chaos.

  1. Create a Meal Plan: Decide which meals you want to prepare and how many servings you’ll need.
  2. Make a Shopping List: Write down the ingredients you don’t already have, including basics such as oils, spices, sauces, and seasonings.
  3. Do Your Shopping: Pick up your produce, proteins, grains, and other ingredients. Seasonal produce and sale items can be easy ways to keep costs down.
  4. Prepare Your Ingredients: Wash and chop produce, cook grains and proteins, and mix any sauces or dressings you’ll need.
  5. Assemble Your Meals: Divide complete meals into containers or store ingredients separately so you can mix and match them later. Keep dressings and other wet ingredients separate, as they can make food soggy.
  6. Store Everything Properly: Put the meals you’ll eat soon in the refrigerator and freeze appropriate portions you plan to keep longer.
  7. Label Your Containers: Adding the contents and date takes only a few seconds and saves you from playing “What’s in this container?” later.

You also don’t have to do every step at once. Even washing produce, chopping vegetables, or cooking one large batch of protein ahead of time counts as meal prep if it makes the rest of your week easier.

Storage and Food Safety Considerations

Making meals ahead of time also means paying attention to how they’re cooled, stored, thawed, and reheated.

  • Refrigerate Promptly: Don’t leave cooked food sitting at room temperature for long periods. Shallow containers can help larger batches cool more quickly.
  • Know How Long Food Keeps: Many cooked leftovers are generally refrigerated for about 3 to 4 days, although storage recommendations vary depending on the food.
  • Freeze Meals You Won’t Eat Soon: Freezer-safe containers or bags are useful for portions you plan to save longer. Removing excess air can also help protect food quality in the freezer.
  • Thaw Safely: The refrigerator is a convenient way to thaw frozen meals in advance. Some foods can also be safely thawed or reheated in the microwave.
  • Reheat Thoroughly: Previously cooked foods should be reheated properly before eating. Stirring food during microwave reheating can help avoid cold spots.
  • Prevent Cross-Contamination: Keep raw meat and poultry away from ready-to-eat foods, and clean cutting boards, utensils, counters, and your hands as you work.

Food safety recommendations can vary depending on what you’ve prepared, so check current guidance for specific foods when you’re unsure.

An Optional Tool for Freezer Meal Prep

If you start preparing larger batches or regularly freezing food, a vacuum sealer may be worth considering.

Vacuum Sealer Machine with Automatic Vacuum Sealer Bag Detection and Starter Kit

Vacuum sealing can be useful for portioning foods and reducing the amount of air around items stored in the freezer. It’s certainly not something you need to begin meal prepping, though. Regular freezer-safe containers and bags work just fine for getting started.

Keep Your Meal Prep From Getting Boring

Eating the exact same chicken-and-rice bowl five days in a row is one way to make yourself abandon meal prepping pretty quickly.

Instead, prepare a few basic ingredients that can work together in different ways.

  • Make a batch of quinoa or rice that can become a bowl one night and a side dish the next.
  • Roast several vegetables at once and pair them with different proteins.
  • Change the flavor with different sauces, dressings, herbs, and seasonings.
  • Keep some fresh ingredients—such as greens, avocado, herbs, or crunchy toppings—to add just before eating.
  • Try flavors from different cuisines while using many of the same basic ingredients.

You don’t need five completely different recipes to create variety. Sometimes changing the seasoning or sauce is enough to make yesterday’s ingredients feel like a different meal.

Final Thoughts

Meal prepping doesn’t have to mean spending your entire Sunday cooking or eating the same lunch five days in a row. It’s simply a way to do a little work ahead of time so meals are easier when the week gets busy.

Start with two or three meals, pay attention to what actually saves you time, and adjust from there. You may discover that you love having complete meals ready to reheat—or that simply having vegetables chopped, a protein cooked, and a few basics ready to go is enough.

The best meal-prep routine isn’t the most impressive one. It’s the one that makes your week easier and that you’ll actually want to keep doing.

You Might Also Enjoy

Scroll to Top