
Author name: Amber Campbell

Amber Campbell is the creator behind Trendy Tidbits, a modern content platform focused on trends, tools, and everyday insights designed to keep readers informed and inspired.

Cooling Products for Hot Sleepers
Trending

5 Cooling Products for Hot Sleepers Who Want a Cooler Bed

Hot sleepers don’t need another vague promise about “refreshing comfort.” You need a bed setup that helps you stop kicking off the covers at 2 a.m., flipping the pillow to the cool side, and wondering why the room feels fine but the mattress feels like a toaster oven.

The following cooling products for hot sleepers take different approaches: some move air, some circulate water, some adjust the sleep surface, and others reduce the heat-trapping layers closest to your skin. The best choice depends on whether you deal with mild warmth, frequent night sweats, a heat-retaining mattress, or a sleep partner with a completely different internal thermostat.

Cooling bedding and bed systems may make sleep more comfortable, but they cannot determine or treat the cause of night sweats. If sweating is new, happens regularly, interrupts your sleep, or occurs with other concerning symptoms, consider speaking with a healthcare professional.

Product Roundup Overview

A cooler bed does not always require a new mattress. In fact, the most useful option is often the one that targets the source of the problem. If your mattress is comfortable but sleeps warm, a cooling system or breathable bedding may make more sense than replacing everything. If the mattress itself holds heat and has lost support, though, a new sheet set can only do so much. It is bedding, not wizardry.

This roundup includes products that address hot sleeping in noticeably different ways. There are active cooling systems for people who want more control, smart sleep systems for data-minded shoppers, breathable sheets for a simpler upgrade, and a cooling-focused mattress for anyone ready to change the foundation of the bed.

What to Consider Before Choosing

Start with the type of cooling you actually need. Passive products, such as percale sheets and breathable comforters, do not create cold air or lower the room temperature. They can help heat dissipate more easily and may feel less stifling than dense microfiber or heavy brushed fabrics. They are usually the easiest and most affordable place to start.

Active systems use either air or water to change the temperature around your body. These may be more effective for people who regularly wake up overheated, but they bring added costs and considerations, including setup, noise, cleaning, and cords or hoses around the bed. That trade-off is worth thinking through before a late-night “add to cart” moment.

Mattress compatibility matters, too. A water-based pad may slightly change the feel of the sleep surface, while air-based systems need space near or under the bed. Smart systems may require specific bed dimensions, reliable Wi-Fi, and ongoing app access for connected features. Measure your bed frame, check outlet placement, and confirm that the product works with your preferred sheets and mattress type.

Also consider who shares the bed. Dual-zone systems can be especially useful when one person runs warm and the other likes a heavier blanket and a suspiciously tropical bedroom temperature. For solo sleepers with occasional warmth, a breathable bedding upgrade may offer better value than a high-tech system.

Finally, consider maintenance. Sheets need regular laundering, while cooling pads and water-based systems require care according to the manufacturer’s instructions. A product that could help but feels too fussy to maintain may end up as expensive bedroom decor.

Featured Products

1. BedJet 3 Climate Comfort Sleep System

The BedJet 3 Climate Comfort Sleep System uses airflow to move room-temperature air through the bedding, helping reduce trapped heat and moisture under the covers. It addresses a specific problem: feeling hot under the covers even when the room itself is not particularly warm.

For hot sleepers, the appeal is straightforward. Moving air can help reduce that trapped-heat feeling without adding a padded layer to the mattress. It may be especially appealing if you dislike the feel of cooling mattress pads or do not want to sleep on top of a water-based surface.

The main limitation is that the system changes the climate under the bedding rather than cooling the mattress itself. Sheet placement matters, and you may notice the sound of moving air, particularly in a very quiet room. It also requires space for the unit and access to a power outlet.

This system is best suited to people who want active cooling but prefer an air-based approach with minimal change to the sleep surface. Couples should look carefully at the brand’s dual-zone options if both sides of the bed need separate adjustment.

2. Chilipad 2.0 Bed Cooling System

The Chilipad 2.0 Bed Cooling System, formerly known as the Chilipad 2.0, circulates temperature-controlled water through a mattress pad. It provides direct heating or cooling at the sleep surface without requiring a new mattress.

The practical benefit is active temperature management across the area covered by the pad. If you consistently wake up warm in the middle of the night, a system like this offers a more substantial intervention than swapping pillowcases or buying a lighter comforter. It can also make sense if you already like your mattress but find its surface too warm.

There are trade-offs. The pad, tubing, control unit, and maintenance requirements make this a more involved purchase than a sheet set. You may notice the pad beneath your fitted sheet, especially if you are sensitive to changes in mattress feel. You will also need room near the bed for the control unit.

The Chilipad 2.0 is best for someone willing to pay more and handle some upkeep in exchange for active temperature management. It is less compelling if you only occasionally sleep warm or want a completely cord-free bed.

3. Eight Sleep Pod 6

The Eight Sleep Pod 6 is a connected sleep system that adds individualized heating and cooling, app-based controls, and wearable-free sleep tracking to an existing bed. Certain configurations also include an adjustable base with elevation features. It has generated attention because it turns the bed into a smart device, which is either fascinating or an example of technology entering a room that was doing just fine with lamps. Possibly both.

Its strongest draw is individualized control. For couples with competing sleep preferences, separate temperature control for each side of the bed can be more practical than constantly negotiating the thermostat. The sleep-tracking features may also appeal if you enjoy reviewing patterns and adjusting your routine based on the data.

The biggest consideration is value. This is a premium system, and its connected features will be more useful to data-oriented sleepers than to someone who simply wants to feel less warm at night. It also requires more setup than standard bedding, and you should review current membership or subscription requirements before buying.

Consider it if temperature control is a high priority, you share a bed with someone who sleeps differently, and connected sleep features genuinely sound helpful. If you prefer simple, low-maintenance bedding, this is probably more technology than you need.

4. Slumber Cloud Performance TENCEL Sheet Set

Slumber Cloud’s Performance TENCEL sheets are often considered by shoppers looking for a less complicated way to cool down their bed. Rather than relying on a powered system, these sheets use temperature-regulating fabric technology and offer a smooth, lightweight alternative to heavier bedding.

Their practical strength is convenience. Sheets are easy to add to an existing bed, do not require a nearby outlet, and can be a sensible first step when warmth is noticeable but not severe. They may also appeal to renters, dorm residents, and anyone who does not want extra equipment around the bed.

The limitation is equally important: sheets alone cannot overcome a heat-retaining foam mattress, heavy comforter, high humidity, or warm bedroom. Fabric feel is also personal. Some people prefer crisp cotton percale, while others like the smoother feel of performance bedding.

These sheets are best for sleepers who want a low-effort upgrade and do not need powered cooling. They can also work well with a lighter comforter or breathable duvet insert.

5. Purple Restore Hybrid Mattress

Purple’s Restore Hybrid mattress line gets attention for its distinctive grid-style comfort layer, which is designed to promote airflow while offering pressure relief. A cooling-focused mattress can be a more lasting solution when the mattress itself is the problem, especially if it feels warm, saggy, or overly enveloping.

The practical advantage is that airflow is built into the bed rather than added on top. That creates a cleaner setup than hoses, fans, or pads, and it may suit you if you are already shopping for a replacement mattress. The responsive feel may also appeal if you dislike sinking deeply into dense foam.

Still, a mattress is the highest-commitment option in this roundup. Comfort is subjective, and no cooling design guarantees that every hot sleeper will stay cool all night. Mattress models, firmness choices, trial terms, return policies, and available configurations can change, so review the current details before buying.

This option is best if you need a new mattress anyway and want airflow to factor into your decision. It is not the most economical answer if your existing mattress is comfortable and you simply sleep a little warm.

How the Options Compare

The BedJet 3 is a relatively straightforward active-cooling choice for sleepers who like airflow and do not mind having a unit near the bed. It does not significantly alter the mattress, which can be a plus if you already love how your bed feels.

The Sleepme Chilipad 2.0 offers more direct surface-temperature management through a water-based pad. It may provide a more noticeable cooling effect, but it also requires more setup and maintenance.

The Eight Sleep Pod 6 takes the connected, dual-zone route. It may be especially useful for couples, though its premium positioning means it makes the most sense when individualized control and sleep-tech features are genuinely valuable to you.

Slumber Cloud sheets are the lowest-commitment option. They are easy to use, easy to remove, and sensible for mild warmth, but they will not perform like a powered cooling system.

The Purple Restore mattress is a longer-term, foundational choice. It addresses airflow at the mattress level, but it is also the biggest purchase and requires careful consideration of your preferred firmness and support needs.

Best Choice for Different Needs

For occasional warmth and an easy upgrade

Start with breathable sheets such as the Slumber Cloud Performance TENCEL Sheet Set. This route is easier to live with, costs less than a powered system, and lets you see whether lighter bedding solves enough of the problem.

For sleepers who feel trapped under the covers

The BedJet 3 is a practical fit if moving air sounds more appealing than sleeping on a cooling pad. It targets the warm microclimate under your sheets without requiring a mattress replacement.

For frequent overheating and more hands-on control

The Sleepme Chilipad 2.0 is worth considering if heat regularly interrupts your sleep and you are comfortable maintaining a water-based system. It is a more involved setup, but it also provides more active temperature control.

For couples with opposite temperature preferences

The Eight Sleep Pod 6 is a strong match for a shared bed where one side runs hot and the other does not. Its appeal is less about novelty and more about avoiding the nightly thermostat debate.

For replacing a warm, aging mattress

A Purple Restore mattress makes more sense when your current mattress also needs replacement for comfort or support reasons. Cooling features are more valuable when they come with a bed you actually enjoy sleeping on.

Final Thoughts

The most useful trending products for hot sleepers are not necessarily the flashiest ones. A smart cooling system may be worthwhile for a couple with major temperature differences, while breathable sheets may be all another sleeper needs.

Before buying, identify whether the heat comes from the room, your bedding, your mattress, or the warm air trapped under the covers. Then choose the least complicated option that realistically addresses the problem. Your bed does not need to become a command center unless that is truly what helps you sleep.

Frequently Asked Questions

Do cooling sheets really help hot sleepers?

Cooling sheets can help by feeling lighter and allowing heat to dissipate more easily than dense, heat-trapping bedding. They are most useful for mild warmth and work best with a breathable comforter and a reasonably cool bedroom.

Is an air-based or water-based cooling system better?

Air-based systems may feel less intrusive because they do not add a pad beneath you, while water-based systems can provide more direct temperature control at the sleep surface. The better choice depends on whether you prioritize simplicity and airflow or more targeted active cooling.

Can a cooling mattress fix night sweats?

A cooling mattress may reduce heat buildup, but it cannot identify or treat the cause of night sweats. If your night sweats are new, frequent, severe, or concerning, consider discussing them with a qualified healthcare professional.

Are smart cooling beds worth the cost?

They can be worthwhile if you need adjustable temperature control, share a bed with someone who has different sleep preferences, or value connected sleep features. For occasional warmth, simpler bedding or an air-based system may offer better value.

What bedding is best for a hot sleeper?

Look for lightweight, breathable materials, and avoid piling on dense layers that hold heat close to your body. Texture preference matters, so crisp percale sheets, smooth performance fabrics, or another breathable option may be the best fit depending on what feels comfortable to you.
You Might Also Enjoy

Empty Entryway Corner
House & Home

How to Use an Empty Entryway Corner as a Family Drop Zone

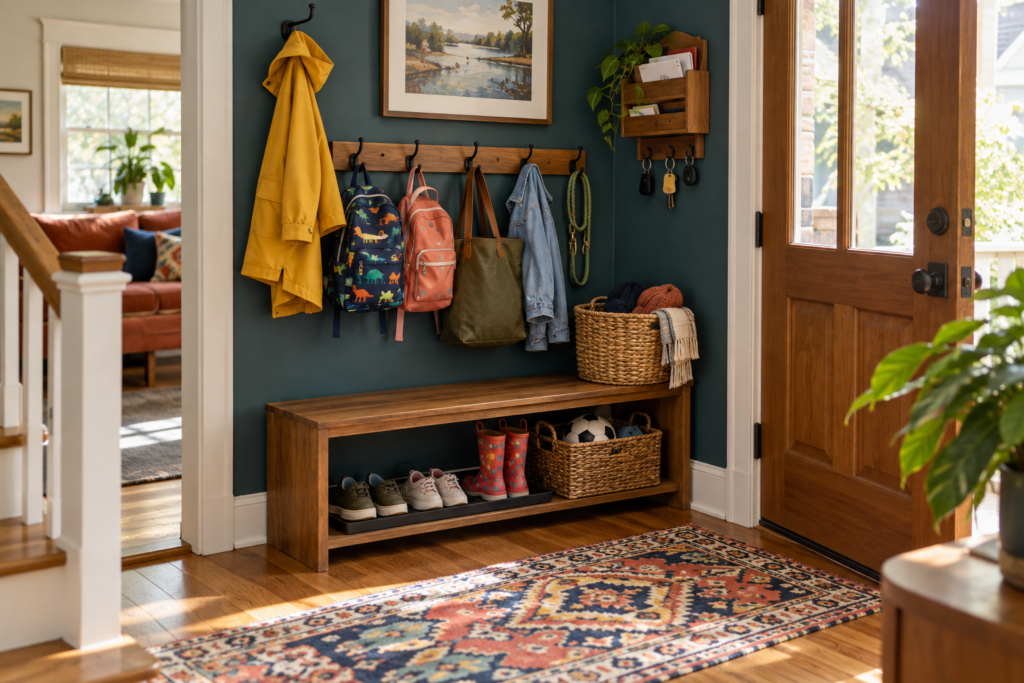
An empty entryway corner can quietly become one of the hardest-working spots in your home. Instead of collecting a migrating pile of shoes, backpacks, mail, and mystery jackets, it can give daily essentials a place to land before they spread across the kitchen counter.

A family drop zone doesn’t need a mudroom, custom cabinetry, or a renovation budget. It simply needs to match the way your household actually comes and goes. A small basket-and-hook setup may be plenty for one home, while another needs a bench, shoe tray, and separate backpack storage to keep weekday mornings from becoming a scavenger hunt.

The goal isn’t to create a picture-perfect entryway that nobody is allowed to touch. It’s to make arriving home and heading out the door a little easier.

Start With What Needs to Land There

Before bringing in bins, hooks, or a handsome hall tree that may or may not become a coat mountain, take stock of what regularly enters your home.

Most family drop zones need to handle a mix of:

  • Shoes and boots
  • Coats, rain jackets, and hats
  • Backpacks, work bags, or tote bags
  • Keys, sunglasses, wallets, and transit cards
  • Sports gear, library books, or school papers
  • Dog-walking supplies
  • Reusable shopping bags
  • Mail that needs attention

Not every item needs permanent storage in the entryway. A drop zone works best when it holds things that are used often and needed near the door. If winter gear is only used a few months each year, for example, keep the everyday basics in the corner and store the off-season overflow elsewhere.

This little edit matters. Buying more containers without deciding what belongs in them just gives clutter assigned seating.

Think about the route your family takes when they walk in. Where do people naturally kick off their shoes? Is there a countertop where keys always land? Does someone head straight to the kitchen with a backpack still on? Your drop zone should work with those habits whenever possible, not ask everyone to take a ceremonial detour through the house.

Protect the Path In and Out

An entryway corner may be empty because it genuinely has room to spare—or because it is part of a necessary walkway. Measure before committing to furniture, especially in a narrow foyer, apartment entry, or hallway that connects to other rooms.

The drop zone should never block the front door, windows, stairs, or a planned way out of the home. The U.S. Fire Administration advises keeping doors and windows clear as part of a home fire escape plan. In practical terms, that means resisting the urge to park a bench, bulky basket, or overflowing shoe rack directly in the path of an exit.

If someone in your household uses a wheelchair, walker, stroller, or other mobility support, leave enough open floor space to move comfortably through the area. A 36-inch clear route is a useful accessibility-informed planning target when wheelchair passage is needed, though it is not a universal requirement for every private home. The right amount of clearance depends on your household and layout.

A few space-saving choices can make a small entry feel much calmer:

  • Use wall hooks instead of a deep coat rack.
  • Choose a narrow bench or slim shoe cabinet rather than a wide cubby unit.
  • Mount a small shelf with a tray for keys rather than adding a console table.
  • Use vertical space for bags and jackets.
  • Keep the floor open by limiting baskets to one or two useful categories.

When the path stays clear, the drop zone feels like support—not one more obstacle to sidestep while carrying groceries.

Build the Drop Zone Around Daily Routines

The best setup is usually made of a few simple zones, not one giant piece of furniture. Consider what your household needs to do when arriving home: hang something, put something down, remove shoes, and find important small items later.

A practical family drop zone often includes four functions.

A place to hang

Hooks are the workhorse here. They are easy for children to reach, useful for guests, and far more likely to get used than hangers tucked inside a closed closet. Give each person one hook if space allows, or designate hooks by category: everyday coats, bags, dog-walking supplies, and “take this with you” items.

If young children use the space, install a lower row of hooks for the things they can manage themselves. Adults can use an upper row for longer coats or less frequently used items.

A place to sit or set things down

A bench is helpful when people regularly put on shoes near the door. It can also make an entry feel more welcoming, even if it is simply a small stool or narrow wood bench.

No room for seating? A sturdy wall shelf, tiny ledge, or tray on a nearby surface can create a landing place for keys and sunglasses. The important part is giving small items an obvious home before they drift into the rest of the house.

A place for shoes

Shoes tend to multiply near the door because, frankly, they are doing their job. The solution is not necessarily to store every pair there. Keep the shoes currently in regular rotation in a low tray, open shelf, basket, or narrow cabinet, then move seasonal or occasional pairs elsewhere.

A shoe tray can be especially useful during wet weather because it helps contain dirt and moisture. If your household has several people, consider a simple limit: one or two pairs per person in the entryway. That keeps the corner functional without turning it into a tiny shoe store.

A place for the small but important stuff

Keys, mail, chargers, sunglasses, permission slips—these items create the most irritating kind of clutter because they are easy to lose and hard to replace in the middle of a rushed morning.

A shallow basket, small wall-mounted organizer, tray, or labeled drawer can help. Keep categories specific enough to be useful. “Mail” may be too broad; “mail to open” and “mail to recycle” create clearer next steps. Likewise, one small tray for keys works better than a decorative bowl that slowly fills with receipts, loose change, batteries, and one inexplicable Lego piece.

Choose a Setup That Fits Your Budget and Space

A functional entryway drop zone can be assembled gradually. Start with the pieces that solve the most annoying problem.

For a low-cost option, try a set of wall hooks, a washable basket, and a shoe tray. This works well in rental homes, small apartments, or homes where the entry is really just a section of hallway. Removable hooks may be useful in some rentals, but check the product instructions, weight limits, and your lease before installing anything.

For a modest upgrade, add a narrow bench with storage underneath or a slim cabinet that keeps shoes out of sight. A small mirror above the setup can make the corner feel more intentional and gives everyone one last chance to notice spinach in their teeth before leaving.

If you have more room, a hall tree or freestanding cubby unit can combine hooks, seating, and shoe storage in one footprint. These pieces are particularly useful for busy households because they make it easier to create individual zones for backpacks, coats, and outdoor gear.

Tall or top-heavy freestanding furniture needs a safety plan, especially around young children. The Consumer Product Safety Commission recommends anchoring furniture according to the manufacturer’s instructions and storing heavier items on lower shelves. Wall hardware should match the wall construction rather than being chosen at random; IKEA’s wall-anchoring guidance notes that suitable fasteners differ for stud-framed and solid walls. If you are unsure what is behind the wall or which hardware to use, ask a knowledgeable professional before proceeding.

Make It Look Intentional Without Making It Precious

An entryway drop zone is easier to maintain when it looks like it belongs in the room. That does not mean every basket needs to match or every backpack must disappear behind cabinet doors.

A few visual choices can make the setup feel calmer:

  • Repeat one material, such as wood, black metal, woven baskets, or white bins.
  • Use washable containers for dirty or damp gear.
  • Pick labels that everyone can understand at a glance.
  • Add a small rug or mat to define the area and catch everyday mess.
  • Include one personal touch, such as a framed photo, small plant, or cheerful print, if it does not take up needed surface space.

Closed storage can make an entry look tidier, but open storage often works better for things that need to be grabbed quickly. A mix is usually the sweet spot: hooks and an open shoe tray for daily items, plus one drawer or basket for visual clutter.

Also, leave a little room for real life. A drop zone filled to the brim on day one has nowhere to absorb a wet umbrella, school project, or bag of groceries waiting to be carried farther into the house.

Give Each Person a Clear Role

Shared entryways become more manageable when everyone can tell where their things belong. This does not require a color-coded command center worthy of air-traffic control.

For younger children, a lower hook and basket with a simple picture label may be enough. Older kids might need a backpack hook, a spot for shoes, and a designated place for sports equipment or library books. Adults benefit from the same clarity, even if nobody says it out loud.

If several people share one compact corner, use names sparingly. Naming every hook can become annoying when routines change. Labels work best for stable categories, such as “returns,” “dog walk,” or “outgoing mail.” For flexible spaces, a row of identical hooks or baskets may be easier to adapt.

The system should also account for visitors and overflow. One spare hook and one empty basket can prevent the whole area from unraveling when someone comes in wearing a bulky coat on a rainy day.

Plan for the Reset, Not Perfection

Even a well-designed family drop zone will get messy. That is normal. It is the part of the home where everyone arrives carrying the evidence of their day.

Build a quick reset into your routine. Once or twice a week, return stray items to their rooms, recycle old papers, clean out the shoe tray, and check whether seasonal gear is taking over. During a busy stretch, simply clearing the floor and returning keys to their tray may be enough.

Pay attention to what keeps ending up outside the system. If backpacks always land beside the bench, the hooks may be too high or too crowded. If shoes spill into the hallway, the storage limit may be unrealistic. If mail still reaches the kitchen counter, the entryway mail spot may need to be closer to the door.

A good organization system can change as your household changes. That is not failure. It is maintenance.

Final Thoughts

An empty entryway corner can support one of the busiest transitions of the day: coming home. A few thoughtfully chosen places for coats, shoes, bags, and small essentials can reduce the daily scramble without demanding a bigger home or a major overhaul.

Start with the trouble spot you notice most often, then let the drop zone grow only as needed. The best version will look less like a showroom and more like a corner that makes ordinary family life run a little smoother.

You Might Also Enjoy

Corner Storage Products for Small Kitchens
House & Home

8 Useful Corner Storage Products for Small Kitchens

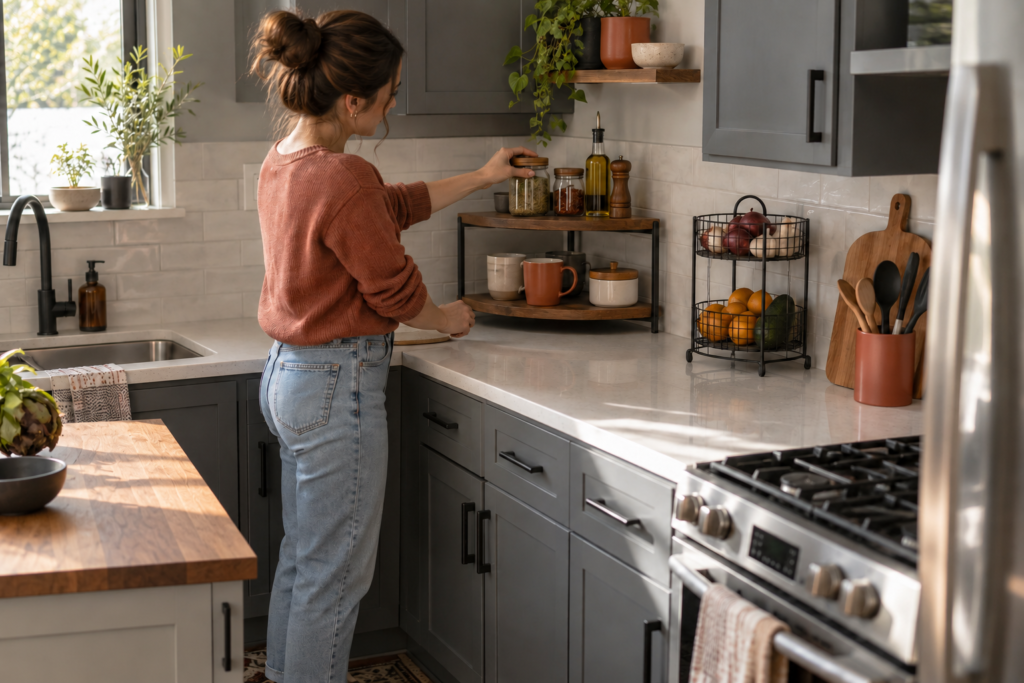
Small kitchens rarely offer enough storage, and corners are often where useful square footage goes to disappear. The right corner storage product can turn that awkward patch beside the sink, pantry, or countertop into a practical home for dry goods, cookware, produce, or everyday cooking tools.

The trick is choosing storage that suits how you actually cook. A compact spice turntable may be far more helpful than a towering shelf if you mostly make weeknight meals, while a freestanding corner rack can earn its keep if your cabinets are already playing a tense game of Tetris.

Making Corner Storage Work in a Small Kitchen

Corner storage products work best when they improve access, not just add more places to pile things. In a small kitchen, every organizer should answer a basic question: Will this make meal prep, cooking, cleanup, or food storage easier?

The eight options below include countertop organizers, cabinet inserts, wall-mounted shelves, and freestanding units. Some are essential problem-solvers for cramped kitchens; others are optional conveniences that make a tight space feel calmer and more usable. Before buying anything, measure the corner itself and check the clearance around cabinet doors, appliances, and drawers.

Affiliate disclosure: This article contains affiliate links. If you make a purchase through one of these links, I may earn a commission at no additional cost to you. As an Amazon Associate, I earn from qualifying purchases.
What to Consider Before Choosing

Start with location. A countertop corner near the stove is useful for oils, salt, pepper, and frequently used spices, but it is not the best place for heat-sensitive pantry foods. A corner near the sink may suit dish soap and cleaning tools better than food storage, especially if splashing is common.

Think about what you need to store. Small jars and bottles need rails or raised edges so they do not slide off. Heavy cookware needs a sturdy floor-standing rack or reinforced cabinet solution. Produce needs airflow, while dry goods stay fresher in sealed containers stored away from moisture and direct sunlight.

Material matters, too. Metal racks are often easy to wipe clean and can suit damp areas if they have a rust-resistant finish. Bamboo and wood look warm and work nicely for dry storage, but spills need to be cleaned promptly. Plastic organizers are lightweight and practical, although thinner versions can flex under heavy jars or cans.

Finally, avoid creating a new clutter zone. A storage product should leave enough room to grab what you need without moving six other things first. If it takes a minor excavation to reach the paprika, the organizer has lost the plot.

8 Corner Storage Products for Small Kitchens

1. Two-Tier Corner Countertop Shelf

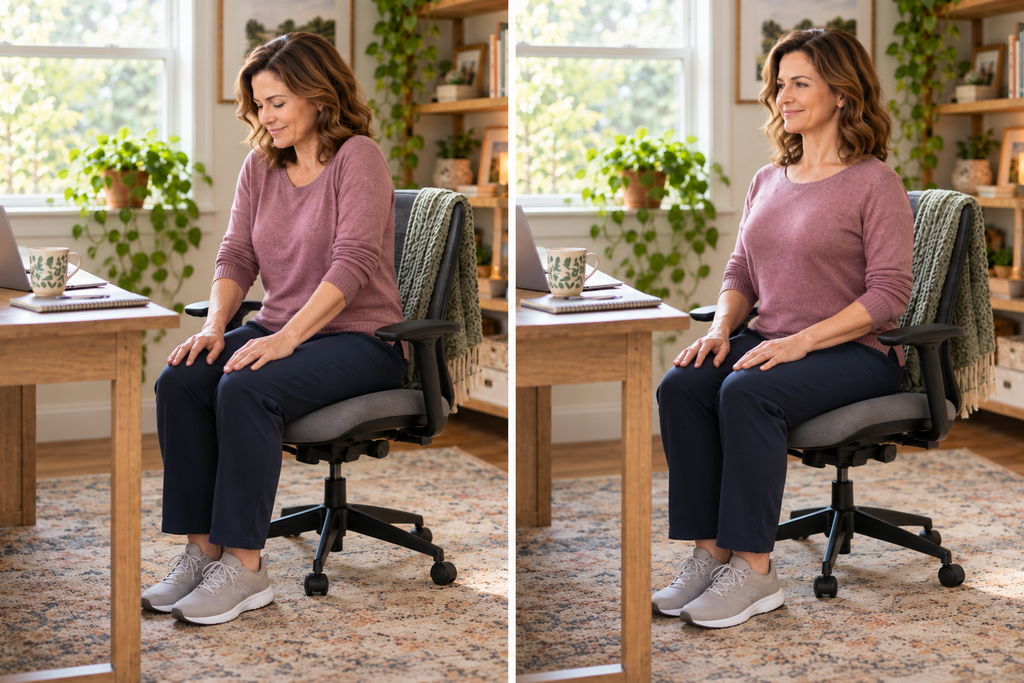
A two-tier corner shelf is one of the simplest ways to use empty counter space without giving up the entire work surface. Its triangular footprint lets it sit neatly against two walls, creating extra vertical storage for mugs, tea, coffee supplies, cooking oils, or small pantry containers.

This is especially useful near a coffee maker or in a baking corner where you regularly reach for vanilla, cinnamon, and measuring spoons. Look for a shelf with a stable base and enough clearance between levels for the items you use most.

The limitation is obvious: it can become visual clutter fast. Reserve it for attractive, frequently used items rather than every stray packet and jar in the kitchen. Wipe it regularly, especially if it holds oil bottles or sticky syrups.

2. Lazy Susan Turntable for Corner Cabinets

A rotating turntable can make a deep corner cabinet much less annoying. Instead of reaching into a dark back corner for vinegar or canned beans, you can spin the tray and bring items forward.

This option works well for shelf-stable foods, condiments, spices, and baking supplies. Versions with a raised rim are particularly useful for jars and bottles because they help prevent items from tipping during rotation. Choose a size that leaves a little space around the cabinet walls; an overly large turntable may catch on the sides or become difficult to spin.

Avoid using a cabinet turntable for foods that require refrigeration. Check pantry items regularly, and move older products to the front so they are used before newer ones.

3. Pull-Out Corner Cabinet Organizer

A pull-out corner organizer is a more involved upgrade, but it can be worthwhile if a blind corner cabinet wastes a lot of storage. These systems typically use trays, baskets, or shelves that extend outward, helping you reach items that would otherwise vanish behind the cabinet frame.

It is a strong choice for pots, pans, mixing bowls, small appliances, or pantry staples in heavier containers. Because installation requirements and dimensions vary widely, this is not always the most renter-friendly option. Measure the cabinet interior, opening width, hinges, plumbing, and nearby drawers before choosing one.

Maintenance is usually straightforward: remove crumbs and wipe the shelves occasionally. Still, do not overload the mechanism. Even a sturdy organizer works better when heavy cookware is distributed rather than stacked in one dramatic cast-iron pile.

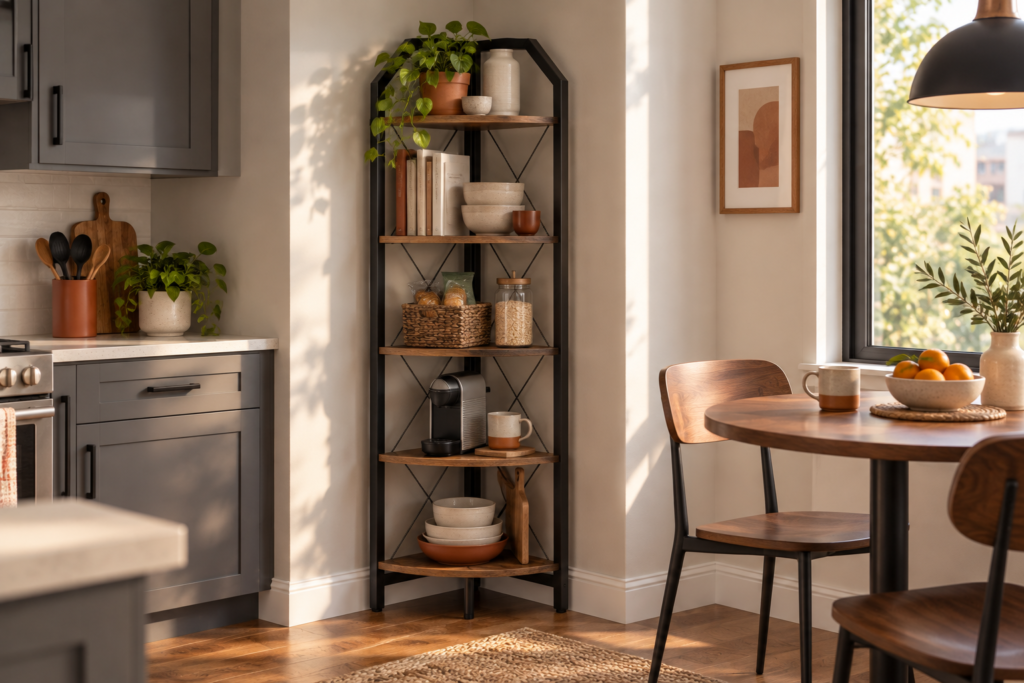
4. Freestanding Corner Kitchen Shelf

A freestanding corner shelf gives you extra storage without drilling into walls or modifying cabinets. It can work in the kitchen itself, beside a pantry door, or in a nearby dining nook used for food storage and serving pieces.

Corner Storage Products for Small Kitchens_shelf

This style is practical for cookware, baskets of snacks, cookbooks, countertop appliances, or sealed dry goods. Open shelving makes it easy to see what you have, which can help prevent duplicate purchases of pasta, rice, or the mysterious third bottle of soy sauce.

The trade-off is that open storage needs more frequent dusting and tidying. It also takes up floor space, so it is best for a genuinely unused corner rather than a narrow path between the refrigerator and sink. Keep heavy items on the lower shelves to improve stability.

5. Wall-Mounted Corner Shelves

Wall-mounted corner shelves are a useful option when counter and floor space are both limited. Installed above a work area, they can hold spices, dry ingredients in small containers, tea tins, mugs, or lightweight kitchen tools.

For renters, they are practical only if the lease permits installation or the removable mounting hardware is suitable for both the wall surface and the intended load. Anything heavier than a few light jars or decorative items needs secure installation. A shelf loaded with glass containers is not a charming kitchen feature if it makes an unexpected descent during dinner.

Use these shelves for items you reach for often but do not need within arm’s reach every minute. Avoid placing open food, unsealed bags, or delicate ingredients directly above the stove, where heat, grease, and steam can make storage and cleanup more difficult.

6. Corner Produce Basket Stand

A tiered corner basket stand can create a dedicated home for onions, potatoes, bananas, citrus, and other produce suited to room-temperature storage and good airflow. It is a practical alternative to leaving produce in grocery bags on the counter, where it becomes easy to forget.

This type of storage works best when you separate produce with different storage needs. Because potatoes and onions have different ideal storage needs, separate baskets are generally more practical. Keep the stand away from direct sunlight, heat sources, and damp areas. Items that need refrigeration, such as berries and leafy greens, still belong in the refrigerator.

Choose baskets that are easy to wipe down or remove for cleaning. Produce can leave behind dirt, loose skins, and the occasional overripe surprise. A little maintenance keeps the stand useful rather than turning it into fruit fly headquarters.

7. Corner Dish-Drying Rack

A corner dish rack makes smart use of space beside the sink, especially in kitchens where a standard rectangular rack consumes most of the counter. Its angled shape can hold plates, cups, utensils, and a few hand-washed prep tools while leaving more room for chopping and serving.

This is an everyday utility product rather than a food-storage solution, but it can make cleanup far easier in a small kitchen. Look for a design that directs water toward the sink or includes a removable tray that can be emptied and cleaned. Standing water under a dish rack is not doing your countertop any favors.

It is best for households that hand-wash dishes often or need extra drying space beyond a dishwasher. If you rarely wash anything by hand, a simple drying mat may take up less room and be easier to store.

8. Stackable Corner Pantry Bins

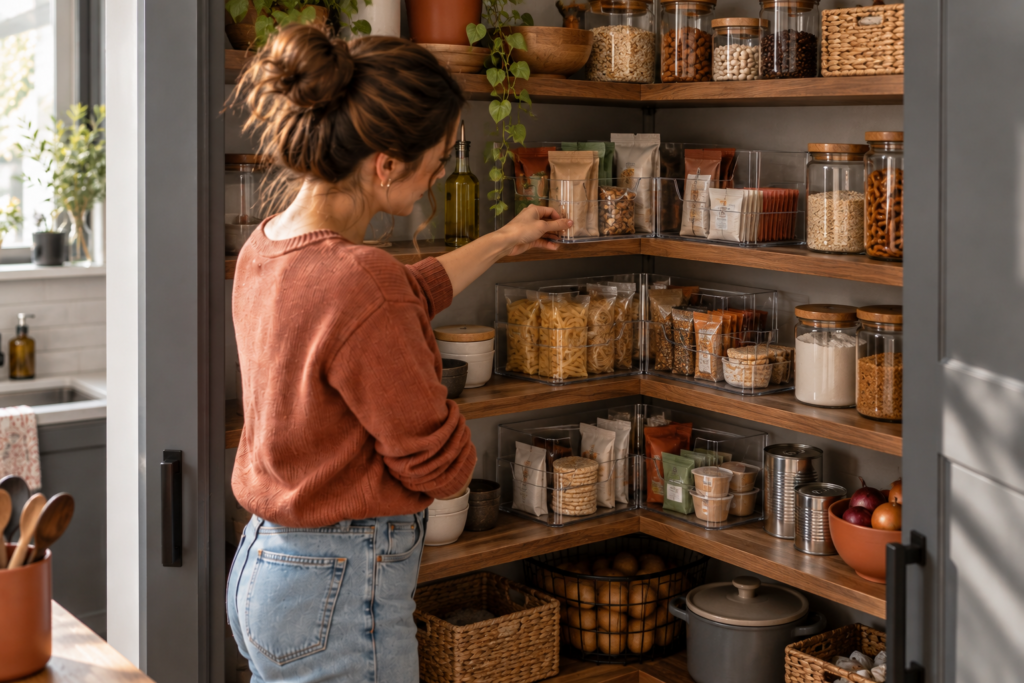
Stackable Corner Pantry Bins are a flexible choice for pantry shelves, deep cabinets, or a small utility closet used for kitchen overflow. Their angled shape helps use the back of a corner shelf while keeping snacks, baking packets, tea, sauces, or lunch supplies grouped together.

Corner Storage Products for Small Kitchens_pantry

Clear bins make it easier to see what is inside, while solid bins create a cleaner look if visual clutter bothers you. Handles are helpful for pulling a bin forward rather than reaching around other items. Use these bins to organize sealed packages, cans, and containers—not as a substitute for airtight containers when food needs protection from moisture or pests.

The bins are generally easy to clean with warm, soapy water followed by thorough drying. They are less useful for very heavy items, and stacking them too high can make the lower bins inconvenient to access.

Small-Kitchen Corner Storage Comparison

ProductBest LocationBest ForMain AdvantageMain Limitation
Two-tier corner shelfCountertopCoffee, spices, oilsAdds vertical storageCan look cluttered
Lazy SusanCorner cabinetJars, cans, condimentsImproves accessNot ideal for heavy cookware
Pull-out organizerBlind corner cabinetPots, pans, pantry goodsUses deep cabinet spaceMay require installation
Freestanding shelfOpen floor cornerAppliances, baskets, cookwareLarge capacityUses floor space
Wall-mounted shelvesEmpty wall cornerLightweight daily itemsSaves counter spaceRequires secure mounting
Produce basket standCounter or pantry cornerRoom-temperature produceImproves airflow and visibilityNeeds regular cleaning
Corner dish rackBeside sinkHand-washed dishesFrees counter spaceNeeds drainage maintenance
Stackable pantry binsPantry or cabinetPackaged foods and snacksFlexible organizationLimited for heavy goods

Best Choice for Different Needs

For Everyday Cooking Supplies

A two-tier countertop shelf or lazy Susan is usually the most useful choice for oils, spices, salt, pepper, and frequently used condiments. Both keep ingredients visible and close to your prep area without requiring a cabinet renovation.

For Deep, Awkward Cabinets

A pull-out corner cabinet organizer offers the biggest improvement when you have a deep blind corner full of hard-to-reach cookware or pantry staples. It requires more planning and installation, but it can make existing storage far more functional.

For Renters and Flexible Setups

Freestanding corner shelves and stackable corner bins are easy to move, rearrange, and take with you later. They are good choices when you do not want to drill into walls, alter cabinetry, or commit to a permanent layout.

For Produce Storage

A corner produce basket stand is a good fit if produce tends to get buried on the counter. It keeps sturdy, room-temperature fruits and vegetables visible, while your refrigerator remains the right place for more perishable produce.

Final Thoughts

The best corner storage product is not necessarily the largest one. In a small kitchen, the most useful option is usually the one that gives you quicker access to ingredients, clears a crowded work surface, or stops food and tools from disappearing into an awkward cabinet void.

Start with the corner that causes the most daily irritation. If it is a cluttered counter, try a compact shelf or dish rack. If it is a deep cabinet, a turntable or pull-out organizer may make a bigger difference. One well-chosen solution can make cooking in a small kitchen feel a little less cramped—and that is no small victory.

Frequently Asked Questions

What should I store in kitchen corner shelves?

Corner shelves are best for lightweight, frequently used items such as spices, mugs, tea, coffee supplies, sealed dry goods, or small serving pieces. Avoid overloading them with heavy cookware or large glass containers unless the shelves are designed and securely installed for that weight.

Are Lazy Susans useful in corner cabinets?

Yes, especially for shelf-stable foods, jars, bottles, and small pantry items. A turntable helps you reach the back of a corner cabinet without removing everything in front first.

Can I store potatoes and onions in the same corner basket?

It is better to store them separately. Both prefer a cool, dark, well-ventilated spot, but keeping them apart can help them last longer.

How do I keep a corner dish rack clean?

Empty standing water regularly, wash the tray and rack with warm, soapy water, and clean the counter underneath. Letting moisture build up can lead to grime and make the area harder to maintain.

Are wall-mounted corner shelves safe for kitchen storage?

They can be safe when installed correctly and used within their weight limits. Reserve them for lighter items, use anchors or mounting methods suited to the wall type, and avoid placing heavy glassware or appliances overhead.

You Might Also Enjoy

Long-Flight Travel Accessories
Travel & Adventure

9 Long-Flight Travel Accessories That Solve Real Problems

Long flights ask a lot of a very small space. The best long-flight travel accessories solve the little problems that become increasingly annoying after several hours: dry cabin air, bright lights, dead batteries, tangled cords, stiff legs, and essentials trapped in the overhead bin.

The best travel accessories that solve long flight problems aren’t necessarily the flashiest ones. They solve the annoying little problems that build up over several hours: dry air, bright cabin lights, dead batteries, tangled cords, stiff legs, and essentials that disappear into the overhead bin at exactly the wrong moment.

Some of these items are practical for nearly anyone, while others are comfort upgrades worth choosing based on your budget, health needs, seating arrangement, and tolerance for being mildly inconvenienced in public.

1. Properly Fitted Compression Socks for Long Periods of Sitting

Long stretches in an airplane seat can leave your legs feeling heavy, stiff, or generally unhappy with the arrangement. Properly fitted, below-the-knee graduated compression socks can be useful for some travelers, particularly those at increased risk of venous thromboembolism (VTE). Travelers without increased VTE risk generally do not need compression socks specifically for blood-clot prevention, although some may still prefer them for comfort. If you are unsure whether they are appropriate for you, ask a healthcare professional.

That said, they’re not a universal travel requirement, and they shouldn’t be treated as a guarantee against blood clots. The CDC notes that the overall risk of a travel-related blood clot is generally small. It also recommends moving your legs frequently and walking around when possible during long-distance travel. Travelers with a history of blood clots or other risk factors should speak with a clinician about appropriate precautions. The CDC’s guidance on blood clot risk and travel is a helpful starting point.

For many people, the basic strategy is refreshingly unglamorous: wear comfortable clothing, flex your ankles occasionally, and get up to walk when it’s safe to do so. Compression socks are not a substitute for movement or personalized medical advice.

2. A Sleep Eye Mask for Unpredictable Cabin Lighting

Evening flights, overnight flights, and flights where the person next to you is watching a very bright action movie at 2 a.m. can make resting difficult. A soft eye mask gives you some control over cabin light without requiring everyone else to follow your sleep schedule.

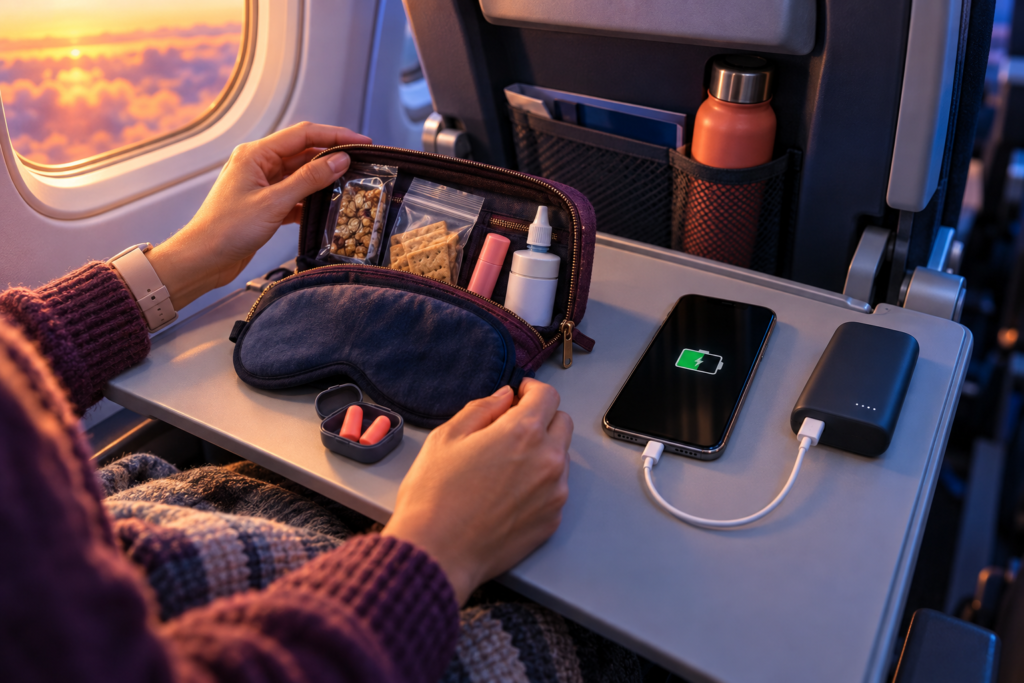
The CDC includes eye masks among the items that may help travelers nap during a flight. They won’t guarantee actual sleep, of course. Airplane rest is often more like “eyes closed while someone opens a bag of pretzels nearby.” Still, blocking overhead lights, window glare, and screen glow can make it easier to settle down.

Look for a lightweight mask with an adjustable strap rather than one that presses hard against your eyes. If you wear eyelash extensions, use a CPAP mask, or simply dislike anything touching your face, this may be a skip-it accessory rather than an essential.

3. Soft Earplugs for Cabin and Neighbor Noise

Airplane cabins have a steady soundtrack: engine noise, announcements, carts rolling down the aisle, crying babies, enthusiastic seatmates, and the occasional mystery rattle. Soft earplugs are one of the smallest and least expensive ways to reduce some of that background noise.

CDC travel guidance lists earplugs alongside eye masks as tools that may help with in-flight naps. They can also be useful if you’re sensitive to noise but don’t want to wear over-ear headphones for hours.

Foam or soft silicone earplugs take up almost no space, making them an easy backup even if you already plan to bring headphones. Just don’t expect total silence. They may, however, make the cabin feel less like you’re trying to rest inside a busy appliance.

4. A Carry-On Power Bank for a Dead Device

A fully charged phone is useful for far more than entertainment. It may hold your boarding pass, hotel address, transit directions, confirmation emails, emergency contacts, and the audiobook you downloaded with such good intentions.

A compact power bank helps when the seat charging port doesn’t work, your seat doesn’t have one, or you’re spending extra time in an airport because travel plans have developed “character.” Keep it in an easy-to-reach pocket along with the correct charging cable for your device.

There’s an important airline safety rule here: power banks and spare lithium batteries must go in your carry-on baggage, not your checked suitcase. The Federal Aviation Administration says most rechargeable lithium-ion batteries up to 100 watt-hours are allowed in carry-on luggage; batteries from 101 to 160 watt-hours generally require airline approval, with a limit of two spare batteries. Check the watt-hour label and your airline’s current rules before you leave, and protect exposed terminals from short circuits. Never fly with a battery or device that is damaged, swollen, smoking, overheating, or subject to a safety recall. Review the FAA’s lithium battery guidance before packing.

This is one accessory where buying the biggest option isn’t automatically best. A smaller, clearly labeled power bank is often easier to pack and simpler to verify against airline rules.

Long-Flight Travel Accessories_tray

5. An Empty Reusable Water Bottle

Cabin air is typically very dry, and the CDC notes that low humidity on flights can contribute to dry eyes and upper-airway dryness. A reusable water bottle gives you a simple way to keep water nearby after you’ve passed through security.

Bring it empty through screening, then fill it after security where a refill station or water fountain is available. Standard U.S. carry-on rules generally limit liquids, gels, aerosols, creams, and pastes to containers of 3.4 ounces, or 100 milliliters, or less, with those containers fitting inside one quart-size liquids bag.

A leakproof bottle with a secure lid is worth the small amount of bag space. You don’t need a giant jug that becomes awkward in a seat pocket. A modest-size bottle is usually easier to refill, carry around the airport, and tuck into your personal item.

If mobility is a concern or getting up during the flight is difficult, having water within reach can be particularly helpful. Flight attendants can provide water when service allows, but keeping your own bottle handy gives you more flexibility.

6. A Small Dry-Air Comfort Kit

A long flight can be rough on lips, hands, and eyes. A simple pouch with travel-size moisturizer, lip balm, and lubricating eye drops can make the cabin’s dry air feel less irritating.

The CDC notes that typical aircraft humidity can be around 10% to 20%, which may contribute to dry mucous membranes and eyes. This doesn’t mean everyone needs a full skincare routine at cruising altitude. It simply means a few familiar comfort items may earn their place in your personal bag.

Stick to TSA-compliant sizes for liquids, creams, and gels unless an item is medically necessary and declared during screening. A solid lip balm is especially easy to pack, while lotion and eye drops should be checked for size before you head to the airport.

If you have persistent eye symptoms, contact-lens concerns, or an existing eye condition, seek personalized guidance from an eye-care professional rather than experimenting mid-flight. For general context on aircraft cabin conditions, see the CDC’s air travel guidance.

7. A Medication Pouch That Stays With You

Essential medication belongs in your personal item or carry-on, not in checked luggage or a suitcase you’ll stow several rows away. A small zip pouch or compact organizer keeps it separate from snacks, cables, and the mysterious collection of receipts that seems to form inside every travel bag.

TSA permits medications in pill, liquid, and other forms, subject to screening. Medically necessary liquids and creams may be allowed in quantities larger than the usual 3.4-ounce limit, but you should declare them during screening.

A simple pouch works best when it holds only what you may need during the journey: regular medication, necessary dosing information, and an appropriate supply in case of delays. Keep labels and original packaging when practical, especially for international travel, where medication rules may differ by destination.

This is an essential-preparation item, not a glamorous travel purchase. But it can save you from the deeply inconvenient experience of realizing your medication is in the overhead bin after the seatbelt sign comes on.

Long-Flight Travel Accessories_sleep

8. A Neck Pillow That Fits Your Sleep Style

Neck pillows are very personal. One traveler swears by a wraparound memory-foam pillow; another finds it feels like wearing a flotation device indoors. There is no universal winner here.

Still, if you tend to nod off and wake up with your head tilted at an alarming angle, a travel pillow may make resting in an upright seat more comfortable. The best shape depends on how you naturally sleep: against a window, straight back, leaning forward, or not at all because you’ve accepted that planes are not bedrooms.

Try it at home before committing it to a trip. Check whether it fits over headphones, works with the headrest, and can attach to your bag without becoming a bulky accessory that catches on every armrest in the terminal.

For travelers with neck pain, limited mobility, or a medical condition affecting posture, a standard travel pillow may not be suitable. Comfort is the goal, not forcing your body into a position it dislikes.

9. A Small Seat-Access Pouch for In-Flight Essentials

This accessory can be as simple as a zip pouch, slim sling bag, or small organizer that fits inside the personal item under the seat in front of you. Its job is to prevent the long-flight version of a scavenger hunt.

Keep your immediate essentials together: passport, phone, charging cable, headphones, eye mask, earplugs, lip balm, medication, and a snack if you’ve packed one. Once you’re seated, you can reach the pouch from your under-seat bag rather than repeatedly opening the overhead bin.

This is especially useful for families, travelers with limited mobility, or anyone seated in a middle or window seat. It can also make boarding less stressful because your larger carry-on can go overhead while the things you’ll actually use stay within reach.

You don’t need to buy a purpose-made travel organizer. A sturdy pouch you already own can do the job perfectly well. The real upgrade is deciding what needs to remain accessible before boarding begins.

Final Thoughts

The most useful long-flight accessories solve problems you can reasonably expect, not problems a glossy travel ad invented. Start with the essentials: accessible medication, water, power, and a way to manage light or noise if those things bother you.

After that, choose comfort upgrades based on your actual travel style. A frequent overnight flyer may love an eye mask and neck pillow, while someone taking a daytime flight may be happier with a charged phone, a water bottle, and less stuff to carry.

You Might Also Enjoy

Damage-Free Organization Products
House & Home

8 Damage-Free Organization Products Renters Can Actually Use

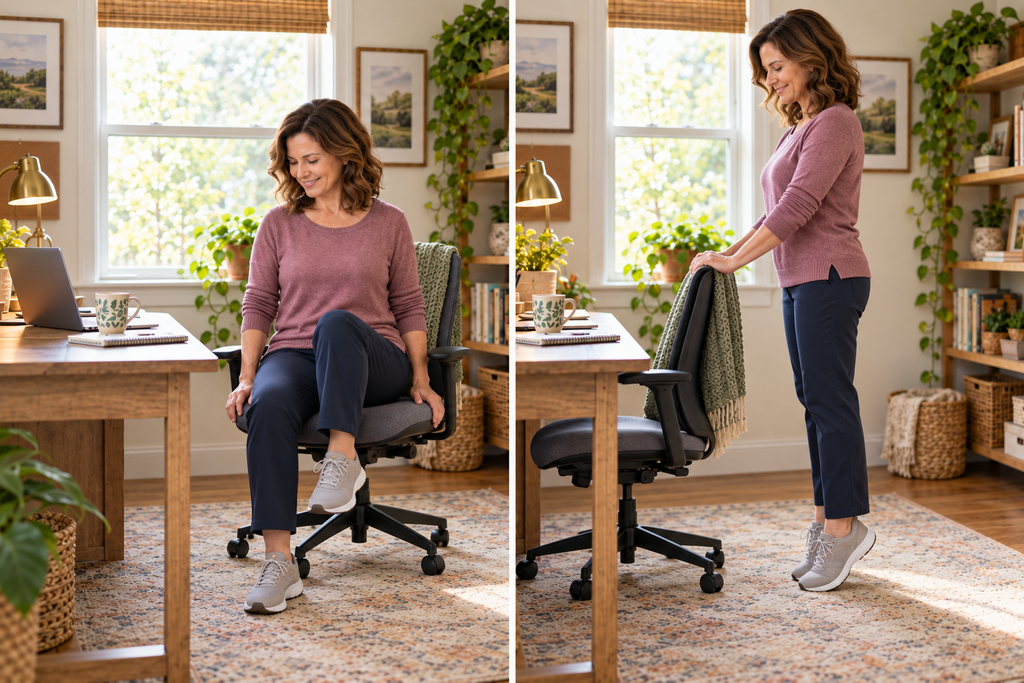
Renters often have the same organization problems as homeowners: too little storage, too many cords, and a bathroom counter that seems to collect every bottle you own. The difference is that you can’t always solve those problems with a drill, a wall-mounted shelf, and a cheerful “we’ll patch it later” attitude.

That’s why damage-free organization products get so much attention. The good ones add storage without making your security deposit feel personally threatened. The less-good ones are basically plastic clutter with adhesive backing. The difference comes down to surface type, weight limits, proper installation, and whether the product solves a problem you actually have.

Here, “damage-free” means no drilling, nails, or permanent mounting when the product is used as directed. No option is risk-free on every rental surface, especially when adhesive is involved.

Here are eight renter-friendly organization products worth considering, along with the real-world limitations that tend to get skipped in those perfectly styled apartment videos.

Affiliate disclosure: This article contains affiliate links. If you make a purchase through one of these links, I may earn a commission at no additional cost to you. As an Amazon Associate, I earn from qualifying purchases.
1. Removable Adhesive Organizing Caddies

A removable adhesive caddy is one of the more useful small-space products because it creates storage where you naturally need it: inside a closet, beside the kitchen sink, on the side of a cabinet, or near the laundry area.

Models such as the Command Large Organizing Caddy are designed for smooth surfaces, including painted walls, finished wood, tile, glass, metal, laminate, and painted concrete. That makes them appealing for holding lightweight cleaning supplies, lint rollers, dish brushes, pantry packets, or the collection of reusable bags that has somehow become a household resident.

The important word here is smooth. Adhesive caddies are not a universal answer for wallpaper, fabric, brick, textured walls, or rough surfaces. The product may not stick properly, and removal may not go as planned.

This option is best if you need a little extra vertical storage but don’t plan to store heavy bottles, bulky tools, or anything that could make a dramatic crash at 2 a.m.

2. Water-Resistant Shower Caddies

Shower storage is a classic rental headache. Built-in shelves are often tiny, shower ledges are never quite where you need them, and suction-cup caddies have a well-earned reputation for eventually giving up.

Water-resistant adhesive shower caddies offer an alternative without requiring screws. The Command Bath Corner Caddy, for example, uses water-resistant adhesive strips and is rated to hold up to 6.5 pounds.

That can be useful for everyday shampoo, conditioner, body wash, and a few lightweight shower items. It is not an invitation to store oversized pump bottles, backup products, or enough bath supplies to open a small pharmacy.

Before buying, consider the shape of your shower and the finish of its walls. A corner caddy makes sense only if you have a suitable corner and a smooth, clean surface for installation. If your bathroom tile is heavily textured, uneven, or interrupted by grout lines where the strips need to sit, a freestanding shower caddy may be less frustrating.

Damage-Free Organization Products

3. Removable Hooks and Cord Clips

Adhesive hooks are hardly new, but they remain among the most practical renter organization products because they solve lots of tiny problems without demanding a major setup.

A few well-placed hooks can hold keys near the door, keep a broom off the floor, corral oven mitts inside a cabinet door, organize lightweight jewelry, or give a tote bag a permanent home instead of leaving it on the dining chair forever. Cord clips can also route charging cables along a desk or nightstand so they don’t disappear behind furniture every other day.

The catch is that “adhesive hook” is not a single product with one universal weight limit. Command’s product weight guide shows that capacities vary across products. Check the exact package rating before hanging anything, especially items that get pulled, bumped, or used frequently.

These products work best for lightweight, everyday objects. They are less suited to heavy backpacks, large framed items, winter coats, or anything you would be genuinely upset to find on the floor.

4. Tension Rods for Awkward Open Spaces

Tension rods may not be the most glamorous organization purchase, but they’re one of those items that can quietly fix a surprisingly specific problem.

In a closet, a tension rod can create room for scarves, lightweight accessories, or a short secondary hanging section. Under a sink, a small tension rod can hold spray bottles by their triggers and free up cabinet space below. In a laundry nook or open storage area, one can also support a lightweight curtain that hides visual clutter without permanently changing the room.

Their appeal is simple: no drilling, no wall anchors, and no repair project when you move out.

Still, a tension rod relies on pressure, so it needs stable opposing surfaces and a sensible load. This is not the product for heavy garments, dense storage bins, or a heavy curtain in a high-traffic doorway. Measure carefully before ordering, too. “Close enough” is rarely close enough when spring tension is involved.

Damage-Free Organization Products

5. Over-the-Door Organizers

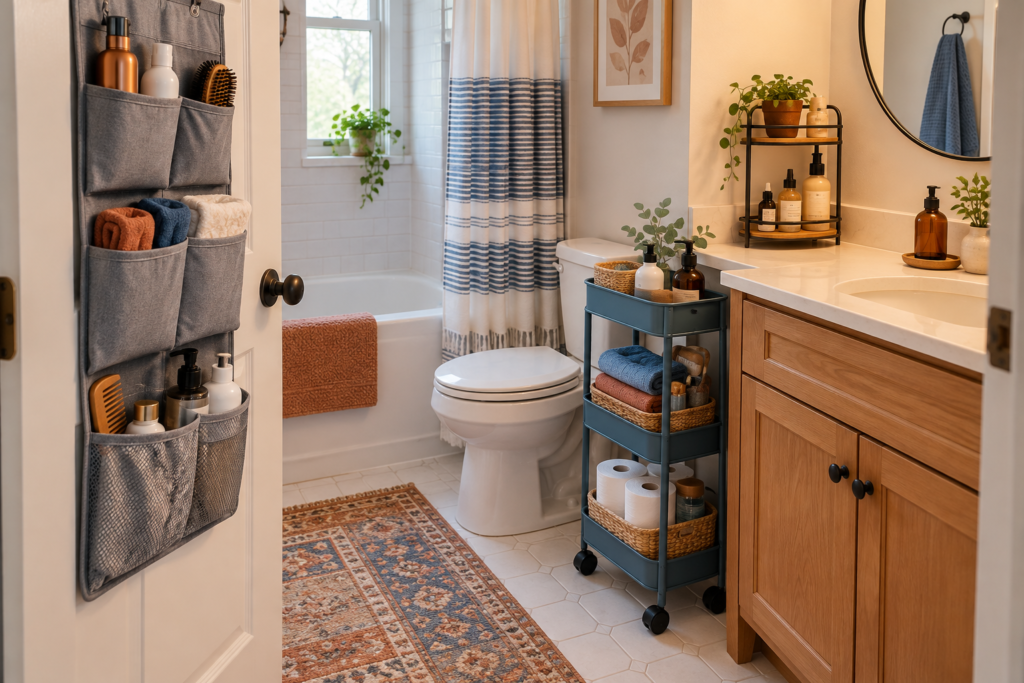
Over-the-door organizers are popular for a reason: doors are vertical space that usually isn’t doing much. A hanging organizer can turn the back of a bedroom, pantry, bathroom, or hall closet door into storage for shoes, cleaning supplies, hair tools, accessories, snacks, or folded linens.

For renters, the biggest benefit is that most versions don’t need permanent installation. You can take the organizer down when you move, use it in another room, or retire it without having to explain screw holes to a landlord.

That said, not every door works well. Thick doors, unusually narrow gaps, or doors that already close tightly can make over-the-door hooks annoying—or keep the door from closing properly. Some organizers can also swing or rattle when loaded, which is not ideal in a small apartment where every sound has the potential to become a household event.

Look for one that fits the items you actually need to store. Deep pockets are useful for cleaning bottles; narrow compartments are better for shoes or accessories. Buying a giant organizer for five small items is an easy way to create a new clutter zone.

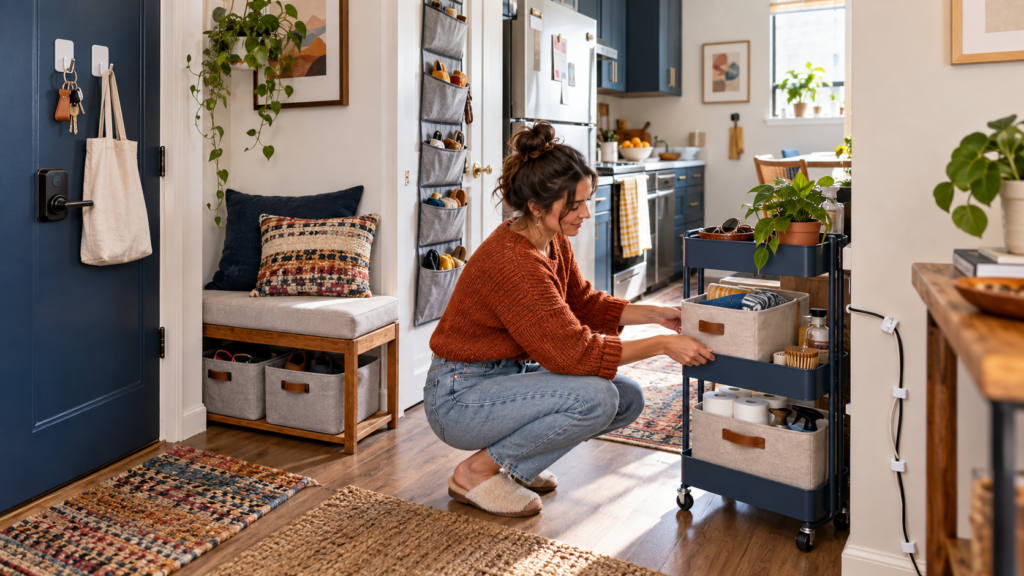
6. Slim Rolling Carts

A narrow rolling cart is one of the few trendy organization products that can earn its keep in several rooms. It can work as a bathroom supply station, pantry overflow cart, bedside catchall, craft cart, or home for frequently used kitchen tools.

The appeal is flexibility. Rather than committing storage to one wall or cabinet, you can move the cart where it helps most. That matters in rentals with limited closets, awkward layouts, or kitchens that seem to have been designed before anyone owned a reusable water bottle.

A rolling cart is especially useful when your storage needs change. It can hold extra toiletries one month, then become a coffee station, plant-supply cart, or work-from-home storage spot later.

The trade-off is visual. Open carts can look tidy in photos and chaotic in real life if every shelf becomes a landing zone for random objects. Choose one with enough clearance to roll easily, and consider baskets or bins if you need to contain smaller items. If the cart will sit in a narrow walkway, measure first. Your shins will thank you.

7. Under-Bed Storage Bins

Under-bed storage is not flashy, which may be exactly why it’s useful. It takes advantage of space that otherwise collects dust, rogue socks, and one mystery object you swear you’ve never seen before.

Low-profile bins or zippered storage bags can be practical for seasonal clothing, extra bedding, shoes, gift wrap, or items you want nearby but not visible. Since these products sit on the floor rather than attach to your rental, they’re among the lowest-risk options for adding storage without changing the space itself.

The biggest limitation is access. Under-bed storage is great for items you don’t need every day; it’s less helpful for things you reach for constantly. It can also become a “deal with this later” zone if you fill it without sorting.

For better long-term usefulness, choose containers that fit the clearance beneath your bed and make it easy to tell what’s inside. A clear lid, label, or simple category system can prevent the dreaded full-floor unpacking session later.

8. Freestanding Shelving Units

Freestanding shelves are not as instantly satisfying as a wall of mounted shelves, but they can be a smarter renter choice when you need meaningful storage. A slim bookcase, small cube shelf, or utility rack can hold pantry staples, folded towels, books, baskets, plants, or office supplies without relying on adhesive strips.

This category is especially useful if your rental lacks built-in storage. A basic shelving unit can turn an empty wall, closet corner, or entryway into a functional zone without asking removable adhesive to do work it was never meant to do.

The downside is that freestanding furniture takes up floor space, and not every small apartment has much to spare. It may also need to be disassembled when you move, which is less fun than it sounds. Still, if you need substantial capacity rather than a place to hang one small item, shelving often provides better value than several smaller organizers.

Choose a size that suits the room’s traffic flow, follow the manufacturer’s assembly and stability instructions, and check whether a tall unit requires anchoring. If anchoring is recommended, ask your landlord what is permitted rather than ignoring the guidance. More storage is only helpful if the unit is stable and you can still walk through the room.

What Makes an Organization Product Truly Renter-Friendly?

The most useful damage-free organization products tend to meet a few simple standards: they don’t require drilling or permanent mounting, they fit your actual surfaces and space, and they can handle the items you plan to store.

Adhesive products deserve the most caution. Even products designed for clean removal should be installed and removed exactly as directed. Surface type, weight, preparation, placement, and removal method all matter. Command’s FAQs note that its adhesive products are not suitable for every surface and provide specific instructions for application and removal. It’s worth reading those directions before placing anything on a painted wall you’d rather not repaint later.

The lasting winners are usually the boringly helpful products: the ones that reduce clutter in a specific spot, don’t create a new problem, and can move with you when your lease ends.

Final Thoughts

The best renter organization products aren’t necessarily the ones with the most dramatic before-and-after videos. They’re the ones that make a cramped bathroom, busy closet, or cluttered kitchen easier to live with—without requiring permanent changes.

Start with the problem that irritates you most often, whether it’s shower bottles, tangled cords, or nowhere to put cleaning supplies. One well-chosen solution can do more for your space than a cart full of trendy organizers ever will.

You Might Also Enjoy

baking projects for preschoolers
Everyday Living

Simple Baking Projects That Let Preschoolers Practice Pouring, Stirring, and Decorating

Baking with a preschooler is rarely a tidy, silent activity. There may be flour on the counter, one sprinkle in a sock, and a very serious debate over whether three blueberries count as “a lot.” But simple baking projects can give your child a real role in the kitchen without turning the afternoon into a complicated production.

The best baking projects for preschoolers keep the child-friendly jobs clear: pouring premeasured ingredients, stirring in a sturdy bowl, placing paper liners, spooning batter with help, and decorating treats after they’ve fully cooled. Adults handle the oven, hot pans, sharp tools, electric mixers, and anything involving hot sugar or glaze.

Along the way, baking creates natural moments to talk about measuring, counting, new words, and what happens when ingredients go into the oven. The goal isn’t a picture-perfect batch of cupcakes. It’s a shared kitchen activity with a snack at the end, which is honestly a pretty good deal.

Set Up the Kitchen for Fewer Spills and More Helpful Hands

A little setup makes preschool baking calmer for everyone involved. It also helps your child focus on one task at a time instead of trying to reach over a bowl, a bag of flour, and the family dog, who has suddenly developed a deep interest in pastry.

A child-height table is often the simplest workspace. If your child will stand at the counter, use a wide, secure learning tower or non-slip stool designed for children, with an adult remaining beside them. Place a damp kitchen towel or non-slip mat beneath a wide mixing bowl so it is less likely to slide while your child stirs. A larger bowl is usually more useful than a cute child-size one; it gives ingredients room to stay inside when the stirring gets enthusiastic.

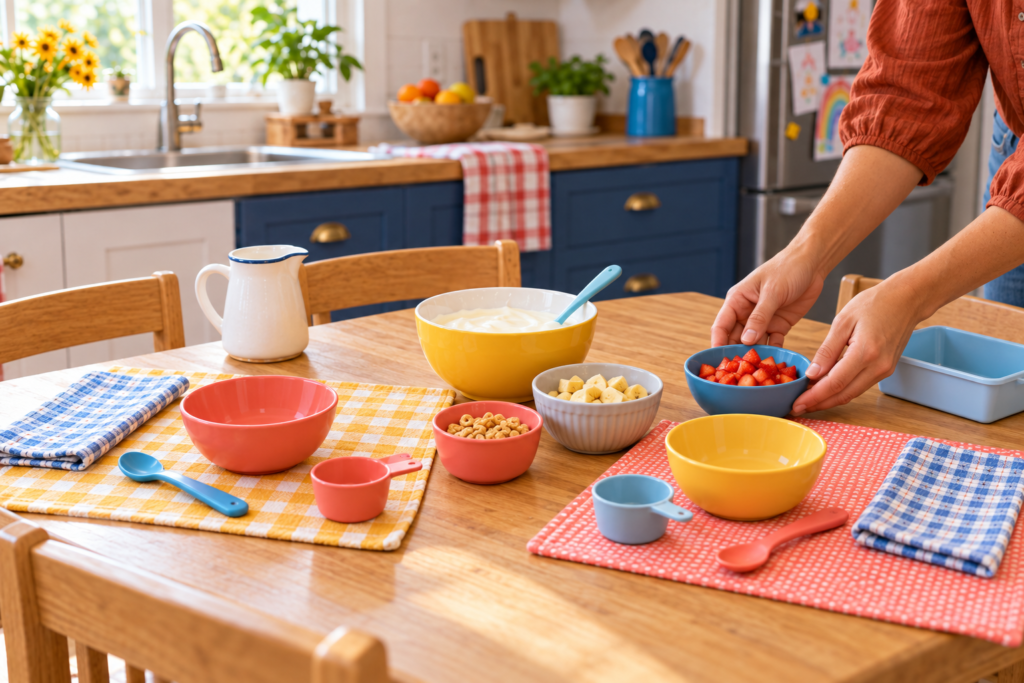
Before calling your helper into the kitchen, measure ingredients into small cups or bowls. This lets them enjoy the satisfying pour without needing to manage a heavy flour canister or a full carton of milk. Small prep bowls, measuring cups with handles, a silicone spatula, and a large spoon are the essentials. A child-size apron, silicone baking mat, or squeeze bottle for frosting can be handy, but they are optional conveniences—not requirements for a happy baking day.

Keep the project short enough to suit the moment. One bowl, one pan, and one decorating step is plenty. A boxed mix can be a perfectly practical choice, especially if the point is participation rather than making every ingredient from scratch.

Before beginning, build in a simple routine: wash hands with soap and water for at least 20 seconds. Wash them again after handling raw eggs, and clean utensils and surfaces that touched raw egg before using them for anything else. The USDA’s food-safety guidance on cleanliness in the kitchen is worth keeping in mind, particularly when little hands are involved.

Banana Muffins Make Pouring and Stirring Feel Manageable

Banana muffins are a friendly first project because many recipes come together in one bowl and bake in individual portions. They also don’t need frosting to feel finished, which means less cleanup when you’re short on time.

baking projects for preschoolers

An adult can mash ripe bananas ahead of time, measure the ingredients, and prepare the muffin tin. Your preschooler can then help with several low-risk steps:

  • Pour premeasured dry ingredients into the bowl
  • Add mashed banana and other measured ingredients
  • Stir with a large spoon or silicone spatula
  • Place paper liners into the muffin pan
  • Sprinkle a small amount of oats, cinnamon sugar, or finely chopped soft fruit on top, if the recipe allows

Give your child a simple instruction such as, “Stir until the white flour mostly disappears.” There is no need to demand perfectly smooth batter. In fact, stopping before the batter is overmixed is often a better outcome than turning stirring into a 10-minute upper-body workout.

The adult should fill the muffin cups or closely guide the spooning if you want your child to participate. Once the pan is ready, the adult should carry it to the oven and handle it while it’s hot. Let the baked muffins cool before serving or storing.

Place cooled muffins in an airtight container. If they won’t be eaten within a couple of days, freezing some can prevent the familiar “Why did we make 12?” situation. Separate layers with parchment or wax paper to avoid a sticky pileup.

No-Fuss Cookies Give Kids a Clear Decorating Job

Cookies can be especially satisfying for preschoolers because the transformation is easy to see: dough goes in, cookies come out, decorations happen. For a low-stress version, use a simple drop-cookie recipe, refrigerated dough, or a mix that does not require complicated shaping.

Preschoolers can pour measured ingredients into the bowl and help stir with a sturdy spoon. Once the raw dough is ready, the adult can portion it onto the lined baking sheet. Save the child’s biggest job for after the cookies have baked and cooled: decorating. Wash hands after handling the raw dough, and remind your child that tasting waits until the cookies are baked.

The baking stage belongs entirely to the adult. Keep children away from the open oven, hot baking sheets, and dangling appliance cords. The American Academy of Pediatrics recommends assigning kitchen tasks based on a child’s abilities and keeping young children supervised around kitchen hazards. Its guidance on cooking with children is a useful reminder that helping does not need to include every step.

Once the cookies are fully cooled, decorating becomes the main event. Offer two or three choices rather than a full bakery-counter spread. For example, set out a small bowl of frosting, a few spoonfuls of sprinkles, and finely crushed freeze-dried fruit or cereal. A butter knife with a rounded edge can work for spreading soft frosting when an adult is nearby, though a small spoon or silicone spatula may be easier for many children.

Skip hard, round, gummy, or chewy candy decorations for younger preschoolers. The CDC identifies foods such as hard candy, jelly beans, gumdrops, caramels, and gummy candies as potential choking hazards for young children. Soft frosting, finely crushed toppings, and sprinkles used lightly are better options. You can review the CDC’s choking-hazard guidance when planning toppings.

Cupcake Decorating Lets Preschoolers Be the Finishing Crew

Cupcakes offer the most obvious decorating payoff, but they work best when you separate baking day from decorating day—or at least take a generous cooling break between the two. Hot cupcakes and frosting are a slippery, melty mess, and nobody needs that kind of drama before lunch.

baking projects for preschoolers

Bake the cupcakes yourself or let your child help with the low-risk mixing and pouring steps, then handle the oven and hot pan yourself. Allow the cupcakes to cool completely before decorating. You can store unfrosted cupcakes in an airtight container if you plan to decorate them later. This approach can make the activity more realistic for a busy afternoon: the baking happens earlier, while the decorating happens when your child is ready to help.

For preschool-friendly decorating, keep it simple:

  • Spread frosting with a small spoon or blunt spatula
  • Add sprinkles by pinching them between fingers
  • Press small pieces of soft fruit onto the frosting
  • Use a squeeze bottle of frosting with adult help
  • Arrange a few mini chocolate chips or finely crushed cookie crumbs on top

A piping bag can be fun, but it is not essential. It also tends to create impressive frosting piles in one spot, which is charming once and less charming on the fourth cupcake. A spoon works just fine.

If you use store-bought frosting, mixes, or toppings, check the label each time you buy them. The FDA notes that the full ingredient list matters for identifying major allergens because a separate “Contains” statement is not required on every package. For a child with a diagnosed food allergy, follow the family’s established medical or allergy plan rather than improvising substitutions. The FDA’s food-allergy label guidance can help you know what to look for.

Fruit Crisp Is a Good Choice for Gentle Mixing and Topping

A fruit crisp is less about precise decorating and more about pouring, stirring, and scattering. It is a nice option when you want a warm baked dessert without frosting, piping bags, or a countertop that looks like a sprinkle factory afterward.

The adult can wash and cut the fruit, since knives are not a preschool task. Apples, berries, peaches, or another fruit suitable for your recipe can work. Your child can help pour the prepared fruit into a baking dish and stir together an oat topping in a bowl.

The topping is often where preschoolers can have the most fun. Premeasure oats, flour, sugar, and spices into separate small containers, then let your child pour them in. If the recipe uses softened butter, an adult can add the softened butter, then the child can use a sturdy fork or pastry blender with close supervision. Because the topping contains raw flour, keep little hands out of the mixture and wash hands and surfaces after preparation.

Your preschooler can scatter the crumble topping over the fruit while you make sure the dish goes into and comes out of the oven. Let the crisp cool before serving; fruit fillings hold heat longer than they look like they should. It is one of those kitchen facts that feels mildly rude but is useful to remember.

Store leftover crisp in a covered container in the refrigerator. Reheat only the portion you plan to serve, then let it cool to a comfortable eating temperature before offering it to your child.

Keep Raw Batter Off the Menu

It can be tempting to treat batter tasting as the traditional reward for helping bake. For preschoolers, it is better to make the finished treat the reward instead.

Raw flour is not typically treated to kill germs, and raw batter can also contain uncooked eggs. FoodSafety.gov advises against eating raw dough or batter, and children under 5 are among the groups at higher risk from foodborne illness. A cheerful “We taste after it’s baked” rule keeps the message simple and consistent.

If your child wants a kitchen job while waiting for the oven timer, try one of these instead: wipe the table with a damp cloth, count cupcake liners, choose a serving plate, or help put unopened ingredients away. They still get to be part of the process without hovering near a hot oven door.

Final Thoughts

The most successful baking projects with preschoolers are usually the ones that leave room for small imperfections. A lopsided muffin, uneven frosting, or extremely sprinkle-heavy cookie still counts as a finished project—and often becomes the one your child is most proud to serve.

Keep the tasks appropriate for your child’s abilities, supervise closely, and handle the heat, sharp tools, appliances, and hot pans yourself. Choose recipes with a few clear jobs your child can genuinely do. That is enough for a sweet, useful afternoon in the kitchen.

You Might Also Enjoy

Preschool Snack-Making Activity
Everyday Living

How to Set Up a Preschool Snack-Making Activity With Simple Kitchen Tools

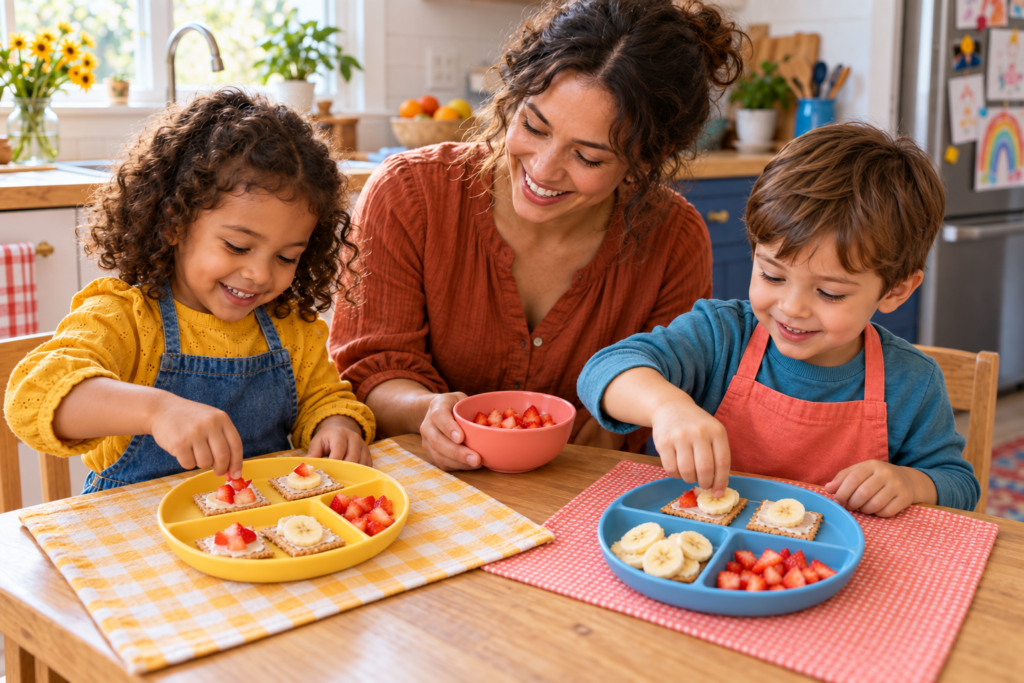
A preschool snack-making activity gives young children a real role in the kitchen without turning your counter into a tiny cooking competition. With a few simple tools and no-cook ingredients, you can create a hands-on routine where children scoop, pour, stir, count, and assemble a snack they’re excited to eat.

The key is keeping the setup small, safe, and manageable. This guide is for parents, caregivers, and early-childhood educators planning an adult-supervised activity with ready-to-eat foods. It is not the time to introduce heat, raw animal foods, or complicated recipes. Think simple bowls, small portions, and plenty of nearby grown-up help.

Quick Overview

A preschool snack-making activity is a simple way to involve children in food preparation while practicing everyday skills. They can help measure yogurt, add soft fruit, stir ingredients, choose toppings, and carry their finished snack to the table.

The best activities use three or four familiar components rather than a sprawling ingredient bar that looks charming for five minutes and then becomes a cereal-and-berry crime scene. Choose foods that are ready to eat, easy to portion, and appropriate for the children participating. A yogurt-and-fruit cup, soft fruit mix, or cracker-and-spread plate can work well when prepared with food safety and choking prevention in mind.

What You’ll Need

Keep the tool list basic. Most kitchens already have what you need.

  • Clean bowls, one per child or small group
  • Child-size spoons for scooping and stirring
  • Small cups or a small pitcher for pouring
  • Measuring cups or measuring spoons
  • A clean cutting board for adult prep
  • Napkins or washable placemats
  • Ready-to-eat snack ingredients
  • A refrigerator for perishable ingredients
  • Soap, warm water, and clean towels for handwashing and cleanup
  • Ingredient labels or allergy information, especially for group settings

An optional plastic or nylon knife may be used to cut very soft foods, such as banana or ripe avocado, with direct adult supervision. These tools are not universally safe simply because they are marketed for children, so consider the child’s age, coordination, and the food being cut. An adult should handle firmer produce, round foods, package opening, and all sharp knife work.

Before You Begin

Start by choosing one snack with a short ingredient list. For example, you might set out plain or flavored yogurt, soft cut fruit, and a cereal topping. Another easy option is a fruit cup with banana slices, appropriately prepared berries, and a spoonful of yogurt. The goal is not to create a restaurant-style parfait. It is to give preschoolers clear, achievable jobs.

Check allergies and dietary needs before buying or setting out ingredients. If you are working with a group, confirm each child’s food plan in advance, read package labels every time you purchase an ingredient, and prevent food sharing. The CDC notes that hand sanitizer does not effectively remove food allergens, so wash hands and food-contact surfaces with soap and water. For a child with a known allergy, follow that child’s written care or emergency plan and the instructions provided by the family and program staff.

Wash hands with warm, soapy water for at least 20 seconds before preparing food and eating. Clean bowls, utensils, cups, and cutting boards before use. Fresh produce should be rinsed under cold running water, not washed with soap or detergent. The USDA also recommends washing cutting boards with hot, soapy water after use.

Plan the snack around choking prevention, too. Children should sit while they eat and remain supervised. Modify foods that can be difficult for young children to chew safely. Cut grapes and cherry tomatoes lengthwise into quarters, then cut them into smaller pieces as needed for the child’s age and chewing ability. Leave nuts, popcorn, hard or sticky candy, raw carrot sticks, apple chunks, chunks of cheese or meat, and spoonfuls of nut butter out of this activity. The American Academy of Pediatrics advises preparing food for young children in pieces no larger than one-half inch.

How to Set Up a Preschool Snack-Making Activity

Step 1: Choose one simple, no-cook snack

Pick a snack with three or four components at most. A good beginner format is a base, a fruit or vegetable, and one optional topping.

For instance, a yogurt snack cup could include yogurt, soft fruit, and a small amount of cereal. A fruit-and-cracker plate could include soft fruit pieces, crackers, and a thin layer of an allergy-appropriate spread applied by an adult..

Avoid recipes that require cooking, blending, baking, raw eggs, raw meat, or complicated assembly. Preschoolers get more from a short activity they can understand than from a recipe with 12 steps and a waiting period longer than their attention span.

Preschool Snack-Making Activity

Step 2: Prepare ingredients before children arrive

Do the higher-risk work first. Wash produce under cold running water, dry it if needed, and cut it into age-appropriate pieces. Open packages, portion ingredients into small containers, and return cold items to the refrigerator until you are ready to begin.

If grapes or cherry tomatoes are on the menu, cut them lengthwise into small pieces rather than serving them whole. Skip ingredients that are hard, round, sticky, or otherwise difficult for young children to manage safely. This is also the time to remove pits, peels, stems, tough skins, and packaging fragments.

Keeping prep separate from the child activity helps you stay focused once snack-making begins. No one needs to be hunting for a clean spoon while a preschooler enthusiastically attempts to pour an entire carton of yogurt into one bowl.

Step 3: Set up a small, clean workstation

Choose a table, island, or counter where children can stand or sit comfortably with close adult supervision. An unoccupied kitchen is not a safe place for young children, so stay present throughout the activity and keep sharp tools, hot appliances, and cleaning products out of reach.

Give each child or small group a bowl, spoon, napkin, and access to only the ingredients they need. A small pitcher or cup makes pouring more manageable than a full-size container. Measuring cups are useful not because the snack demands precision, but because they naturally encourage counting, comparing, and taking turns.

For groups, create separate workstations for a few children each rather than using one large shared table. Fewer hands reaching across the ingredients makes the activity calmer, cleaner, and easier to supervise.

Preschool Snack-Making Activity

Step 4: Wash hands and explain the snack jobs

Before touching food, guide children through handwashing with warm water and soap. Make it part of the routine rather than an interruption. Once their hands are clean, briefly explain what everyone will do: scoop, pour, stir, choose, and eat while seated.

Keep instructions concrete. Instead of saying, “Use a reasonable amount,” show children which spoon or cup to use and where the ingredient goes. You might say, “One scoop of yogurt goes in your bowl,” or, “Choose three pieces of banana.” Preschoolers respond well when a task has a clear beginning and end.

This is also a good time to explain that ingredients stay in their designated containers and that everyone eats their own snack. Those boundaries matter even more when allergies or dietary restrictions are involved.

Step 5: Let children complete age-appropriate tasks

Offer jobs that build independence without creating unnecessary risk. Preschoolers can often scoop soft ingredients, pour a small amount from a child-size cup, stir, count pieces, and choose between two safe toppings. With support, they may also serve themselves from a small pitcher or bowl.

Stay close enough to guide movement and prevent overpouring, but allow children to do as much as they reasonably can. A slightly uneven scoop is not a problem. Neither is a banana slice that lands beside the bowl. The point is participation, not snack perfection.

If you use an optional plastic or nylon knife, reserve it for soft food and supervise directly. A child might gently cut a banana segment or a piece of ripe avocado, but an adult should take over if the food slides, requires force, or causes frustration.

Step 6: Serve and eat the snack seated

Once the snack is assembled, move children to a table or eating area. They should sit while eating, with an adult present throughout the meal. Keep the pace relaxed; preschoolers may be proud of what they made and want to point out every single blueberry. Fair enough.

Encourage children to use a spoon or their fingers as appropriate for the food. Avoid rushing them or making tasting a requirement. The activity can still be successful if a child only handles, smells, or takes a tiny taste of a new ingredient.

Step 7: Clean up and store leftovers safely

Clear food from the workspace as soon as the activity is over. Wash bowls, utensils, cups, and cutting boards with hot, soapy water. Clean the table or counter, and help children wash their hands again if needed.

Refrigerate perishable leftovers promptly. FoodSafety.gov advises refrigerating perishable foods within two hours at room temperature, or within one hour when temperatures are above 90°F. Do not save food from individual bowls that children have already eaten from; saliva and warm room temperatures are not a great leftover strategy.

Helpful Tips

  • Keep ingredient choices limited. Two or three options feel empowering without becoming overwhelming.
  • Use clear bowls or small containers so children can see what they are choosing.
  • Portion toppings in advance. A small cup of cereal or fruit is easier to manage than a family-size package.
  • Put cold ingredients out last, especially yogurt, cheese, or cut fruit.
  • Choose washable placemats or a tray if you want a defined work area and easier cleanup.
  • Let children help clean up by carrying napkins to the trash, placing spoons in a dish bin, or wiping a small section of the table with guidance.
  • Use the activity to practice simple words and concepts: full, empty, more, less, one, two, stir, and scoop.
  • If you are in a child-care setting, check your facility’s food-service, licensing, and allergy procedures before planning the activity. Local requirements may add rules beyond general guidance.

Common Mistakes to Avoid

  • Choosing too many ingredients: A large topping bar can lead to confusion, waste, and too much waiting. Stick with a simple snack formula.
  • Using foods with choking risks without modifying them: Do not serve whole grapes, whole cherry tomatoes, nuts, popcorn, or hard chunks of raw produce to preschoolers.
  • Setting out large containers: Full yogurt tubs, juice bottles, and cereal boxes are difficult for small hands to control. Transfer small amounts to child-manageable containers.
  • Treating hand sanitizer as a substitute for handwashing: Soap and water are especially important when food allergens may be involved.
  • Leaving children to work independently in the kitchen: Preschool snack preparation should always be directly supervised by an adult.
  • Making cutting the main event: Most children can have a satisfying role through scooping, stirring, pouring, and assembling. Knife work is optional, not essential.
  • Saving food that has already been served or eaten from: Keep untouched ingredients separate and refrigerate them promptly. Discard individual leftovers that children have eaten from.

Final Thoughts

The best preschool snack-making activity is usually the simplest one: a few safe ingredients, a clean workspace, and jobs children can genuinely do. When the setup matches their abilities, children get the satisfying experience of helping without introducing unnecessary kitchen hazards.

Keep supervision close, make safety decisions before the food comes out, and let a little mess be part of the learning. A crooked spoonful of yogurt still counts as snack-time magic when a preschooler made it themselves.

Frequently Asked Questions

Can preschoolers use real kitchen tools?

Preschoolers can use simple tools such as spoons, small cups, measuring cups, and bowls with direct adult supervision. Sharp knives, hot appliances, blenders, and other higher-risk equipment should remain adult-only.

What is an easy first snack-making activity for preschoolers?

A yogurt-and-soft-fruit cup is a practical first option. Children can scoop yogurt, add pre-cut soft fruit, stir, and choose a small topping while an adult handles washing, cutting, and refrigeration.

How do I make snack-making safer for a group of children?

Collect allergy information in advance, read ingredient labels, prevent food sharing, use clean equipment, and set up small, supervised workstations. Follow any child-care or school food-service rules that apply to your setting.

Can I prepare ingredients ahead of time?

Yes. Adults can wash and cut produce, portion ingredients, and set out tools before the activity begins. Keep perishable foods refrigerated until the activity starts, and return untouched leftovers to the refrigerator promptly.

You Might Also Enjoy

Walking Workouts vs. Beginner Yoga
Everyday Living

Walking Workouts vs. Beginner Yoga: Which Gentle Exercise Fits Your Routine?

Walking workouts and beginner yoga are both approachable ways to add more movement to your week without signing up for a boot camp or buying a closetful of gear. The better fit depends on what you want from that time: a clearly aerobic session, a calming indoor practice, help with flexibility and balance, or simply something you’ll realistically do when the day gets busy.

The comparison is less about finding a universal winner and more about matching the exercise to your routine. Brisk walking offers a straightforward route to moderate-intensity aerobic activity, while beginner yoga provides a slower, more varied practice that may emphasize movement quality, balance, and flexibility. Both can be useful. Neither has to become a personality trait.

Walking Workouts vs. Beginner Yoga: Comparison Overview

Walking workouts and beginner yoga often appeal to the same person: someone looking for gentle exercise that feels manageable rather than punishing. Both can be adapted for short sessions, require relatively little equipment, and can work at home or near home. They also let you start slowly instead of trying to “catch up” to a fitness routine overnight.

The key difference is the kind of movement each option prioritizes. A brisk walk is a recognized form of moderate aerobic activity, especially when you can talk but not sing comfortably. Beginner yoga varies widely by class and style; it may be very gentle, more active, or focused mainly on poses and breathing. That variety is useful, but it means yoga should not automatically be treated as equivalent to a cardio workout.

Side-by-Side Comparison

CriteriaWalking WorkoutsBeginner Yoga
Main movement focusSteady, repetitive movement that can build aerobic activity when paced brisklyPoses, transitions, breathing, flexibility, balance, and body awareness
Cardio potentialBrisk walking is a standard example of moderate-intensity aerobic activityVaries substantially by style; gentle classes may not provide the same aerobic challenge as brisk walking
Typical settingOutdoors, on a treadmill, or indoors with a walking routineIndoors at home, in a studio, or in a quiet open space
Equipment needsSupportive shoes and weather-appropriate clothing for outdoor walksA nonslip mat is helpful; a sturdy chair, wall, or supportive props can assist with modifications
Balance and flexibility focusInvolves balance and mobility but does not naturally include dedicated flexibility or balance practiceOften includes balance-focused poses and flexibility work
Scheduling flexibilityEasy to divide into short walks or fit between errands and appointmentsCan be brief, but a session may feel more practical when you have uninterrupted floor space and time
Common limitationsWeather, route safety, uneven surfaces, traffic, and poor lightingPose modifications, wrist or knee comfort, and finding a beginner-appropriate class or routine

Key Differences

Aerobic Activity and Intensity

Walking has the clearer advantage if your goal is to build moderate-intensity aerobic minutes. The CDC lists brisk walking as moderate activity and suggests a simple intensity check: During moderate exercise, you can talk but not sing. That pace differs from person to person, so there is no need to chase someone else down the sidewalk like you’re late for a train.

Yoga’s aerobic effect depends on the style and pace. More active forms can reach moderate intensity, but a gentle beginner practice may focus on slower movements, stretches, and rest periods. That does not make it less worthwhile; it simply serves a different purpose.

Balance, Flexibility, and Body Awareness

Beginner yoga usually gives more direct attention to balance, flexibility, posture, and controlled movement. The National Institute on Aging includes yoga among activities that can incorporate balance exercise, which can be especially relevant for older adults. A thoughtful class may also introduce modifications that make poses more accessible.

Walking involves balance too, particularly on uneven ground or hills, but it is not designed around balance practice. If you want dedicated time to work on standing steadily, moving through a fuller range of motion, and noticing how your body feels, yoga is often the more natural fit.

Convenience and Environment

Walking can be the easier choice when you have 10 spare minutes and a safe place to move. You can walk outside, use indoor hallways, or follow an indoor walking routine when the weather turns dramatic. No floor setup is required, and you do not have to rearrange the furniture just to exercise.

Yoga is often more convenient when outdoor conditions are unpleasant or local walking routes do not feel safe. It does require enough clear floor space to extend your arms and lie down comfortably. That can be a living room corner, bedroom, or even a cleared patch beside the bed—though moving the laundry pile first may improve the mood.

Safety Considerations

Neither activity is automatically risk-free. Outdoor walking brings practical concerns, including uneven pavement, traffic, low visibility, weather, and footwear. The National Institute on Aging recommends sturdy shoes, awareness of walking surfaces, and adjustments for poor conditions. Indoor walking or yoga can be sensible alternatives when the route is icy, poorly lit, or simply not a place where you feel comfortable.

Yoga can involve strains or sprains, especially when beginners force a pose or follow an instructor whose pace does not suit them. The National Center for Complementary and Integrative Health advises beginners to avoid extreme poses and forceful breathing. People with balance problems, pain, recent injuries, or certain health conditions may need individualized guidance and modifications.

Structure Versus Variety

Walking is pleasantly simple. Pick a route, choose a pace, and go. That repeatability can make it easier to build a routine, track time, or add movement around daily obligations. The downside is that some people find it monotonous, particularly if every walk follows the same loop past the same three barking dogs.

Beginner yoga usually offers more variety within one session. A routine might include standing poses, seated movement, balance work, and relaxation. That variety can keep things interesting, but it may feel less straightforward if you prefer a clear, no-decisions-needed workout.

How Each Exercise Fits Into Everyday Life

For Short Movement Breaks

Walking is usually the more practical option for short breaks. A quick walk before work, after lunch, or between household tasks can fit into your day without much preparation. Short sessions can still contribute to your overall activity, particularly when longer workouts are hard to schedule.

Yoga can work in short blocks too, but a five-minute practice may feel more purposeful when it has a clear focus, such as gentle standing movements or a few supported poses. It is less ideal if you need to be out the door in six minutes and are still looking for your mat.

For Indoor Routines

Beginner yoga has an advantage for reliable indoor exercise. It does not depend on daylight, sidewalk conditions, or the forecast. A mat can help with grip and comfort, but a stable, clear, nonslip surface matters most.

Indoor walking is also an option, especially with a hallway, open room, or guided routine. It may feel less engaging in a small space, but it can be a practical substitute for outdoor walking when conditions are unsafe or uncomfortable.

For Building a Well-Rounded Routine

Walking is particularly useful for the aerobic portion of an activity plan. Federal guidance recommends that adults aim for 150 to 300 minutes of moderate aerobic activity each week, along with muscle-strengthening activity on two days. Walking can help with the aerobic side, but it does not automatically cover strengthening or dedicated balance work.

Yoga can complement walking by adding balance and flexibility, although it should not be assumed to meet every exercise need either. A gentle practice may not provide substantial aerobic or muscle-strengthening activity. Combining the two can make sense: walks for steady movement and yoga sessions for a slower, more varied change of pace.

For Beginners Who Need Modifications

A walking workout is easy to scale by changing the route, duration, pace, or number of breaks. Flat, well-lit paths are generally easier starting points than steep trails or cracked sidewalks. Supportive footwear matters more than fancy workout clothing.

Yoga can be highly adaptable, but beginners benefit from clear instructions and permission to modify. A chair, wall, or other sturdy support can help with balance work. If a movement causes pain, dizziness, or substantial discomfort, stop rather than trying to earn points for determination. If you have a chronic condition, a history of falls, or new symptoms, seek individualized advice from a clinician or physical therapist.

Equipment and Practical Upkeep

Walking has almost no equipment maintenance beyond keeping your shoes clean, dry, supportive, and appropriate for the conditions. Shoes wear down over time, especially with frequent use on hard surfaces. Route “maintenance” is more about planning: Check the weather, choose safe paths, and avoid treating poor lighting or icy pavement as a character-building opportunity.

Yoga equipment is similarly low-maintenance. Clean and dry your mat according to its care instructions to help preserve its surface and grip. Mats can lose traction or begin to flake with use, while blocks, straps, and bolsters are optional rather than essential. A simple mat rolls up for storage, but even that may be more gear than you want to manage in a small space.

Cost and Overall Value

Walking can be the lower-cost starting point if you already own comfortable, supportive shoes and have access to a safe place to walk. There is no required membership, mat, or special setup. Investing in suitable walking shoes may make sense if you plan to walk regularly, need more support, or often cover longer distances, but the activity itself does not demand expensive extras.

Beginner yoga can also be inexpensive, particularly with a basic mat and free or low-cost guided routines. Paying for an in-person beginner class may be valuable when you want instruction on positioning, pacing, and modifications. If you prefer quiet exercise at home and will use the mat regularly, that modest investment can be practical. If floor space is scarce and your routine is inconsistent, walking may offer better value.

Who Should Choose Each Option

Choose Walking Workouts if Your Main Goal Is Aerobic Activity

Brisk walking is the better starting point if you want a clear path toward moderate-intensity aerobic exercise. It is simple to understand, easy to adjust, and can be divided into shorter sessions throughout the day. Choose a pace that feels challenging but still allows conversation.

Choose Beginner Yoga if You Want an Indoor, Slower-Paced Practice

Yoga may fit better if you prefer to move indoors, want a quieter routine, or feel drawn to balance and flexibility work. Look for classes or videos clearly labeled for beginners, and favor instructors who demonstrate modifications rather than treating every pose as a test.

Choose Walking if You Need Maximum Scheduling Flexibility

For unpredictable days, walking is often easier to repeat consistently. A short walk can happen before an appointment, during a break, or while running an errand. It asks very little of your home setup and does not require a dedicated block of floor time.

Choose Beginner Yoga if Balance Is a Priority

Yoga is often the stronger fit when you want deliberate balance-focused movement alongside flexibility and controlled transitions. Use a wall, chair, or other sturdy support if you feel unsteady. For ongoing balance concerns or a history of falls, individualized professional guidance is the safer place to start.

Final Verdict

Walking workouts are the more direct choice if you want moderate aerobic activity, especially when you can maintain a brisk, sustainable pace. They are flexible, low-fuss, and easy to fit into a crowded day. Their main drawbacks are environmental: weather, route safety, uneven ground, and the fact that walking alone does not cover every type of exercise.

Beginner yoga is the better match when you value an indoor routine with more emphasis on balance, flexibility, and a slower pace. It can be a useful complement to walking, not necessarily a replacement for it. Choose walking when cardio and convenience lead the list; choose yoga when controlled movement and indoor comfort matter more. If both sound appealing, alternating them may be the most realistic answer.

Frequently Asked Questions

Is walking or beginner yoga better for cardio?

Brisk walking is the clearer cardio choice because it is recognized as moderate-intensity aerobic activity. Gentle yoga may not raise your effort level to the same degree, though more active yoga styles can be more aerobically demanding.

Can beginner yoga help with balance?

It can be part of balance-focused activity because many yoga practices include standing poses and controlled transitions. Use modifications or sturdy support if you feel unsteady.

Does an easy walk count as exercise?

An easy walk is still movement, but it may not reach moderate intensity. For moderate effort, the CDC’s practical guide is being able to talk but not sing.

Do I need a yoga mat to start beginner yoga?

A mat is helpful for comfort and grip, but it is not mandatory. A clear, stable, nonslip surface is the more important starting point.

Can I combine walking workouts and beginner yoga?

Yes. Walking can support aerobic activity, while yoga can add variety, balance, and flexibility work. Together, they can create a more rounded routine than relying on either one alone.

You Might Also Enjoy

Gentle Fitness Routine
Everyday Living

How to Start a Gentle Fitness Routine When You Have Not Exercised in a While

Starting a gentle fitness routine after time away does not require a dramatic reset, matching workout sets, or a sudden interest in burpees. The most useful place to begin is smaller: a comfortable type of movement, a realistic window in your week, and a pace that lets you finish feeling capable rather than wiped out.

This guide can help you return to regular movement without treating exercise like an all-or-nothing challenge. It takes a gradual, everyday approach, whether walking, cycling, moving to music, or doing simple strength exercises at home sounds most appealing. If you have a medical condition, are recovering from an injury or surgery, are pregnant or postpartum, or have concerns about starting activity, get individualized guidance from a qualified clinician or physical therapist first.

Quick Overview

A gentle fitness routine is less about finding the “best” workout and more about making movement fit your current comfort, ability, schedule, and surroundings. You will learn how to choose an activity, set a deliberately modest starting point, monitor your effort, and build consistency before asking more from yourself.

Federal physical activity guidance recommends starting with small amounts and building gradually when you have been inactive. As one example, it suggests 5 to 15 minutes of walking per session, 2 to 3 times per week.. The longer-term guideline for adults is 150 to 300 minutes of moderate aerobic activity weekly, plus muscle-strengthening activity on at least 2 days a week—but that is a destination, not a first-week assignment. Any amount of activity is better than none, and smaller chunks count.

What You’ll Need

  • Comfortable clothing that lets you move easily
  • Shoes appropriate for your chosen activity, if needed
  • A safe place to move, such as a clear room, sidewalk, park, pool, gym, or stationary bike
  • A simple way to track sessions, such as a calendar, notes app, or paper checklist
  • Water nearby if it is warm, you will be out for a while, or it simply makes the routine more comfortable
  • Optional basic strength equipment, such as a sturdy chair, resistance band, or light household item you can hold comfortably

Before You Begin

Gentle Fitness Routine

Start by choosing a form of movement that seems tolerable—or maybe even pleasant. “Enjoyable” can be a high bar on a busy Tuesday, so aim for something you do not dread. A walk around the block, a few minutes on a stationary bike, gentle dancing in the living room, water-based movement, or chair-based exercises can all be reasonable options. Walking is popular because it is simple, but it is not a requirement.

Give your starting routine an honest place in your schedule. A short session after lunch, before dinner, or while listening to a favorite podcast is often easier to repeat than a grand plan that depends on a perfect free hour appearing from the mist. The CDC also suggests choosing activities, places, and times you like, scheduling them, and involving another person if encouragement helps. Those practical details can make getting started more manageable.

Pay attention to safety before you begin. Choose a clear route or space, check the weather and lighting if you will be outdoors, and make sure any chair or equipment feels stable. Stop activity and seek prompt medical help for pain, tightness, or pressure in your chest, neck, shoulder, or arm; extreme shortness of breath; dizziness; or feeling sick. Ongoing pain in your joints, feet, ankles, or legs is also a reason to get professional advice before continuing or changing your routine. NIDDK provides additional guidance on warning signs during activity.

Step-by-Step Instructions

Step 1: Pick one realistic activity

Choose one activity for your first couple of weeks rather than trying to assemble a full fitness personality overnight. The best option is one that works with your mobility, location, budget, and preferences.

For example, you might take a short walk, pedal a stationary bike, use a community pool if you already have access, follow a gentle movement video, or do a few chair-supported strength exercises. If leaving home creates too many hurdles, an indoor option may be easier to maintain. If being indoors makes you stare at the laundry instead, a walk outside may be the better fit.

Before moving on, make sure your choice is simple enough to repeat without needing special arrangements every time.

Step 2: Set a small first-session goal

Keep the first goal intentionally modest. If you have not exercised in a while, 5 to 15 minutes of light or light-to-moderate movement, 2 or 3 times a week, is a supported starting range. You are not trying to prove anything on day one. You are testing what feels manageable now.

Set a timer if that helps you avoid either cutting the session short out of uncertainty or going far beyond what feels comfortable because the music got good. When the time is up, slow down for a moment and notice how you feel. Finishing with a sense that you could do this again is useful information.

Step 3: Keep the effort comfortably manageable

Use the talk test to judge your pace. During moderate activity, you can generally talk but not sing. Since fitness levels differ, an activity that is moderate for one person may feel vigorous for another. Light activity is a perfectly valid place to start.

For a walk, this may mean strolling at a pace where you feel warmer and more alert but can still carry on a conversation. For cycling, it may mean easy pedaling without straining to keep up with a machine’s preset program. Ignore the temptation to treat breathlessness, soreness, or exhaustion as proof that the session “counted.” They are not required admission tickets.

Step 4: Repeat your routine before adding more

Do the same short routine for a while before increasing anything. Consistency gives you a clearer picture of whether the activity fits your life and how your body responds to it. It also reduces the classic beginner mistake of starting with a burst of enthusiasm and then avoiding the whole thing for two weeks.

Once your current routine feels comfortable and repeatable, add a few minutes to a session or add another day. Federal guidance recommends increasing duration and frequency before increasing intensity. There is no universal pace of progression, so let comfort, recovery, schedule, and practical reality guide your next adjustment.

Step 5: Add a gentle strength session when ready

After your movement routine feels steadier, consider adding simple muscle-strengthening activity. For someone restarting, beginning with one light- or moderate-effort session a week can be a reasonable introduction before working toward the general guideline of strength activity on at least two days each week.

Keep it basic. You might use a sturdy chair for sit-to-stands, do wall push-ups, practice standing leg exercises while holding a counter for support, or use a resistance band according to its instructions. Focus on controlled movement and stable positioning, not on adding lots of repetitions or heavy resistance. If an exercise causes pain or feels unsafe, stop and choose another option or seek qualified guidance.

Step 6: Make the routine easier to remember

Attach your activity to something already happening in your day. A short walk after your morning coffee, a few minutes of cycling before your evening show, or light movement during a regular break can reduce the need to negotiate with yourself every time.

Put sessions on your calendar as appointments with yourself, but keep the plan flexible. If rain, childcare, work, fatigue, or a very ordinary bad day gets in the way, swap in an indoor option or reschedule the session. Missing one planned day is not a reason to abandon the week. It is just a missed day.

Step 7: Track consistency, not perfection

Keep a simple record of what you did: the activity, approximate duration, and how it felt. A note such as “Walked 10 minutes; pace felt easy” is enough. Tracking can help you spot what works without turning every movement session into a performance review.

Avoid making the routine depend on calorie totals, weight changes, or a streak that can never be broken. Those measures can distract from the practical goal: building a movement habit that fits your life. A routine with short, regular sessions is often more useful than an ambitious plan that only happens when conditions are suspiciously ideal.

Helpful Tips

Gentle Fitness Routine
  • Lay out shoes or comfortable clothes ahead of time if mornings tend to feel rushed.
  • Choose a route with a natural turnaround point, such as a mailbox, corner, or park bench, so you do not need to guess how far to go.
  • Keep an indoor backup ready for bad weather or low-energy days, such as gentle marching in place, chair movements, or a short beginner video.
  • Invite a friend, neighbor, or family member along if company makes movement feel easier or more enjoyable.
  • Use music, an audiobook, or a podcast if it makes the time pass more pleasantly. Just keep outdoor volume low enough to stay aware of traffic and your surroundings.
  • Let the activity match the day. A slower, shorter session still counts as following through.
  • Review your routine every couple of weeks. If it feels consistently manageable, add a little time or an extra session rather than changing everything at once.

Common Mistakes to Avoid

  • Starting with an intense workout plan. A demanding routine may sound motivating, but it can be uncomfortable, impractical, or hard to repeat after a long break. Begin with a pace and duration that feel manageable.
  • Copying someone else’s routine exactly. Their schedule, experience, access to equipment, and comfort level may be very different from yours. Build around what works in your actual life.
  • Increasing time, frequency, and intensity all at once. Make one change at a time, usually adding duration or another day before making the activity harder.
  • Treating soreness or pain as a sign to push harder. Discomfort that concerns you is a cue to pause, not a motivational slogan. Seek professional advice for persistent pain or concerning symptoms.
  • Waiting for the perfect time or outfit. Comfortable basics and a safe place to move are enough to begin. Coordinated activewear can remain an optional subplot.
  • Forgetting to plan for obstacles. A backup indoor routine or alternate time slot makes it easier to continue when weather or schedules change.

Final Thoughts

A gentle fitness routine works best when it feels like a realistic part of your week, not a punishment for having a week. Begin with a manageable amount, repeat what works, and let your routine grow at a pace that still feels sustainable.

The goal is not to impress anyone with a dramatic first session. It is to create a steady relationship with movement that you can return to, even after busy seasons, holidays, bad weather, and all the other things life cheerfully throws onto the calendar.

Frequently Asked Questions

Is walking enough to start a fitness routine?

Yes. Walking can be a practical starting activity because you can adjust the pace and duration to your comfort level. If walking does not suit your preferences or abilities, options such as stationary cycling, water-based movement, chair exercises, or gentle dancing can also work.

How many days a week should I exercise when starting again?

A manageable starting point can be 2 or 3 days a week with short sessions, such as 5 to 15 minutes. Repeat that schedule until it feels comfortable, then gradually add time or another day if you want to.

Should I start with cardio or strength exercises?

Either can be a reasonable starting point, but beginning with one simple movement routine may feel less overwhelming. Once that habit is established, you can add light strength work, starting as gently as needed.

When should I talk with a clinician before exercising?

Talk with a clinician for personalized guidance if you have a chronic condition or significant medical concern, are managing a disability, or are recovering from an injury or surgery. The CDC also advises inactive people to consult a clinician before beginning vigorous-intensity activity, especially if they have a disability or are overweight.

You Might Also Enjoy

Make Your Home Feel Cozy
House & Home

How to Make Your Home Feel Cozy Without Adding More Clutter

You can make your home feel cozy without adding more clutter. In fact, one of the fastest ways to make a room feel less restful is to keep adding things in the name of making it “warm.” A few extra pillows become a chair no one can sit in. Decorative baskets become mysterious storage for more mysterious stuff. Suddenly, the room has ambiance but nowhere to set down a cup of tea.

The good news is that coziness is less about having more décor and more about making your space comfortable, useful, and easy to live in. Light, texture, clear surfaces, familiar objects, and a layout that supports your routine can do a lot of the heavy lifting.

Whether you live in a small rental, a busy family home, or a place that simply feels a little unfinished, these ideas can help your home feel cozy without turning every corner into a storage problem.

Start With the Room’s Real Job

Before adding anything, consider what the room needs to do for you. A living room might be where you read, watch movies, host friends, fold laundry, and occasionally lose the remote under a blanket. A bedroom should support rest and getting ready, not become a holding zone for unopened mail and everything that doesn’t have another home.

When a room’s function is clear, it becomes easier to spot what makes it feel chaotic rather than cozy.

For example, a cozy living room may need:

  • Comfortable seating that people can actually use
  • A reachable place for drinks, remotes, or books
  • Lighting that works after dark
  • Clear paths for moving through the room
  • A small amount of personality

That doesn’t necessarily require more furniture or decorative accessories. It may mean moving one side table closer to the sofa, clearing a crowded coffee table, or giving blankets one designated home.

A room usually feels more inviting when it supports the way you live in it. That’s a much more reliable goal than trying to make it look like a staged photo that has never encountered a phone charger, snack wrapper, or Tuesday night.

Let Lighting Create the Atmosphere

Lighting can change the feel of a home without taking up shelf space, floor space, or mental space. Instead of buying several new decorative objects, look at the light sources already in the room.

Make Your Home Feel Cozy

Overhead lighting is useful, especially for cleaning, cooking, and finding the earring that rolled under a chair. But relying on one bright ceiling fixture can make a room feel flat or harsh in the evening. Moving a lamp you already own, changing its placement, or using a warmer-looking bulb can create a softer, more layered effect.

Try using light at different heights:

  • A floor lamp beside a reading chair
  • A table lamp on a stable side table or dresser
  • A small plug-in night-light for a dark hallway
  • Under-cabinet lighting in a kitchen work area
  • A dimmable lamp near a sofa or bed

Warm-looking light is a common design choice for creating a softer evening atmosphere. The U.S. Department of Energy notes that some dim-to-warm LED products begin around 2700 to 3000 kelvin and become warmer in appearance as they dim, with certain products reaching about 1800 kelvin—similar to candlelight. If you prefer that look, a dim-to-warm LED option can add atmosphere without adding another decorative item.

Renters don’t need to rewire anything to make this work. Plug-in lamps, battery-operated puck lights in dark cabinets, and bulbs that fit existing fixtures can all make a difference. The goal isn’t to keep your home dim all the time. It’s to give yourself better options than “bright enough for surgery” or complete darkness.

Clear the Visual Noise Before Adding Texture

Texture is one of the easiest ways to make a home feel cozy, but it works best when it has room to be noticed. A soft throw, woven shade, wooden tray, or fabric headboard can get lost when every surface is already crowded.

Rather than buying new accents, start by editing what’s visible. This doesn’t mean stripping your home until it looks like nobody enjoys anything. It means keeping the items that make a room feel personal and putting away the extras that create visual static.

A useful approach is to choose a few “comfort anchors” for each room. These are the things that make the space feel like yours: a favorite quilt, a framed family photo, a piece of art, a few books you’re currently reading, or a handmade bowl used for keys.

Everything else should earn its place by being useful, meaningful, or genuinely pleasing to look at.

In a small room, this might mean displaying one meaningful object on a shelf instead of arranging seven tiny ones. In a larger home, it could mean leaving breathing room on a mantel or console table instead of filling every inch. Empty space isn’t unfinished. It gives your favorite things a chance to feel intentional.

Use Softness Where It Helps Most

Cozy textures don’t require a mountain of throw pillows. The most useful soft elements are the ones that improve comfort where you already spend time.

A washable throw blanket on the sofa can make movie night more comfortable. Curtains can soften a bedroom and define the window area. A fabric basket can hold blankets you regularly use. A cushioned bench may make sense near an entry if it gives you a stable place to sit while putting on shoes.

Choose materials that suit your household and your tolerance for maintenance. A beautiful cream-colored knit blanket may not be the best choice if it will spend most of its life under a shedding pet or beside a toddler with crackers. There’s no prize for choosing the most delicate textile in the room.

For a lower-cost refresh, try rearranging textiles you already own:

  • Move a spare quilt from a closet to the back of the sofa.
  • Use coordinating pillow covers from another room.
  • Fold an extra towel neatly in a guest bathroom.
  • Put a washable runner where bare floors feel cold, as long as it lies flat and stays secure.
  • Bring out a tablecloth for meals or weekend gatherings instead of leaving it on the table year-round.

Softness works when it’s accessible and easy to care for. If every cozy item needs special laundering, constant fluffing, or a complicated storage plan, it may create more work than comfort.

Keep Floors and Walkways Open

An open path through a room can make it feel calmer almost immediately. It also matters for everyday safety. Extra stools, floor baskets, stacks of magazines, loose charging cords, and small rugs can slowly turn a comfortable room into an obstacle course.

Make Your Home Feel Cozy

The CDC’s home fall-prevention guidance recommends keeping floors clear, securing or removing throw rugs, and ensuring lights are easy to reach. Those basics are especially important in homes with older adults, young children, people with low vision, or anyone with mobility concerns. They’re also useful for anyone who has tried to walk through a dark hallway while carrying laundry.

If you use rugs, choose them deliberately. One larger rug that lies flat and is properly secured often works better than several small, loose rugs scattered around the room. Avoid placing a rug where its edge will curl, slide, or catch underfoot.

Look at the routes you use every day: from the bed to the bathroom, from the sofa to the kitchen, and from the front door to wherever bags and shoes tend to land. These paths don’t need to be wide and empty like a hotel lobby. They just need to be clear enough for normal life.

That openness can make a home feel more peaceful than another piece of furniture ever could.

Make Daily Essentials Easier to Put Away

Clutter often appears when frequently used items don’t have an easy landing spot. This isn’t a character flaw. It’s usually a systems problem.

If mail always piles up on the kitchen counter, a giant decorative bowl may hide it for a day or two, but it won’t solve the issue. A better fix might be one small tray for incoming mail, paired with a regular time to sort it. If shoes gather by the door, a narrow shoe rack or designated mat may be more useful than a decorative basket that overflows by Thursday.

The key is to contain only what needs to live in that area. Storage should reduce loose items, not give every random object a prettier place to multiply.

Consider the friction points in your home:

  • Where do coats, bags, and shoes land?
  • Which surfaces collect chargers, receipts, and mail?
  • What gets left out because putting it away takes too many steps?
  • Which items are used daily but stored too far from where they’re needed?

A small solution may be enough. A hook behind a door, a drawer divider, a lidded box for remote controls, or a tray by the entry can reduce clutter without changing the room’s appearance much at all.

Maintenance matters here, too. Choose systems you can reset in a minute or two. A complicated organizing method is unlikely to survive a busy week, and that isn’t a moral failure. It’s just a sign that the system asks too much.

Add Personal Touches, Not Random Filler

A cozy home should feel lived in, not generic. Personal items can create that feeling without requiring dozens of accessories.

Display things you already have a connection to: a framed postcard from a trip, a child’s drawing, a record you love, a ceramic mug collection you actually use, or a favorite cookbook on a kitchen stand. These details add warmth because they tell a small story.

The trick is editing. You don’t need every sentimental object visible at once. Rotating a few pieces seasonally—or whenever you feel like a change—can keep your home personal without making it feel crowded.

Wall space can be especially helpful in small homes because it adds character without taking up valuable surfaces. One larger piece of art, a simple gallery of meaningful photos, or a wall-mounted shelf for a few favorite books can bring life to a room while leaving tables and counters open.

For renters, removable picture-hanging products or framed art placed on a sturdy dresser can offer flexibility. Make sure any leaning piece is stable and unlikely to fall, especially in a high-traffic area.

Treat Scent and Candlelight as Optional Extras

Scent can be pleasant, but it isn’t required for a cozy home. Fresh air, clean textiles, and a kitchen that is reasonably under control can be plenty. If you enjoy fragrance, use it in a way that suits your household, keeping in mind that guests and family members may have sensitivities or simply different preferences.

Candles deserve a little more care than their cozy reputation sometimes gets. Flameless candles can create a warm glow without an open flame. If you use real candles, the National Fire Protection Association advises keeping them at least 1 foot away from anything combustible, placing them on a sturdy, uncluttered surface, and extinguishing them when you leave the room or go to bed. Its candle safety guidance also recommends flameless candles as an alternative.

In other words, a candle doesn’t need to be nestled into a tray of dried flowers, books, blankets, and decorative paper to look inviting. It needs space. Cozy should never come with a fire hazard.

Build in a Gentle Reset

A comfortable home doesn’t stay that way because someone maintains it perfectly. It stays workable because it has a few simple reset habits.

Try a short evening reset in the rooms you use most. Put cups in the kitchen, return remotes to one spot, fold the blanket, clear the main walkway, and move anything that obviously belongs elsewhere. Even five or ten minutes can make the next morning easier.

The goal isn’t spotless. A home can have toys on the floor, dishes waiting to be washed, and a chair with a sweater on it while still feeling warm and welcoming. The reset simply prevents small piles from becoming permanent furniture.

If daily tidying isn’t realistic, choose a rhythm that fits your life: once every few days, before company comes over, or on the weekend. A cozy home should support your routine, not demand a new personality.

Final Thoughts

Making your home feel cozy without adding clutter is mostly about noticing what already helps you feel comfortable. Better lighting, clearer surfaces, practical storage, soft layers, and a few personal touches can make a bigger difference than another cart full of décor.

Start with one room and one change that makes everyday life easier. The coziest spaces aren’t perfectly styled. They’re the ones where you can settle in, find what you need, and relax without moving three decorative pillows first.

You Might Also Enjoy

Low-Impact Movement Breaks
Everyday Living

7 Low-Impact Movement Breaks to Try During a Work-From-Home Day

A work-from-home day can make it surprisingly easy to stay in one position for far too long. One minute you’re answering an email; the next, you’ve been folded over a laptop like a question mark for half the morning.

Low-impact movement breaks offer a simple way to interrupt that static routine. They don’t replace regular exercise, and they aren’t meant to push through pain. They’re just brief, gentle chances to stand up, change position, and move within a comfortable range before your next meeting notification appears.

1. March in Place

Marching in place is about as straightforward as a work-from-home movement break gets: Stand beside your desk, lift one foot at a time, and keep the pace comfortable. There’s no need for special shoes, a yoga mat, or the kind of workout outfit that makes you wonder whether laundry day has gotten out of hand.

This is a practical choice when you need to step away from a screen but don’t have time to leave the room. Let your arms swing naturally if that feels good, or keep a hand near a desk or sturdy chair for extra balance support. Smaller steps count, especially if you’re just getting started or working in a tight office corner.

The CDC includes marching in place among its simple workplace activity-break options. Try it briefly between tasks, then switch to another gentle move rather than treating it like a formal workout. The point is to break up a long period of sitting, not to turn your Tuesday spreadsheet into a boot camp.

If lifting your knees feels uncomfortable, keep the movement low and easy. If you have balance concerns, a recent injury, or a health condition that affects activity, ask a health-care professional or qualified physical-activity specialist which options may be appropriate.

Why it stands out: Marching in place gives you an easy, whole-body change of pace without requiring much space, equipment, or a complicated routine.

2. Reach Both Arms Up and Down

A simple overhead reach can be a welcome change after typing, scrolling, or leaning toward a screen. Stand tall or sit securely in a supportive chair, then slowly lift both arms overhead as far as is comfortable before lowering them again. Keep the motion relaxed—this is not the moment to audition for the ceiling fan.

Try pairing the movement with an unhurried breath: Breathe in as your arms rise and out as they lower. If raising both arms overhead isn’t comfortable, lift them only partway, reach one arm at a time, or skip the move.

This break is handy during a mouse- and keyboard-heavy workday because it changes your upper-body position without demanding much space or setup. You can do several comfortable repetitions while a document loads, before joining a video call, or during a quick break from computer tasks.

OSHA encourages workers to avoid holding static computer postures for too long by periodically standing, stretching, or walking. A reach-and-lower sequence is one small way to make that shift without rearranging your workspace.

Why it stands out: It provides a gentle change of position for an upper body that has spent too long hovering over a keyboard.

3. Gently Lean Side to Side

For this low-impact movement break, stand with your feet comfortably apart and lift one arm overhead if that feels good. Lean gently to the opposite side, return to center, and repeat on the other side. Keep the motion small and controlled; a comfortable side bend is plenty.

You don’t need to force a deep stretch. Think of this as a change of position rather than a contest with your range of motion. Keep your shoulders relaxed, avoid twisting, and skip the overhead arm if it causes discomfort. Placing one hand on a desk for light support can make the movement feel steadier.

Side-to-side leans fit naturally into a short sequence with arm reaches and shoulder rolls. The CDC’s workplace activity-break guide suggests periodically changing simple movements during a brief activity segment, so your break can stay varied without becoming a whole production.

This move may not suit everyone. If you have back, shoulder, balance, or mobility concerns, reduce the range, perform it seated if appropriate for you, or choose a different movement. Stop if anything hurts.

Why it stands out: The side bend changes your usual forward-facing desk position with a calm, adaptable motion.

4. Step Side to Side

Side steps are a useful choice when marching in place starts to feel repetitive. Take one easy step to the right, bring the other foot in, and then reverse direction. Keep your knees soft, your steps modest, and your movements controlled enough that you could still answer a coworker’s message without accidentally launching your water bottle.

This movement needs only a small, clear patch of floor. Before starting, move charging cords, bags, pet toys, and suspiciously placed coffee mugs out of the way. Socks on a slick floor can also make a casual movement break more adventurous than necessary, so use a secure surface and stable footwear if needed.

You can step side to side at a gentle pace beside your desk, kitchen counter, or sturdy chair. If balance is a concern, keep one hand near a stable surface rather than trying to power through. There’s no prize for making a low-impact break high drama.

Federal physical activity guidance encourages adults to move more and sit less, noting that even small amounts of activity can provide benefits. These brief breaks don’t need to replace your planned walk, workout, or other activity; they simply add movement between long stretches of computer work.

Why it stands out: Side steps add variety while still fitting into a small home-office space.

5. Press Arms Forward, Then Draw Elbows Back

This move is simple but satisfying after a long spell of typing. Stand or sit upright, extend your arms forward at a comfortable height, and then draw your elbows gently toward your sides. Think of opening and closing the space across your chest and upper back rather than yanking your elbows behind you.

Keep your shoulders down instead of letting them creep toward your ears. Use a slow, controlled rhythm, and perform the movement with your elbows bent from the start if straightening your arms doesn’t feel comfortable.

It’s a useful desk-adjacent option because you can do it without getting on the floor, changing clothes, or finding a quiet corner of the house. That matters when your schedule is packed and the kitchen table is also serving as your office, mail station, and mysterious crumb collection zone.

Like the other ideas here, this is a gentle activity break—not a treatment for pain or an instant posture fix. If you have persistent discomfort, numbness, weakness, or other concerning symptoms, speak with a health-care professional rather than relying on desk movements alone.

Why it stands out: The forward-and-back arm motion is easy to control and works well in the limited space around a desk chair.

6. Roll the Shoulders Forward and Backward

Shoulder rolls may look almost too simple to bother with, but that’s exactly why they’re useful during a busy day. You can do them seated or standing: Slowly lift your shoulders, roll them back and down, and then reverse direction if that feels comfortable.

Keep the circles gentle. Large, forceful rolls aren’t necessary, and neither is holding your breath while you do them. A few slow repetitions provide a quick change from staying in the same computer-working position, especially when you’ve been focused enough to forget your shoulders exist.

This is also one of the most discreet movement breaks available. It works while you’re waiting for a video call to begin, reading a long email, or pausing between tasks. No equipment is needed, which makes it realistic for small-space workers and anyone who doesn’t want a home office that resembles a fitness-equipment aisle.

OSHA’s computer workstation guidance recommends frequent short breaks from computer tasks to look away, stretch, stand, or walk. Shoulder rolls can be one easy part of that broader habit of changing position periodically.

Why it stands out: Shoulder rolls are a no-space, no-equipment option you can do almost anywhere without significantly interrupting your day.

7. Alternate Knee Lifts or Rise Onto Toes and Return to Heels

This final movement break gives you two flexible options. For alternating knee lifts, stand near a stable desk or chair and slowly raise one knee at a time to a comfortable height. For toe rises, gently lift your heels so you’re standing on the balls of your feet, then lower them with control.

Knee lifts can be a natural next step after marching in place, while toe rises may feel more manageable if you want to remain mostly in one spot. Neither movement needs to be big. A small, steady range is often the right call, particularly if you’re easing into more frequent movement breaks.

Balance matters here. Use a sturdy surface for support if needed, keep the area around your feet clear, and avoid rushing. If you feel unsteady, choose a seated arm movement instead. Adapting a movement is not “doing it wrong”; it’s simply making the break work for your body and home setup.

The CDC advises starting at a lower intensity and building gradually. That’s a sensible approach for low-impact movement at home, where the goal isn’t to finish a call sweaty and wondering why you made this harder than it needed to be.

Why it stands out: These two options let you choose between a gentle balance-focused move and a simple lower-leg movement without needing extra gear.

Final Thoughts

The best work-from-home movement break is usually the one you’ll actually take. Start with one or two comfortable moves between tasks, then build a small rotation that fits your schedule, space, and mobility. Even a brief pause can help break up a long stretch in one static computer posture.

For broader activity goals, the U.S. physical activity guidelines recommend 150 to 300 minutes of moderate-intensity aerobic activity each week, plus muscle-strengthening activity on two days. These quick breaks can contribute to a more active day, but stretching alone does not count as moderate- or vigorous-intensity aerobic activity. Keep the movements gentle, adapt as needed, and stop if anything hurts.

You Might Also Enjoy

Spa-Inspired Bathroom
House & Home

How to Create a Spa-Inspired Bathroom on a Small Budget

A spa-inspired bathroom doesn’t require a marble renovation, a rainfall showerhead, or a basket full of products you’ll forget to use by February. The feeling comes from a few simple things working together: softer light, less visual clutter, clean textiles, and small comforts that make an ordinary routine feel less rushed.

This can be an especially useful refresh before a busy holiday season, when guests may visit and the house starts collecting extra stuff at an alarming rate. It also works beautifully as a quieter reset after the holidays, when a calm bathroom can feel like a tiny rebellion against the wrapping paper, laundry, and general chaos of real life.

The goal isn’t to make your bathroom look like a hotel brochure. It’s to make it feel cleaner, calmer, and more pleasant to use—without creating a shopping list that defeats the whole point.

Affiliate disclosure: This article contains affiliate links. If you make a purchase through one of these links, I may earn a commission at no additional cost to you. As an Amazon Associate I earn from qualifying purchases.
Start With What Needs Attention Most

Before buying anything, take a practical look at the room. A spa-inspired bathroom is less about adding décor than removing the things that make the space feel busy or neglected.

Spa-Inspired Bathroom_cluttered

That may mean dealing with a shower curtain that has seen better days, a counter crowded with half-used bottles, or towels that are technically still towels but no longer feel particularly welcoming. In a small bathroom, every visible item has more impact, so a quick edit can change the mood faster than a major project.

Focus first on the essentials:

  • Clear expired or unused toiletries from cabinets and drawers.
  • Put daily-use items in one tray, basket, or small container rather than scattering them across the counter.
  • Wash bath mats, towels, and shower curtains if they’re still in good condition.
  • Deep-clean the sink, mirror, grout, faucet, and drain area.
  • Replace anything that affects comfort or hygiene, such as a worn toilet brush, cracked soap dish, or musty bath mat.

This is also a good time to think about household routines. If several people use the bathroom, an elaborate arrangement of matching jars may not survive until lunchtime. Choose organization that works for the people who actually live there. A labeled basket for hair tools or a simple drawer divider can be more useful than a countertop display that requires everyone to behave as if they’re checking into a boutique hotel.

Build the Look Around a Calm, Simple Color Palette

Small bathrooms usually feel more restful when the color scheme stays limited. That doesn’t mean everything has to be white, beige, or suspiciously similar to oatmeal. It simply means choosing a few colors that work together rather than bringing home every appealing item from the home aisle.

Start with the colors already present in the tile, flooring, cabinetry, or paint. Then use towels and accessories to create a more intentional look. Soft neutrals, muted greens, pale blue-grays, warm terracotta, charcoal, or navy can all feel spa-like, depending on the room.

For a low-cost update, try this approach:

  • Choose one main towel color.
  • Add one accent shade with a hand towel, soap dispenser, or small storage basket.
  • Keep most other visible items neutral or clear.
  • Use natural-looking materials, such as wood, cotton, woven fiber, ceramic, or glass, where practical.

Fresh white towels can create a classic hotel-style effect, but they aren’t the only option—and they may not be the easiest choice in a household with children, pets, makeup experiments, or hair-dye adventures. A deeper neutral or medium-toned towel can still look polished while being a little more forgiving.

If repainting is within your budget, a soft wall color can make a major difference. But paint is optional. In a rental or a bathroom you don’t want to overhaul, textiles and storage can provide plenty of visual change without turning the refresh into a full project.

Upgrade the Textiles Before the Décor

If your budget allows for only one or two purchases, put them toward items you touch every day. A soft bath mat and better towels do more for the spa feeling than a shelf full of decorative Ta

Take a look at this soft bath mat

Look for towels that feel comfortable and suit your laundry routine. A coordinated set isn’t necessary; even two matching bath towels and a couple of hand towels can make the room feel more pulled together. Consider keeping older, less attractive towels for cleaning, pet care, or messy hair-color days rather than throwing them out immediately.

A shower curtain is another high-impact upgrade, particularly in a compact bathroom where it takes up a large amount of visual space. A plain fabric curtain, subtle stripe, waffle texture, or quiet botanical pattern can soften the room without making it feel overly themed.

For the floor, choose a bath mat that is easy to wash and dries reasonably well in your space. Plush mats feel lovely, but they may not be practical in a bathroom with limited ventilation. A simple cotton mat, low-pile option, or washable woven rug can offer the same sense of comfort with less lingering dampness.

When guests are expected for a holiday gathering or weekend visit, set out clean hand towels and make sure there’s an extra roll of toilet paper within easy reach. It’s a small detail, but it helps people feel welcome without turning your bathroom into a staged showroom.

Make Storage Feel Intentional, Not Overdecorated

The most relaxing bathrooms tend to have clear surfaces. That doesn’t mean every product must disappear into a drawer; daily necessities deserve a convenient home. The trick is containing them.

A small tray can hold hand soap, lotion, and a candle or small vase. A lidded basket can hide extra toilet paper or cleaning cloths. A clear container can corral cotton pads, bath salts, or other frequently used items—but only if you’ll actually use what’s inside. There’s no rule saying every bathroom needs decanted cotton balls. Sometimes the original package is fine.

In a very small space, vertical storage is often more helpful than adding furniture. Consider:

  • Adhesive hooks for robes, towels, or a shower squeegee
  • A narrow over-the-toilet shelf or cabinet, if it fits safely
  • A slim rolling cart for a bathroom with limited cabinet space
  • Drawer organizers for makeup, skincare, and grooming tools
  • A shower caddy that keeps bottles off the tub edge

Try to store backups out of sight when possible. Seeing six shampoo bottles, three spare tubes of toothpaste, and a bulk pack of toilet paper can make a room feel more like a supply closet. Useful? Absolutely. Serene? Less so.

For seasonal hosting, create one small guest basket if it would make visitors more comfortable. Include practical items such as extra soap, tissues, menstrual products, toothpaste, or travel-size basics you already have. There’s no need to buy a pile of novelty toiletries or make guests feel as if they’ve entered a gift shop.

Use Lighting to Change the Mood

Bathroom lighting is often designed for practicality, not ambiance. Bright overhead lighting helps with shaving, makeup, and the occasional close inspection of a questionable skin situation. It doesn’t always encourage relaxation.

Rather than replacing fixtures, which can become expensive quickly, add softer light around the edges. A small lamp placed safely away from water, a battery-operated candle, or a warm-toned night-light can make evening baths and early mornings feel less harsh.

If you use candles, keep safety first: place them on a stable, heat-safe surface away from towels, paper, shower curtains, and curious pets or children. Flameless candles offer a similar glow with less worry and can be especially handy during holiday gatherings, when the house is already full of distractions.

Try the Spa Day candle

Natural light helps, too. Keep windows clean and avoid heavy treatments that block daylight unless privacy requires them. A moisture-tolerant window covering in a light color can preserve privacy while keeping the room from feeling closed in.

Spa-Inspired Bathroom_soothing

Add One or Two Sensory Details

A spa-inspired bathroom should feel good, but it doesn’t need to smell like twelve competing essential oils. A lighter approach is usually more inviting, especially for guests or family members who are sensitive to fragrance.

A single scented soap, a modest reed diffuser, or a lightly fragranced lotion may be enough. Fresh eucalyptus can look lovely in a shower, but it’s optional and should be replaced before it becomes dry, dusty décor. A small plant can bring life and color, provided your bathroom’s light and humidity suit it. If not, there’s no shame in choosing a realistic faux plant or skipping greenery altogether.

Other low-cost sensory upgrades include:

  • A wooden bath brush or simple washcloths
  • A small stool or tray for holding a book, drink, or bath products during a soak
  • A comfortable robe or pair of washable slippers
  • A speaker for quiet music, podcasts, or absolutely nothing—which is also a valid luxury

Keep surfaces manageable. One plant, one tray, and one useful basket can feel intentional. Ten little objects tend to feel like something that needs dusting.

Plan a Refresh That Matches Your Budget

A calming bathroom update can happen in stages. There’s no need to replace everything at once, especially before a holiday season when your spending may already be focused elsewhere.

With a very small budget, concentrate on cleaning, decluttering, laundering textiles, and rearranging what you own. Decanting isn’t necessary, but grouping items in containers you already have can make the counter look more orderly. A fresh hand soap, a new washcloth set, or a thrifted tray may be all the “new” the room needs.

With a moderate budget, prioritize a shower curtain, bath mat, towels, simple storage, and one lighting or fragrance detail. These items are visible, practical, and likely to make the biggest day-to-day difference.

If you have more room in the budget, consider improvements that solve a real annoyance: better shelving, updated hardware, a mirror with more useful lighting, or a fresh coat of bathroom-friendly paint. Aim for changes that will still serve you after the season ends rather than holiday-specific décor that requires another storage bin in the garage.

Keep the Spa Feeling Going After the Refresh

The less complicated your setup, the easier it is to maintain. A five-minute reset once or twice a week can prevent the room from drifting back into cluttered-counter territory. Hang towels to dry, return products to their designated spots, wipe down the sink, and keep a small supply of cleaning essentials nearby.

After guests leave or the holiday season winds down, use up opened products before buying more. Wash and store any extra guest towels, recycle empty containers, and return seasonal touches to storage only if you genuinely look forward to using them again. A calm bathroom shouldn’t create a new clutter problem in the name of relaxation.

Final Thoughts

Creating a spa-inspired bathroom on a small budget is really about making everyday care feel a little easier. Clean towels, softer lighting, useful storage, and fewer distractions can go a long way, even in the smallest room in the house.

Choose the changes that make your own routine better, whether that means a fresh bath mat, a clearer counter, or simply a few quiet minutes behind a closed door. That counts as a luxury, too.

You Might Also Enjoy

Scroll to Top