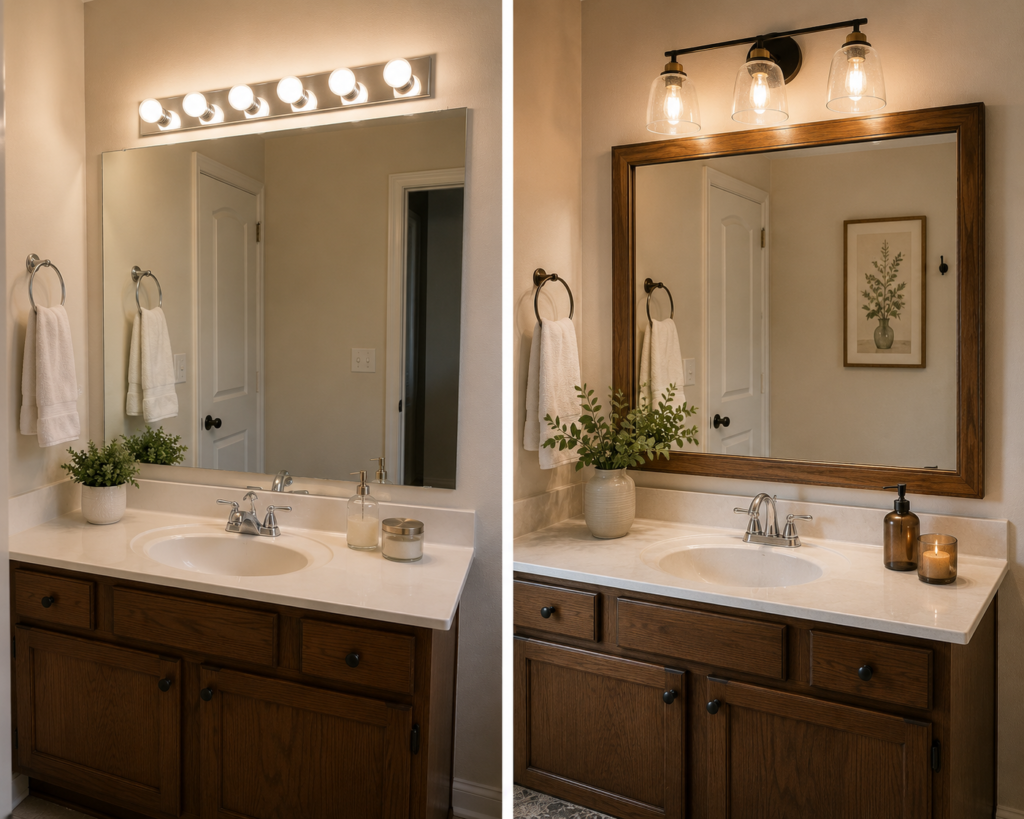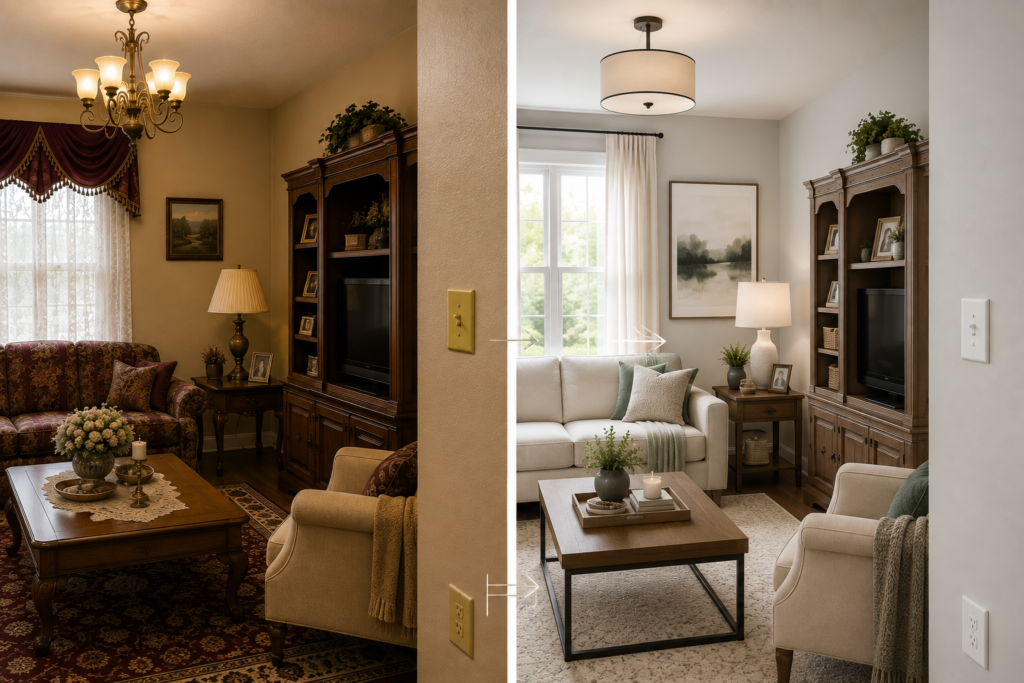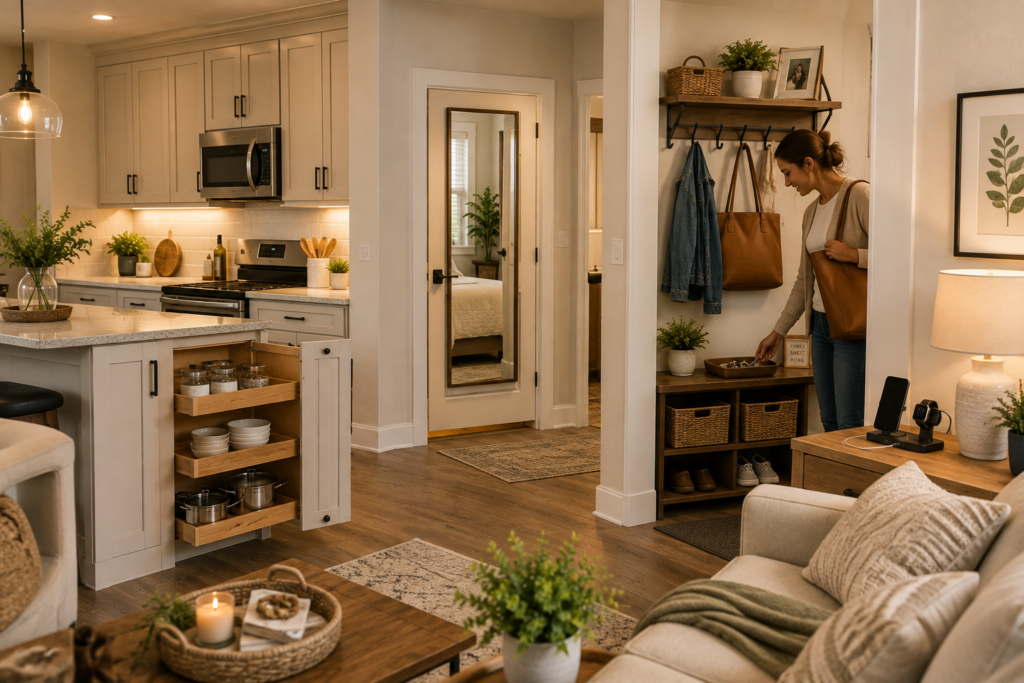
House & Home

Empty Entryway Corner
House & Home

How to Use an Empty Entryway Corner as a Family Drop Zone

An empty entryway corner can quietly become one of the hardest-working spots in your home. Instead of collecting a migrating pile of shoes, backpacks, mail, and mystery jackets, it can give daily essentials a place to land before they spread across the kitchen counter.

A family drop zone doesn’t need a mudroom, custom cabinetry, or a renovation budget. It simply needs to match the way your household actually comes and goes. A small basket-and-hook setup may be plenty for one home, while another needs a bench, shoe tray, and separate backpack storage to keep weekday mornings from becoming a scavenger hunt.

The goal isn’t to create a picture-perfect entryway that nobody is allowed to touch. It’s to make arriving home and heading out the door a little easier.

Start With What Needs to Land There

Before bringing in bins, hooks, or a handsome hall tree that may or may not become a coat mountain, take stock of what regularly enters your home.

Most family drop zones need to handle a mix of:

  • Shoes and boots
  • Coats, rain jackets, and hats
  • Backpacks, work bags, or tote bags
  • Keys, sunglasses, wallets, and transit cards
  • Sports gear, library books, or school papers
  • Dog-walking supplies
  • Reusable shopping bags
  • Mail that needs attention

Not every item needs permanent storage in the entryway. A drop zone works best when it holds things that are used often and needed near the door. If winter gear is only used a few months each year, for example, keep the everyday basics in the corner and store the off-season overflow elsewhere.

This little edit matters. Buying more containers without deciding what belongs in them just gives clutter assigned seating.

Think about the route your family takes when they walk in. Where do people naturally kick off their shoes? Is there a countertop where keys always land? Does someone head straight to the kitchen with a backpack still on? Your drop zone should work with those habits whenever possible, not ask everyone to take a ceremonial detour through the house.

Protect the Path In and Out

An entryway corner may be empty because it genuinely has room to spare—or because it is part of a necessary walkway. Measure before committing to furniture, especially in a narrow foyer, apartment entry, or hallway that connects to other rooms.

The drop zone should never block the front door, windows, stairs, or a planned way out of the home. The U.S. Fire Administration advises keeping doors and windows clear as part of a home fire escape plan. In practical terms, that means resisting the urge to park a bench, bulky basket, or overflowing shoe rack directly in the path of an exit.

If someone in your household uses a wheelchair, walker, stroller, or other mobility support, leave enough open floor space to move comfortably through the area. A 36-inch clear route is a useful accessibility-informed planning target when wheelchair passage is needed, though it is not a universal requirement for every private home. The right amount of clearance depends on your household and layout.

A few space-saving choices can make a small entry feel much calmer:

  • Use wall hooks instead of a deep coat rack.
  • Choose a narrow bench or slim shoe cabinet rather than a wide cubby unit.
  • Mount a small shelf with a tray for keys rather than adding a console table.
  • Use vertical space for bags and jackets.
  • Keep the floor open by limiting baskets to one or two useful categories.

When the path stays clear, the drop zone feels like support—not one more obstacle to sidestep while carrying groceries.

Build the Drop Zone Around Daily Routines

The best setup is usually made of a few simple zones, not one giant piece of furniture. Consider what your household needs to do when arriving home: hang something, put something down, remove shoes, and find important small items later.

A practical family drop zone often includes four functions.

A place to hang

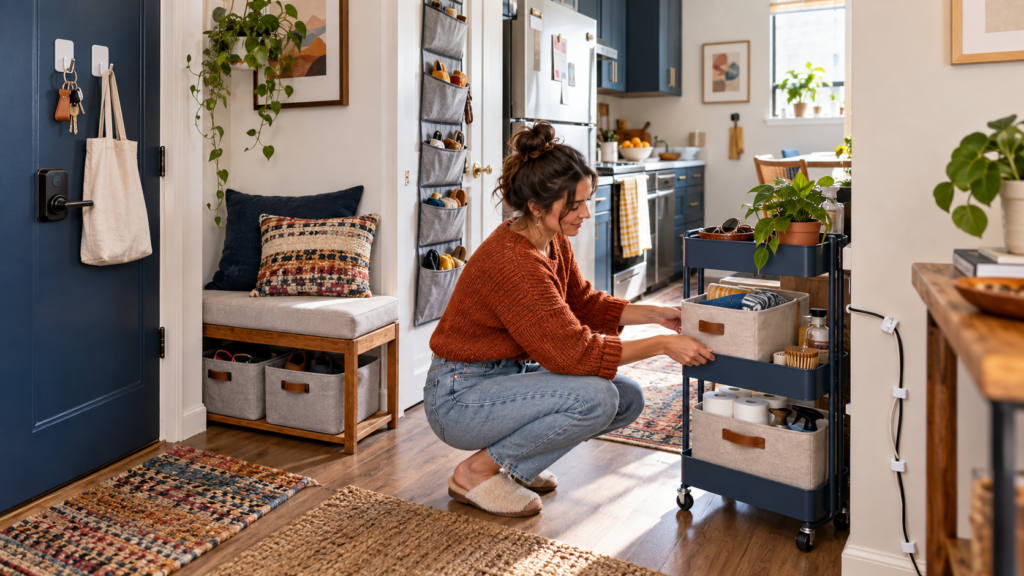
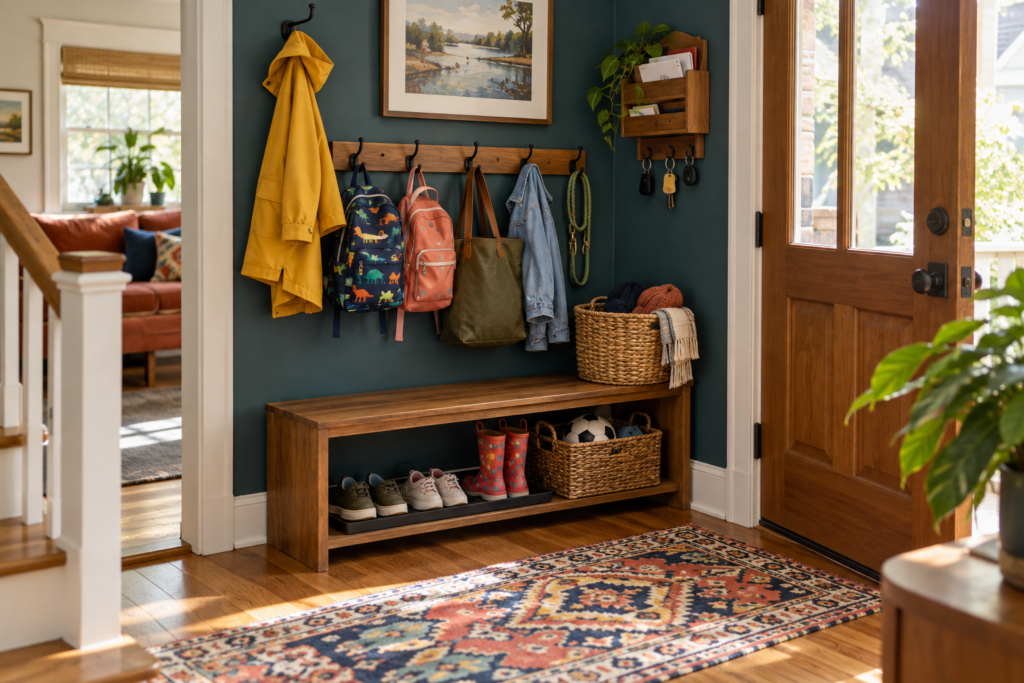
Hooks are the workhorse here. They are easy for children to reach, useful for guests, and far more likely to get used than hangers tucked inside a closed closet. Give each person one hook if space allows, or designate hooks by category: everyday coats, bags, dog-walking supplies, and “take this with you” items.

If young children use the space, install a lower row of hooks for the things they can manage themselves. Adults can use an upper row for longer coats or less frequently used items.

A place to sit or set things down

A bench is helpful when people regularly put on shoes near the door. It can also make an entry feel more welcoming, even if it is simply a small stool or narrow wood bench.

No room for seating? A sturdy wall shelf, tiny ledge, or tray on a nearby surface can create a landing place for keys and sunglasses. The important part is giving small items an obvious home before they drift into the rest of the house.

A place for shoes

Shoes tend to multiply near the door because, frankly, they are doing their job. The solution is not necessarily to store every pair there. Keep the shoes currently in regular rotation in a low tray, open shelf, basket, or narrow cabinet, then move seasonal or occasional pairs elsewhere.

A shoe tray can be especially useful during wet weather because it helps contain dirt and moisture. If your household has several people, consider a simple limit: one or two pairs per person in the entryway. That keeps the corner functional without turning it into a tiny shoe store.

A place for the small but important stuff

Keys, mail, chargers, sunglasses, permission slips—these items create the most irritating kind of clutter because they are easy to lose and hard to replace in the middle of a rushed morning.

A shallow basket, small wall-mounted organizer, tray, or labeled drawer can help. Keep categories specific enough to be useful. “Mail” may be too broad; “mail to open” and “mail to recycle” create clearer next steps. Likewise, one small tray for keys works better than a decorative bowl that slowly fills with receipts, loose change, batteries, and one inexplicable Lego piece.

Choose a Setup That Fits Your Budget and Space

A functional entryway drop zone can be assembled gradually. Start with the pieces that solve the most annoying problem.

For a low-cost option, try a set of wall hooks, a washable basket, and a shoe tray. This works well in rental homes, small apartments, or homes where the entry is really just a section of hallway. Removable hooks may be useful in some rentals, but check the product instructions, weight limits, and your lease before installing anything.

For a modest upgrade, add a narrow bench with storage underneath or a slim cabinet that keeps shoes out of sight. A small mirror above the setup can make the corner feel more intentional and gives everyone one last chance to notice spinach in their teeth before leaving.

If you have more room, a hall tree or freestanding cubby unit can combine hooks, seating, and shoe storage in one footprint. These pieces are particularly useful for busy households because they make it easier to create individual zones for backpacks, coats, and outdoor gear.

Tall or top-heavy freestanding furniture needs a safety plan, especially around young children. The Consumer Product Safety Commission recommends anchoring furniture according to the manufacturer’s instructions and storing heavier items on lower shelves. Wall hardware should match the wall construction rather than being chosen at random; IKEA’s wall-anchoring guidance notes that suitable fasteners differ for stud-framed and solid walls. If you are unsure what is behind the wall or which hardware to use, ask a knowledgeable professional before proceeding.

Make It Look Intentional Without Making It Precious

An entryway drop zone is easier to maintain when it looks like it belongs in the room. That does not mean every basket needs to match or every backpack must disappear behind cabinet doors.

A few visual choices can make the setup feel calmer:

  • Repeat one material, such as wood, black metal, woven baskets, or white bins.
  • Use washable containers for dirty or damp gear.
  • Pick labels that everyone can understand at a glance.
  • Add a small rug or mat to define the area and catch everyday mess.
  • Include one personal touch, such as a framed photo, small plant, or cheerful print, if it does not take up needed surface space.

Closed storage can make an entry look tidier, but open storage often works better for things that need to be grabbed quickly. A mix is usually the sweet spot: hooks and an open shoe tray for daily items, plus one drawer or basket for visual clutter.

Also, leave a little room for real life. A drop zone filled to the brim on day one has nowhere to absorb a wet umbrella, school project, or bag of groceries waiting to be carried farther into the house.

Give Each Person a Clear Role

Shared entryways become more manageable when everyone can tell where their things belong. This does not require a color-coded command center worthy of air-traffic control.

For younger children, a lower hook and basket with a simple picture label may be enough. Older kids might need a backpack hook, a spot for shoes, and a designated place for sports equipment or library books. Adults benefit from the same clarity, even if nobody says it out loud.

If several people share one compact corner, use names sparingly. Naming every hook can become annoying when routines change. Labels work best for stable categories, such as “returns,” “dog walk,” or “outgoing mail.” For flexible spaces, a row of identical hooks or baskets may be easier to adapt.

The system should also account for visitors and overflow. One spare hook and one empty basket can prevent the whole area from unraveling when someone comes in wearing a bulky coat on a rainy day.

Plan for the Reset, Not Perfection

Even a well-designed family drop zone will get messy. That is normal. It is the part of the home where everyone arrives carrying the evidence of their day.

Build a quick reset into your routine. Once or twice a week, return stray items to their rooms, recycle old papers, clean out the shoe tray, and check whether seasonal gear is taking over. During a busy stretch, simply clearing the floor and returning keys to their tray may be enough.

Pay attention to what keeps ending up outside the system. If backpacks always land beside the bench, the hooks may be too high or too crowded. If shoes spill into the hallway, the storage limit may be unrealistic. If mail still reaches the kitchen counter, the entryway mail spot may need to be closer to the door.

A good organization system can change as your household changes. That is not failure. It is maintenance.

Final Thoughts

An empty entryway corner can support one of the busiest transitions of the day: coming home. A few thoughtfully chosen places for coats, shoes, bags, and small essentials can reduce the daily scramble without demanding a bigger home or a major overhaul.

Start with the trouble spot you notice most often, then let the drop zone grow only as needed. The best version will look less like a showroom and more like a corner that makes ordinary family life run a little smoother.
You Might Also Enjoy

Corner Storage Products for Small Kitchens
House & Home

8 Useful Corner Storage Products for Small Kitchens

Small kitchens rarely offer enough storage, and corners are often where useful square footage goes to disappear. The right corner storage product can turn that awkward patch beside the sink, pantry, or countertop into a practical home for dry goods, cookware, produce, or everyday cooking tools.

The trick is choosing storage that suits how you actually cook. A compact spice turntable may be far more helpful than a towering shelf if you mostly make weeknight meals, while a freestanding corner rack can earn its keep if your cabinets are already playing a tense game of Tetris.

Making Corner Storage Work in a Small Kitchen

Corner storage products work best when they improve access, not just add more places to pile things. In a small kitchen, every organizer should answer a basic question: Will this make meal prep, cooking, cleanup, or food storage easier?

The eight options below include countertop organizers, cabinet inserts, wall-mounted shelves, and freestanding units. Some are essential problem-solvers for cramped kitchens; others are optional conveniences that make a tight space feel calmer and more usable. Before buying anything, measure the corner itself and check the clearance around cabinet doors, appliances, and drawers.

Affiliate disclosure: This article contains affiliate links. If you make a purchase through one of these links, I may earn a commission at no additional cost to you. As an Amazon Associate, I earn from qualifying purchases.

What to Consider Before Choosing

Start with location. A countertop corner near the stove is useful for oils, salt, pepper, and frequently used spices, but it is not the best place for heat-sensitive pantry foods. A corner near the sink may suit dish soap and cleaning tools better than food storage, especially if splashing is common.

Think about what you need to store. Small jars and bottles need rails or raised edges so they do not slide off. Heavy cookware needs a sturdy floor-standing rack or reinforced cabinet solution. Produce needs airflow, while dry goods stay fresher in sealed containers stored away from moisture and direct sunlight.

Material matters, too. Metal racks are often easy to wipe clean and can suit damp areas if they have a rust-resistant finish. Bamboo and wood look warm and work nicely for dry storage, but spills need to be cleaned promptly. Plastic organizers are lightweight and practical, although thinner versions can flex under heavy jars or cans.

Finally, avoid creating a new clutter zone. A storage product should leave enough room to grab what you need without moving six other things first. If it takes a minor excavation to reach the paprika, the organizer has lost the plot.

8 Corner Storage Products for Small Kitchens

1. Two-Tier Corner Countertop Shelf

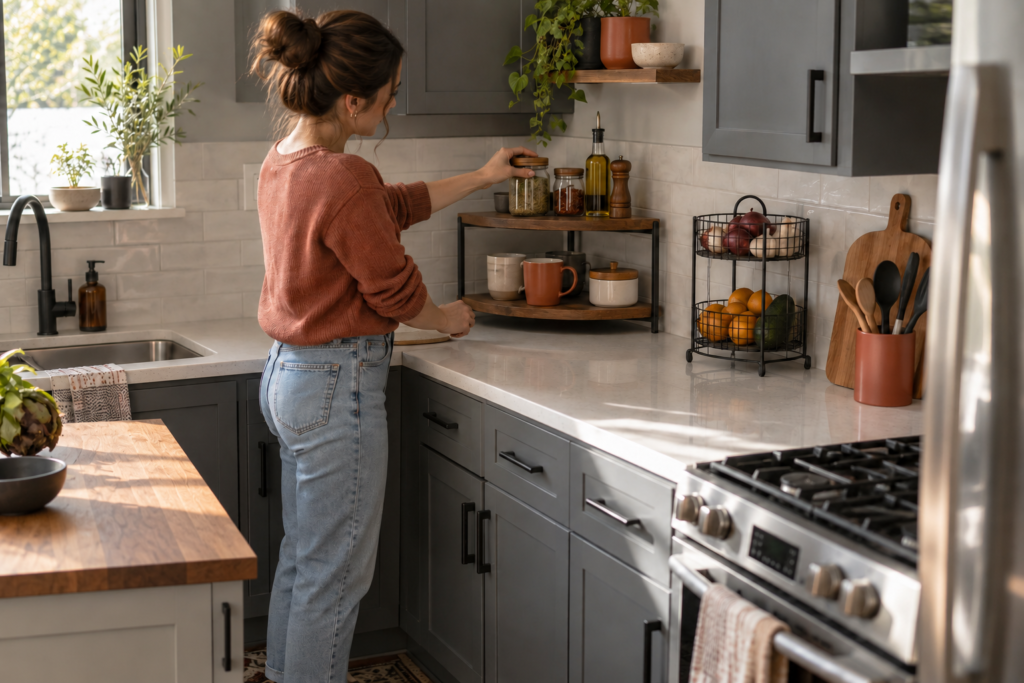
A two-tier corner shelf is one of the simplest ways to use empty counter space without giving up the entire work surface. Its triangular footprint lets it sit neatly against two walls, creating extra vertical storage for mugs, tea, coffee supplies, cooking oils, or small pantry containers.

This is especially useful near a coffee maker or in a baking corner where you regularly reach for vanilla, cinnamon, and measuring spoons. Look for a shelf with a stable base and enough clearance between levels for the items you use most.

The limitation is obvious: it can become visual clutter fast. Reserve it for attractive, frequently used items rather than every stray packet and jar in the kitchen. Wipe it regularly, especially if it holds oil bottles or sticky syrups.

2. Lazy Susan Turntable for Corner Cabinets

A rotating turntable can make a deep corner cabinet much less annoying. Instead of reaching into a dark back corner for vinegar or canned beans, you can spin the tray and bring items forward.

This option works well for shelf-stable foods, condiments, spices, and baking supplies. Versions with a raised rim are particularly useful for jars and bottles because they help prevent items from tipping during rotation. Choose a size that leaves a little space around the cabinet walls; an overly large turntable may catch on the sides or become difficult to spin.

Avoid using a cabinet turntable for foods that require refrigeration. Check pantry items regularly, and move older products to the front so they are used before newer ones.

3. Pull-Out Corner Cabinet Organizer

A pull-out corner organizer is a more involved upgrade, but it can be worthwhile if a blind corner cabinet wastes a lot of storage. These systems typically use trays, baskets, or shelves that extend outward, helping you reach items that would otherwise vanish behind the cabinet frame.

It is a strong choice for pots, pans, mixing bowls, small appliances, or pantry staples in heavier containers. Because installation requirements and dimensions vary widely, this is not always the most renter-friendly option. Measure the cabinet interior, opening width, hinges, plumbing, and nearby drawers before choosing one.

Maintenance is usually straightforward: remove crumbs and wipe the shelves occasionally. Still, do not overload the mechanism. Even a sturdy organizer works better when heavy cookware is distributed rather than stacked in one dramatic cast-iron pile.

4. Freestanding Corner Kitchen Shelf

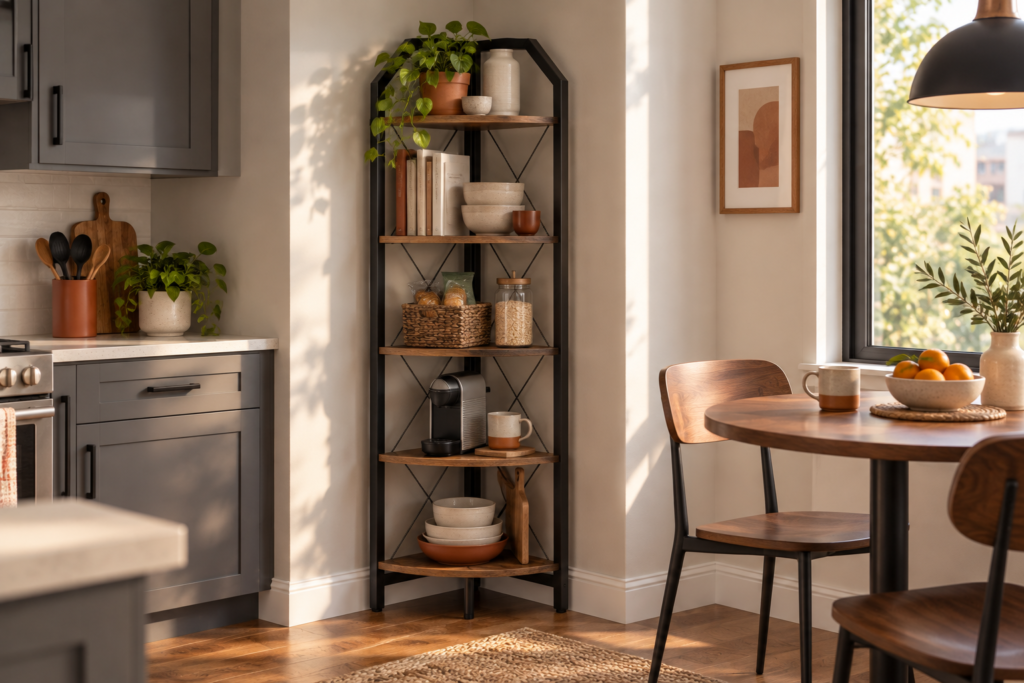
A freestanding corner shelf gives you extra storage without drilling into walls or modifying cabinets. It can work in the kitchen itself, beside a pantry door, or in a nearby dining nook used for food storage and serving pieces.

Corner Storage Products for Small Kitchens_shelf

This style is practical for cookware, baskets of snacks, cookbooks, countertop appliances, or sealed dry goods. Open shelving makes it easy to see what you have, which can help prevent duplicate purchases of pasta, rice, or the mysterious third bottle of soy sauce.

The trade-off is that open storage needs more frequent dusting and tidying. It also takes up floor space, so it is best for a genuinely unused corner rather than a narrow path between the refrigerator and sink. Keep heavy items on the lower shelves to improve stability.

5. Wall-Mounted Corner Shelves

Wall-mounted corner shelves are a useful option when counter and floor space are both limited. Installed above a work area, they can hold spices, dry ingredients in small containers, tea tins, mugs, or lightweight kitchen tools.

For renters, they are practical only if the lease permits installation or the removable mounting hardware is suitable for both the wall surface and the intended load. Anything heavier than a few light jars or decorative items needs secure installation. A shelf loaded with glass containers is not a charming kitchen feature if it makes an unexpected descent during dinner.

Use these shelves for items you reach for often but do not need within arm’s reach every minute. Avoid placing open food, unsealed bags, or delicate ingredients directly above the stove, where heat, grease, and steam can make storage and cleanup more difficult.

6. Corner Produce Basket Stand

A tiered corner basket stand can create a dedicated home for onions, potatoes, bananas, citrus, and other produce suited to room-temperature storage and good airflow. It is a practical alternative to leaving produce in grocery bags on the counter, where it becomes easy to forget.

This type of storage works best when you separate produce with different storage needs. Because potatoes and onions have different ideal storage needs, separate baskets are generally more practical. Keep the stand away from direct sunlight, heat sources, and damp areas. Items that need refrigeration, such as berries and leafy greens, still belong in the refrigerator.

Choose baskets that are easy to wipe down or remove for cleaning. Produce can leave behind dirt, loose skins, and the occasional overripe surprise. A little maintenance keeps the stand useful rather than turning it into fruit fly headquarters.

7. Corner Dish-Drying Rack

A corner dish rack makes smart use of space beside the sink, especially in kitchens where a standard rectangular rack consumes most of the counter. Its angled shape can hold plates, cups, utensils, and a few hand-washed prep tools while leaving more room for chopping and serving.

This is an everyday utility product rather than a food-storage solution, but it can make cleanup far easier in a small kitchen. Look for a design that directs water toward the sink or includes a removable tray that can be emptied and cleaned. Standing water under a dish rack is not doing your countertop any favors.

It is best for households that hand-wash dishes often or need extra drying space beyond a dishwasher. If you rarely wash anything by hand, a simple drying mat may take up less room and be easier to store.

8. Stackable Corner Pantry Bins

Stackable Corner Pantry Bins are a flexible choice for pantry shelves, deep cabinets, or a small utility closet used for kitchen overflow. Their angled shape helps use the back of a corner shelf while keeping snacks, baking packets, tea, sauces, or lunch supplies grouped together.

Corner Storage Products for Small Kitchens_pantry

Clear bins make it easier to see what is inside, while solid bins create a cleaner look if visual clutter bothers you. Handles are helpful for pulling a bin forward rather than reaching around other items. Use these bins to organize sealed packages, cans, and containers—not as a substitute for airtight containers when food needs protection from moisture or pests.

The bins are generally easy to clean with warm, soapy water followed by thorough drying. They are less useful for very heavy items, and stacking them too high can make the lower bins inconvenient to access.

Small-Kitchen Corner Storage Comparison

ProductBest LocationBest ForMain AdvantageMain Limitation
Two-tier corner shelfCountertopCoffee, spices, oilsAdds vertical storageCan look cluttered
Lazy SusanCorner cabinetJars, cans, condimentsImproves accessNot ideal for heavy cookware
Pull-out organizerBlind corner cabinetPots, pans, pantry goodsUses deep cabinet spaceMay require installation
Freestanding shelfOpen floor cornerAppliances, baskets, cookwareLarge capacityUses floor space
Wall-mounted shelvesEmpty wall cornerLightweight daily itemsSaves counter spaceRequires secure mounting
Produce basket standCounter or pantry cornerRoom-temperature produceImproves airflow and visibilityNeeds regular cleaning
Corner dish rackBeside sinkHand-washed dishesFrees counter spaceNeeds drainage maintenance
Stackable pantry binsPantry or cabinetPackaged foods and snacksFlexible organizationLimited for heavy goods

Best Choice for Different Needs

For Everyday Cooking Supplies

A two-tier countertop shelf or lazy Susan is usually the most useful choice for oils, spices, salt, pepper, and frequently used condiments. Both keep ingredients visible and close to your prep area without requiring a cabinet renovation.

For Deep, Awkward Cabinets

A pull-out corner cabinet organizer offers the biggest improvement when you have a deep blind corner full of hard-to-reach cookware or pantry staples. It requires more planning and installation, but it can make existing storage far more functional.

For Renters and Flexible Setups

Freestanding corner shelves and stackable corner bins are easy to move, rearrange, and take with you later. They are good choices when you do not want to drill into walls, alter cabinetry, or commit to a permanent layout.

For Produce Storage

A corner produce basket stand is a good fit if produce tends to get buried on the counter. It keeps sturdy, room-temperature fruits and vegetables visible, while your refrigerator remains the right place for more perishable produce.

Final Thoughts

The best corner storage product is not necessarily the largest one. In a small kitchen, the most useful option is usually the one that gives you quicker access to ingredients, clears a crowded work surface, or stops food and tools from disappearing into an awkward cabinet void.

Start with the corner that causes the most daily irritation. If it is a cluttered counter, try a compact shelf or dish rack. If it is a deep cabinet, a turntable or pull-out organizer may make a bigger difference. One well-chosen solution can make cooking in a small kitchen feel a little less cramped—and that is no small victory.

Frequently Asked Questions

What should I store in kitchen corner shelves?

Corner shelves are best for lightweight, frequently used items such as spices, mugs, tea, coffee supplies, sealed dry goods, or small serving pieces. Avoid overloading them with heavy cookware or large glass containers unless the shelves are designed and securely installed for that weight.

Are Lazy Susans useful in corner cabinets?

Yes, especially for shelf-stable foods, jars, bottles, and small pantry items. A turntable helps you reach the back of a corner cabinet without removing everything in front first.

Can I store potatoes and onions in the same corner basket?

It is better to store them separately. Both prefer a cool, dark, well-ventilated spot, but keeping them apart can help them last longer.

How do I keep a corner dish rack clean?

Empty standing water regularly, wash the tray and rack with warm, soapy water, and clean the counter underneath. Letting moisture build up can lead to grime and make the area harder to maintain.

Are wall-mounted corner shelves safe for kitchen storage?

They can be safe when installed correctly and used within their weight limits. Reserve them for lighter items, use anchors or mounting methods suited to the wall type, and avoid placing heavy glassware or appliances overhead.

You Might Also Enjoy

Damage-Free Organization Products
House & Home

8 Damage-Free Organization Products Renters Can Actually Use

Renters often have the same organization problems as homeowners: too little storage, too many cords, and a bathroom counter that seems to collect every bottle you own. The difference is that you can’t always solve those problems with a drill, a wall-mounted shelf, and a cheerful “we’ll patch it later” attitude.

That’s why damage-free organization products get so much attention. The good ones add storage without making your security deposit feel personally threatened. The less-good ones are basically plastic clutter with adhesive backing. The difference comes down to surface type, weight limits, proper installation, and whether the product solves a problem you actually have.

Here, “damage-free” means no drilling, nails, or permanent mounting when the product is used as directed. No option is risk-free on every rental surface, especially when adhesive is involved.

Here are eight renter-friendly organization products worth considering, along with the real-world limitations that tend to get skipped in those perfectly styled apartment videos.

Affiliate disclosure: This article contains affiliate links. If you make a purchase through one of these links, I may earn a commission at no additional cost to you. As an Amazon Associate, I earn from qualifying purchases.

1. Removable Adhesive Organizing Caddies

A removable adhesive caddy is one of the more useful small-space products because it creates storage where you naturally need it: inside a closet, beside the kitchen sink, on the side of a cabinet, or near the laundry area.

Models such as the Command Large Organizing Caddy are designed for smooth surfaces, including painted walls, finished wood, tile, glass, metal, laminate, and painted concrete. That makes them appealing for holding lightweight cleaning supplies, lint rollers, dish brushes, pantry packets, or the collection of reusable bags that has somehow become a household resident.

The important word here is smooth. Adhesive caddies are not a universal answer for wallpaper, fabric, brick, textured walls, or rough surfaces. The product may not stick properly, and removal may not go as planned.

This option is best if you need a little extra vertical storage but don’t plan to store heavy bottles, bulky tools, or anything that could make a dramatic crash at 2 a.m.

2. Water-Resistant Shower Caddies

Shower storage is a classic rental headache. Built-in shelves are often tiny, shower ledges are never quite where you need them, and suction-cup caddies have a well-earned reputation for eventually giving up.

Water-resistant adhesive shower caddies offer an alternative without requiring screws. The Command Bath Corner Caddy, for example, uses water-resistant adhesive strips and is rated to hold up to 6.5 pounds.

That can be useful for everyday shampoo, conditioner, body wash, and a few lightweight shower items. It is not an invitation to store oversized pump bottles, backup products, or enough bath supplies to open a small pharmacy.

Before buying, consider the shape of your shower and the finish of its walls. A corner caddy makes sense only if you have a suitable corner and a smooth, clean surface for installation. If your bathroom tile is heavily textured, uneven, or interrupted by grout lines where the strips need to sit, a freestanding shower caddy may be less frustrating.

Damage-Free Organization Products

3. Removable Hooks and Cord Clips

Adhesive hooks are hardly new, but they remain among the most practical renter organization products because they solve lots of tiny problems without demanding a major setup.

A few well-placed hooks can hold keys near the door, keep a broom off the floor, corral oven mitts inside a cabinet door, organize lightweight jewelry, or give a tote bag a permanent home instead of leaving it on the dining chair forever. Cord clips can also route charging cables along a desk or nightstand so they don’t disappear behind furniture every other day.

The catch is that “adhesive hook” is not a single product with one universal weight limit. Command’s product weight guide shows that capacities vary across products. Check the exact package rating before hanging anything, especially items that get pulled, bumped, or used frequently.

These products work best for lightweight, everyday objects. They are less suited to heavy backpacks, large framed items, winter coats, or anything you would be genuinely upset to find on the floor.

4. Tension Rods for Awkward Open Spaces

Tension rods may not be the most glamorous organization purchase, but they’re one of those items that can quietly fix a surprisingly specific problem.

In a closet, a tension rod can create room for scarves, lightweight accessories, or a short secondary hanging section. Under a sink, a small tension rod can hold spray bottles by their triggers and free up cabinet space below. In a laundry nook or open storage area, one can also support a lightweight curtain that hides visual clutter without permanently changing the room.

Their appeal is simple: no drilling, no wall anchors, and no repair project when you move out.

Still, a tension rod relies on pressure, so it needs stable opposing surfaces and a sensible load. This is not the product for heavy garments, dense storage bins, or a heavy curtain in a high-traffic doorway. Measure carefully before ordering, too. “Close enough” is rarely close enough when spring tension is involved.

Damage-Free Organization Products

5. Over-the-Door Organizers

Over-the-door organizers are popular for a reason: doors are vertical space that usually isn’t doing much. A hanging organizer can turn the back of a bedroom, pantry, bathroom, or hall closet door into storage for shoes, cleaning supplies, hair tools, accessories, snacks, or folded linens.

For renters, the biggest benefit is that most versions don’t need permanent installation. You can take the organizer down when you move, use it in another room, or retire it without having to explain screw holes to a landlord.

That said, not every door works well. Thick doors, unusually narrow gaps, or doors that already close tightly can make over-the-door hooks annoying—or keep the door from closing properly. Some organizers can also swing or rattle when loaded, which is not ideal in a small apartment where every sound has the potential to become a household event.

Look for one that fits the items you actually need to store. Deep pockets are useful for cleaning bottles; narrow compartments are better for shoes or accessories. Buying a giant organizer for five small items is an easy way to create a new clutter zone.

6. Slim Rolling Carts

A narrow rolling cart is one of the few trendy organization products that can earn its keep in several rooms. It can work as a bathroom supply station, pantry overflow cart, bedside catchall, craft cart, or home for frequently used kitchen tools.

The appeal is flexibility. Rather than committing storage to one wall or cabinet, you can move the cart where it helps most. That matters in rentals with limited closets, awkward layouts, or kitchens that seem to have been designed before anyone owned a reusable water bottle.

A rolling cart is especially useful when your storage needs change. It can hold extra toiletries one month, then become a coffee station, plant-supply cart, or work-from-home storage spot later.

The trade-off is visual. Open carts can look tidy in photos and chaotic in real life if every shelf becomes a landing zone for random objects. Choose one with enough clearance to roll easily, and consider baskets or bins if you need to contain smaller items. If the cart will sit in a narrow walkway, measure first. Your shins will thank you.

7. Under-Bed Storage Bins

Under-bed storage is not flashy, which may be exactly why it’s useful. It takes advantage of space that otherwise collects dust, rogue socks, and one mystery object you swear you’ve never seen before.

Low-profile bins or zippered storage bags can be practical for seasonal clothing, extra bedding, shoes, gift wrap, or items you want nearby but not visible. Since these products sit on the floor rather than attach to your rental, they’re among the lowest-risk options for adding storage without changing the space itself.

The biggest limitation is access. Under-bed storage is great for items you don’t need every day; it’s less helpful for things you reach for constantly. It can also become a “deal with this later” zone if you fill it without sorting.

For better long-term usefulness, choose containers that fit the clearance beneath your bed and make it easy to tell what’s inside. A clear lid, label, or simple category system can prevent the dreaded full-floor unpacking session later.

8. Freestanding Shelving Units

Freestanding shelves are not as instantly satisfying as a wall of mounted shelves, but they can be a smarter renter choice when you need meaningful storage. A slim bookcase, small cube shelf, or utility rack can hold pantry staples, folded towels, books, baskets, plants, or office supplies without relying on adhesive strips.

This category is especially useful if your rental lacks built-in storage. A basic shelving unit can turn an empty wall, closet corner, or entryway into a functional zone without asking removable adhesive to do work it was never meant to do.

The downside is that freestanding furniture takes up floor space, and not every small apartment has much to spare. It may also need to be disassembled when you move, which is less fun than it sounds. Still, if you need substantial capacity rather than a place to hang one small item, shelving often provides better value than several smaller organizers.

Choose a size that suits the room’s traffic flow, follow the manufacturer’s assembly and stability instructions, and check whether a tall unit requires anchoring. If anchoring is recommended, ask your landlord what is permitted rather than ignoring the guidance. More storage is only helpful if the unit is stable and you can still walk through the room.

What Makes an Organization Product Truly Renter-Friendly?

The most useful damage-free organization products tend to meet a few simple standards: they don’t require drilling or permanent mounting, they fit your actual surfaces and space, and they can handle the items you plan to store.

Adhesive products deserve the most caution. Even products designed for clean removal should be installed and removed exactly as directed. Surface type, weight, preparation, placement, and removal method all matter. Command’s FAQs note that its adhesive products are not suitable for every surface and provide specific instructions for application and removal. It’s worth reading those directions before placing anything on a painted wall you’d rather not repaint later.

The lasting winners are usually the boringly helpful products: the ones that reduce clutter in a specific spot, don’t create a new problem, and can move with you when your lease ends.

Final Thoughts

The best renter organization products aren’t necessarily the ones with the most dramatic before-and-after videos. They’re the ones that make a cramped bathroom, busy closet, or cluttered kitchen easier to live with—without requiring permanent changes.

Start with the problem that irritates you most often, whether it’s shower bottles, tangled cords, or nowhere to put cleaning supplies. One well-chosen solution can do more for your space than a cart full of trendy organizers ever will.

You Might Also Enjoy

Make Your Home Feel Cozy
House & Home

How to Make Your Home Feel Cozy Without Adding More Clutter

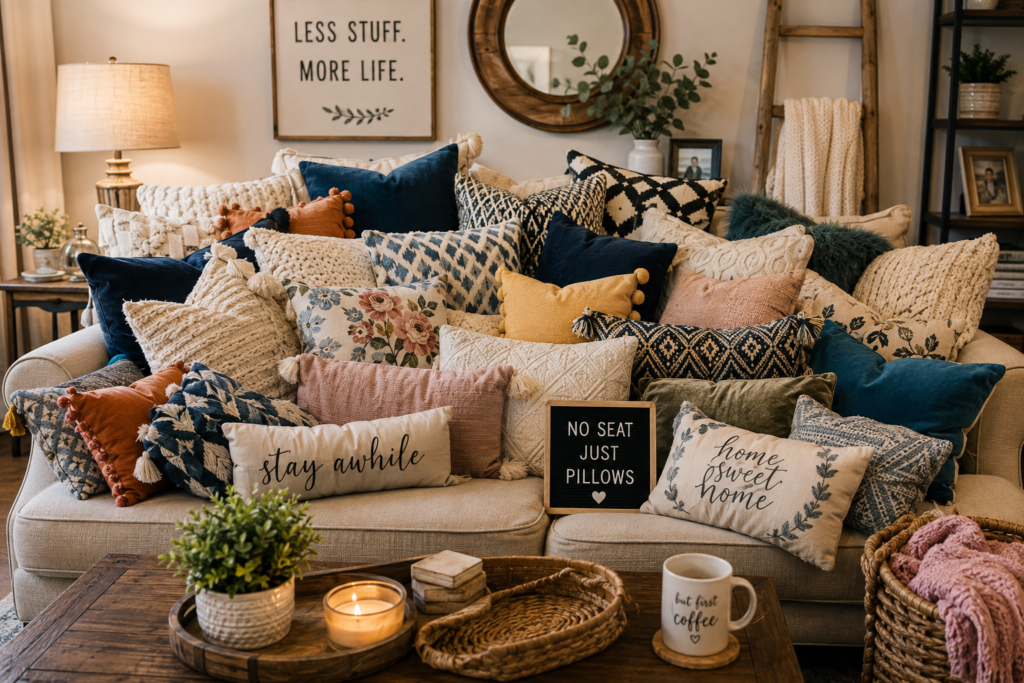
You can make your home feel cozy without adding more clutter. In fact, one of the fastest ways to make a room feel less restful is to keep adding things in the name of making it “warm.” A few extra pillows become a chair no one can sit in. Decorative baskets become mysterious storage for more mysterious stuff. Suddenly, the room has ambiance but nowhere to set down a cup of tea.

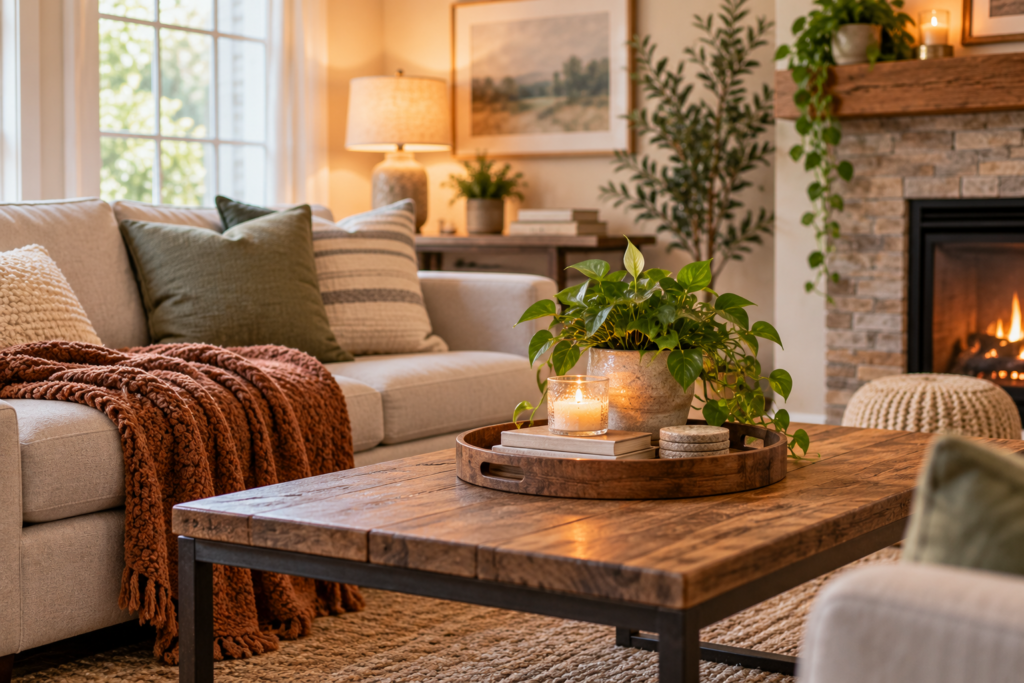
The good news is that coziness is less about having more décor and more about making your space comfortable, useful, and easy to live in. Light, texture, clear surfaces, familiar objects, and a layout that supports your routine can do a lot of the heavy lifting.

Whether you live in a small rental, a busy family home, or a place that simply feels a little unfinished, these ideas can help your home feel cozy without turning every corner into a storage problem.

Start With the Room’s Real Job

Before adding anything, consider what the room needs to do for you. A living room might be where you read, watch movies, host friends, fold laundry, and occasionally lose the remote under a blanket. A bedroom should support rest and getting ready, not become a holding zone for unopened mail and everything that doesn’t have another home.

When a room’s function is clear, it becomes easier to spot what makes it feel chaotic rather than cozy.

For example, a cozy living room may need:

  • Comfortable seating that people can actually use
  • A reachable place for drinks, remotes, or books
  • Lighting that works after dark
  • Clear paths for moving through the room
  • A small amount of personality

That doesn’t necessarily require more furniture or decorative accessories. It may mean moving one side table closer to the sofa, clearing a crowded coffee table, or giving blankets one designated home.

A room usually feels more inviting when it supports the way you live in it. That’s a much more reliable goal than trying to make it look like a staged photo that has never encountered a phone charger, snack wrapper, or Tuesday night.

Let Lighting Create the Atmosphere

Lighting can change the feel of a home without taking up shelf space, floor space, or mental space. Instead of buying several new decorative objects, look at the light sources already in the room.

Make Your Home Feel Cozy

Overhead lighting is useful, especially for cleaning, cooking, and finding the earring that rolled under a chair. But relying on one bright ceiling fixture can make a room feel flat or harsh in the evening. Moving a lamp you already own, changing its placement, or using a warmer-looking bulb can create a softer, more layered effect.

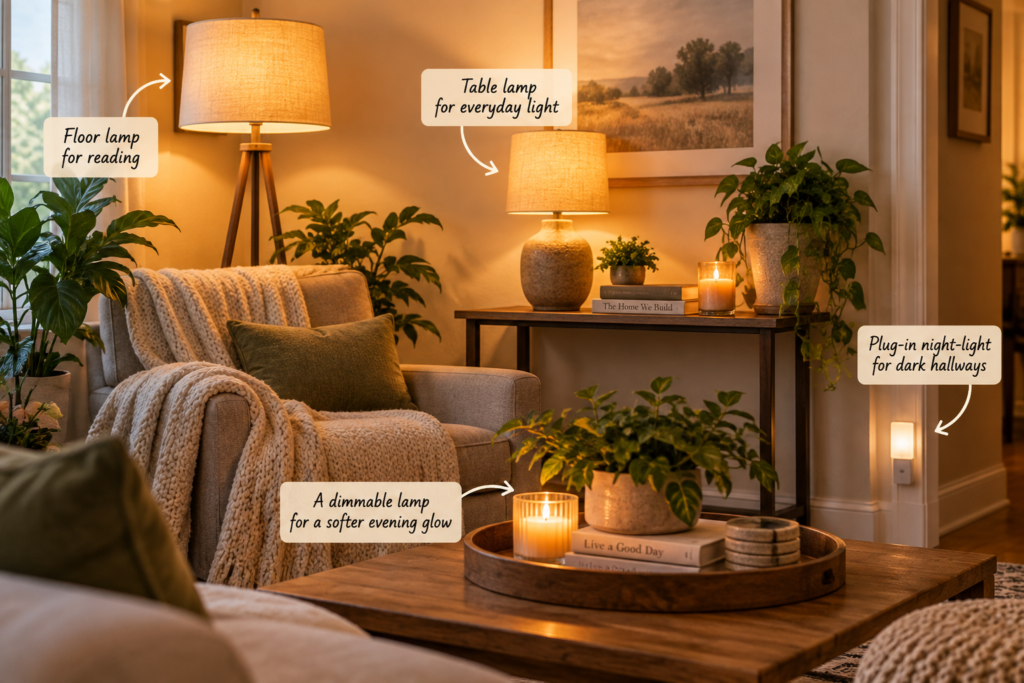
Try using light at different heights:

  • A floor lamp beside a reading chair
  • A table lamp on a stable side table or dresser
  • A small plug-in night-light for a dark hallway
  • Under-cabinet lighting in a kitchen work area
  • A dimmable lamp near a sofa or bed

Warm-looking light is a common design choice for creating a softer evening atmosphere. The U.S. Department of Energy notes that some dim-to-warm LED products begin around 2700 to 3000 kelvin and become warmer in appearance as they dim, with certain products reaching about 1800 kelvin—similar to candlelight. If you prefer that look, a dim-to-warm LED option can add atmosphere without adding another decorative item.

Renters don’t need to rewire anything to make this work. Plug-in lamps, battery-operated puck lights in dark cabinets, and bulbs that fit existing fixtures can all make a difference. The goal isn’t to keep your home dim all the time. It’s to give yourself better options than “bright enough for surgery” or complete darkness.

Clear the Visual Noise Before Adding Texture

Texture is one of the easiest ways to make a home feel cozy, but it works best when it has room to be noticed. A soft throw, woven shade, wooden tray, or fabric headboard can get lost when every surface is already crowded.

Rather than buying new accents, start by editing what’s visible. This doesn’t mean stripping your home until it looks like nobody enjoys anything. It means keeping the items that make a room feel personal and putting away the extras that create visual static.

A useful approach is to choose a few “comfort anchors” for each room. These are the things that make the space feel like yours: a favorite quilt, a framed family photo, a piece of art, a few books you’re currently reading, or a handmade bowl used for keys.

Everything else should earn its place by being useful, meaningful, or genuinely pleasing to look at.

In a small room, this might mean displaying one meaningful object on a shelf instead of arranging seven tiny ones. In a larger home, it could mean leaving breathing room on a mantel or console table instead of filling every inch. Empty space isn’t unfinished. It gives your favorite things a chance to feel intentional.

Use Softness Where It Helps Most

Cozy textures don’t require a mountain of throw pillows. The most useful soft elements are the ones that improve comfort where you already spend time.

A washable throw blanket on the sofa can make movie night more comfortable. Curtains can soften a bedroom and define the window area. A fabric basket can hold blankets you regularly use. A cushioned bench may make sense near an entry if it gives you a stable place to sit while putting on shoes.

Choose materials that suit your household and your tolerance for maintenance. A beautiful cream-colored knit blanket may not be the best choice if it will spend most of its life under a shedding pet or beside a toddler with crackers. There’s no prize for choosing the most delicate textile in the room.

For a lower-cost refresh, try rearranging textiles you already own:

  • Move a spare quilt from a closet to the back of the sofa.
  • Use coordinating pillow covers from another room.
  • Fold an extra towel neatly in a guest bathroom.
  • Put a washable runner where bare floors feel cold, as long as it lies flat and stays secure.
  • Bring out a tablecloth for meals or weekend gatherings instead of leaving it on the table year-round.

Softness works when it’s accessible and easy to care for. If every cozy item needs special laundering, constant fluffing, or a complicated storage plan, it may create more work than comfort.

Keep Floors and Walkways Open

An open path through a room can make it feel calmer almost immediately. It also matters for everyday safety. Extra stools, floor baskets, stacks of magazines, loose charging cords, and small rugs can slowly turn a comfortable room into an obstacle course.

Make Your Home Feel Cozy

The CDC’s home fall-prevention guidance recommends keeping floors clear, securing or removing throw rugs, and ensuring lights are easy to reach. Those basics are especially important in homes with older adults, young children, people with low vision, or anyone with mobility concerns. They’re also useful for anyone who has tried to walk through a dark hallway while carrying laundry.

If you use rugs, choose them deliberately. One larger rug that lies flat and is properly secured often works better than several small, loose rugs scattered around the room. Avoid placing a rug where its edge will curl, slide, or catch underfoot.

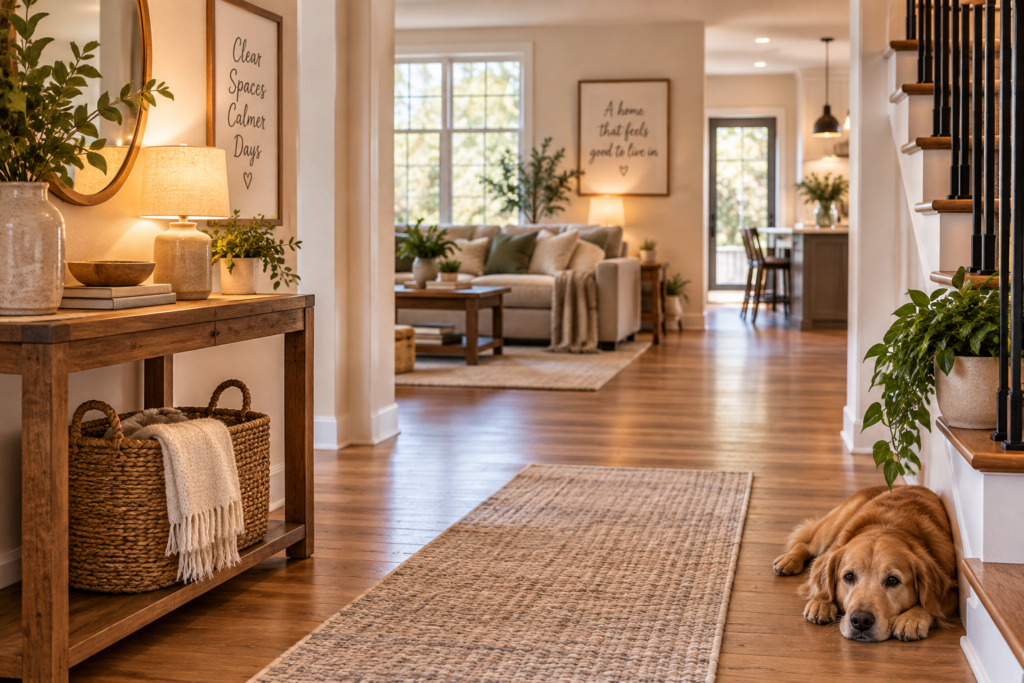
Look at the routes you use every day: from the bed to the bathroom, from the sofa to the kitchen, and from the front door to wherever bags and shoes tend to land. These paths don’t need to be wide and empty like a hotel lobby. They just need to be clear enough for normal life.

That openness can make a home feel more peaceful than another piece of furniture ever could.

Make Daily Essentials Easier to Put Away

Clutter often appears when frequently used items don’t have an easy landing spot. This isn’t a character flaw. It’s usually a systems problem.

If mail always piles up on the kitchen counter, a giant decorative bowl may hide it for a day or two, but it won’t solve the issue. A better fix might be one small tray for incoming mail, paired with a regular time to sort it. If shoes gather by the door, a narrow shoe rack or designated mat may be more useful than a decorative basket that overflows by Thursday.

The key is to contain only what needs to live in that area. Storage should reduce loose items, not give every random object a prettier place to multiply.

Consider the friction points in your home:

  • Where do coats, bags, and shoes land?
  • Which surfaces collect chargers, receipts, and mail?
  • What gets left out because putting it away takes too many steps?
  • Which items are used daily but stored too far from where they’re needed?

A small solution may be enough. A hook behind a door, a drawer divider, a lidded box for remote controls, or a tray by the entry can reduce clutter without changing the room’s appearance much at all.

Maintenance matters here, too. Choose systems you can reset in a minute or two. A complicated organizing method is unlikely to survive a busy week, and that isn’t a moral failure. It’s just a sign that the system asks too much.

Add Personal Touches, Not Random Filler

A cozy home should feel lived in, not generic. Personal items can create that feeling without requiring dozens of accessories.

Display things you already have a connection to: a framed postcard from a trip, a child’s drawing, a record you love, a ceramic mug collection you actually use, or a favorite cookbook on a kitchen stand. These details add warmth because they tell a small story.

The trick is editing. You don’t need every sentimental object visible at once. Rotating a few pieces seasonally—or whenever you feel like a change—can keep your home personal without making it feel crowded.

Wall space can be especially helpful in small homes because it adds character without taking up valuable surfaces. One larger piece of art, a simple gallery of meaningful photos, or a wall-mounted shelf for a few favorite books can bring life to a room while leaving tables and counters open.

For renters, removable picture-hanging products or framed art placed on a sturdy dresser can offer flexibility. Make sure any leaning piece is stable and unlikely to fall, especially in a high-traffic area.

Treat Scent and Candlelight as Optional Extras

Scent can be pleasant, but it isn’t required for a cozy home. Fresh air, clean textiles, and a kitchen that is reasonably under control can be plenty. If you enjoy fragrance, use it in a way that suits your household, keeping in mind that guests and family members may have sensitivities or simply different preferences.

Candles deserve a little more care than their cozy reputation sometimes gets. Flameless candles can create a warm glow without an open flame. If you use real candles, the National Fire Protection Association advises keeping them at least 1 foot away from anything combustible, placing them on a sturdy, uncluttered surface, and extinguishing them when you leave the room or go to bed. Its candle safety guidance also recommends flameless candles as an alternative.

In other words, a candle doesn’t need to be nestled into a tray of dried flowers, books, blankets, and decorative paper to look inviting. It needs space. Cozy should never come with a fire hazard.

Build in a Gentle Reset

A comfortable home doesn’t stay that way because someone maintains it perfectly. It stays workable because it has a few simple reset habits.

Try a short evening reset in the rooms you use most. Put cups in the kitchen, return remotes to one spot, fold the blanket, clear the main walkway, and move anything that obviously belongs elsewhere. Even five or ten minutes can make the next morning easier.

The goal isn’t spotless. A home can have toys on the floor, dishes waiting to be washed, and a chair with a sweater on it while still feeling warm and welcoming. The reset simply prevents small piles from becoming permanent furniture.

If daily tidying isn’t realistic, choose a rhythm that fits your life: once every few days, before company comes over, or on the weekend. A cozy home should support your routine, not demand a new personality.

Final Thoughts

Making your home feel cozy without adding clutter is mostly about noticing what already helps you feel comfortable. Better lighting, clearer surfaces, practical storage, soft layers, and a few personal touches can make a bigger difference than another cart full of décor.

Start with one room and one change that makes everyday life easier. The coziest spaces aren’t perfectly styled. They’re the ones where you can settle in, find what you need, and relax without moving three decorative pillows first.

You Might Also Enjoy

Spa-Inspired Bathroom
House & Home

How to Create a Spa-Inspired Bathroom on a Small Budget

A spa-inspired bathroom doesn’t require a marble renovation, a rainfall showerhead, or a basket full of products you’ll forget to use by February. The feeling comes from a few simple things working together: softer light, less visual clutter, clean textiles, and small comforts that make an ordinary routine feel less rushed.

This can be an especially useful refresh before a busy holiday season, when guests may visit and the house starts collecting extra stuff at an alarming rate. It also works beautifully as a quieter reset after the holidays, when a calm bathroom can feel like a tiny rebellion against the wrapping paper, laundry, and general chaos of real life.

The goal isn’t to make your bathroom look like a hotel brochure. It’s to make it feel cleaner, calmer, and more pleasant to use—without creating a shopping list that defeats the whole point.

Affiliate disclosure: This article contains affiliate links. If you make a purchase through one of these links, I may earn a commission at no additional cost to you. As an Amazon Associate I earn from qualifying purchases.

Start With What Needs Attention Most

Before buying anything, take a practical look at the room. A spa-inspired bathroom is less about adding décor than removing the things that make the space feel busy or neglected.

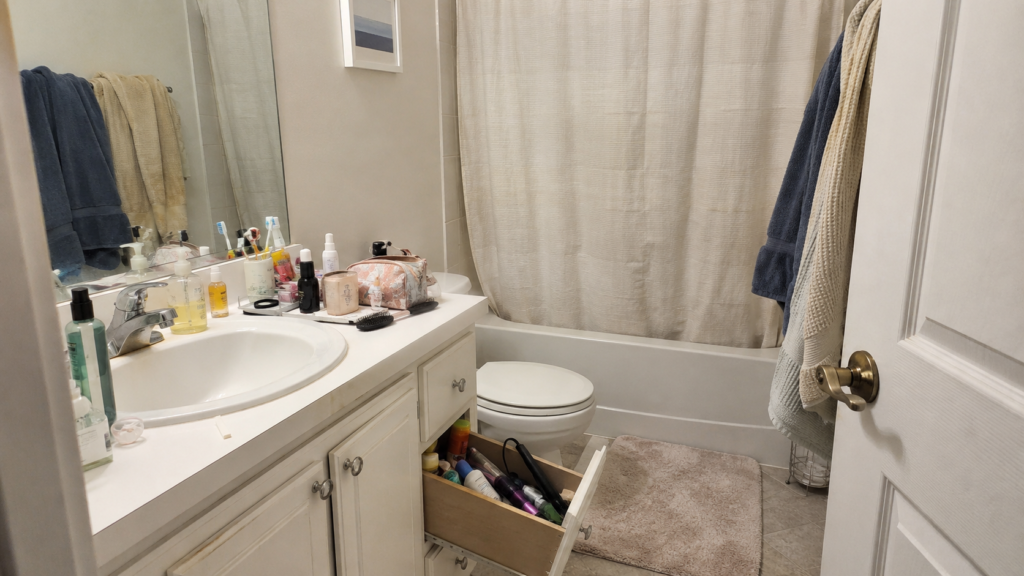
Spa-Inspired Bathroom_cluttered

That may mean dealing with a shower curtain that has seen better days, a counter crowded with half-used bottles, or towels that are technically still towels but no longer feel particularly welcoming. In a small bathroom, every visible item has more impact, so a quick edit can change the mood faster than a major project.

Focus first on the essentials:

  • Clear expired or unused toiletries from cabinets and drawers.
  • Put daily-use items in one tray, basket, or small container rather than scattering them across the counter.
  • Wash bath mats, towels, and shower curtains if they’re still in good condition.
  • Deep-clean the sink, mirror, grout, faucet, and drain area.
  • Replace anything that affects comfort or hygiene, such as a worn toilet brush, cracked soap dish, or musty bath mat.

This is also a good time to think about household routines. If several people use the bathroom, an elaborate arrangement of matching jars may not survive until lunchtime. Choose organization that works for the people who actually live there. A labeled basket for hair tools or a simple drawer divider can be more useful than a countertop display that requires everyone to behave as if they’re checking into a boutique hotel.

Build the Look Around a Calm, Simple Color Palette

Small bathrooms usually feel more restful when the color scheme stays limited. That doesn’t mean everything has to be white, beige, or suspiciously similar to oatmeal. It simply means choosing a few colors that work together rather than bringing home every appealing item from the home aisle.

Start with the colors already present in the tile, flooring, cabinetry, or paint. Then use towels and accessories to create a more intentional look. Soft neutrals, muted greens, pale blue-grays, warm terracotta, charcoal, or navy can all feel spa-like, depending on the room.

For a low-cost update, try this approach:

  • Choose one main towel color.
  • Add one accent shade with a hand towel, soap dispenser, or small storage basket.
  • Keep most other visible items neutral or clear.
  • Use natural-looking materials, such as wood, cotton, woven fiber, ceramic, or glass, where practical.

Fresh white towels can create a classic hotel-style effect, but they aren’t the only option—and they may not be the easiest choice in a household with children, pets, makeup experiments, or hair-dye adventures. A deeper neutral or medium-toned towel can still look polished while being a little more forgiving.

If repainting is within your budget, a soft wall color can make a major difference. But paint is optional. In a rental or a bathroom you don’t want to overhaul, textiles and storage can provide plenty of visual change without turning the refresh into a full project.

Upgrade the Textiles Before the Décor

If your budget allows for only one or two purchases, put them toward items you touch every day. A soft bath mat and better towels do more for the spa feeling than a shelf full of decorative Ta

Take a look at this soft bath mat

Look for towels that feel comfortable and suit your laundry routine. A coordinated set isn’t necessary; even two matching bath towels and a couple of hand towels can make the room feel more pulled together. Consider keeping older, less attractive towels for cleaning, pet care, or messy hair-color days rather than throwing them out immediately.

A shower curtain is another high-impact upgrade, particularly in a compact bathroom where it takes up a large amount of visual space. A plain fabric curtain, subtle stripe, waffle texture, or quiet botanical pattern can soften the room without making it feel overly themed.

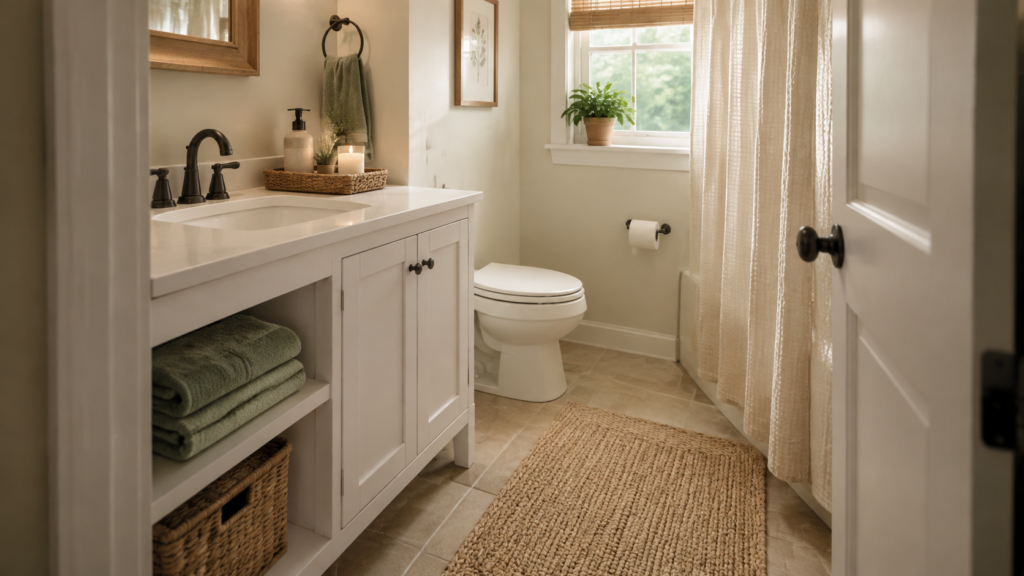
For the floor, choose a bath mat that is easy to wash and dries reasonably well in your space. Plush mats feel lovely, but they may not be practical in a bathroom with limited ventilation. A simple cotton mat, low-pile option, or washable woven rug can offer the same sense of comfort with less lingering dampness.

When guests are expected for a holiday gathering or weekend visit, set out clean hand towels and make sure there’s an extra roll of toilet paper within easy reach. It’s a small detail, but it helps people feel welcome without turning your bathroom into a staged showroom.

Make Storage Feel Intentional, Not Overdecorated

The most relaxing bathrooms tend to have clear surfaces. That doesn’t mean every product must disappear into a drawer; daily necessities deserve a convenient home. The trick is containing them.

A small tray can hold hand soap, lotion, and a candle or small vase. A lidded basket can hide extra toilet paper or cleaning cloths. A clear container can corral cotton pads, bath salts, or other frequently used items—but only if you’ll actually use what’s inside. There’s no rule saying every bathroom needs decanted cotton balls. Sometimes the original package is fine.

In a very small space, vertical storage is often more helpful than adding furniture. Consider:

  • Adhesive hooks for robes, towels, or a shower squeegee
  • A narrow over-the-toilet shelf or cabinet, if it fits safely
  • A slim rolling cart for a bathroom with limited cabinet space
  • Drawer organizers for makeup, skincare, and grooming tools
  • A shower caddy that keeps bottles off the tub edge

Try to store backups out of sight when possible. Seeing six shampoo bottles, three spare tubes of toothpaste, and a bulk pack of toilet paper can make a room feel more like a supply closet. Useful? Absolutely. Serene? Less so.

For seasonal hosting, create one small guest basket if it would make visitors more comfortable. Include practical items such as extra soap, tissues, menstrual products, toothpaste, or travel-size basics you already have. There’s no need to buy a pile of novelty toiletries or make guests feel as if they’ve entered a gift shop.

Use Lighting to Change the Mood

Bathroom lighting is often designed for practicality, not ambiance. Bright overhead lighting helps with shaving, makeup, and the occasional close inspection of a questionable skin situation. It doesn’t always encourage relaxation.

Rather than replacing fixtures, which can become expensive quickly, add softer light around the edges. A small lamp placed safely away from water, a battery-operated candle, or a warm-toned night-light can make evening baths and early mornings feel less harsh.

If you use candles, keep safety first: place them on a stable, heat-safe surface away from towels, paper, shower curtains, and curious pets or children. Flameless candles offer a similar glow with less worry and can be especially handy during holiday gatherings, when the house is already full of distractions.

Try the Spa Day candle

Natural light helps, too. Keep windows clean and avoid heavy treatments that block daylight unless privacy requires them. A moisture-tolerant window covering in a light color can preserve privacy while keeping the room from feeling closed in.

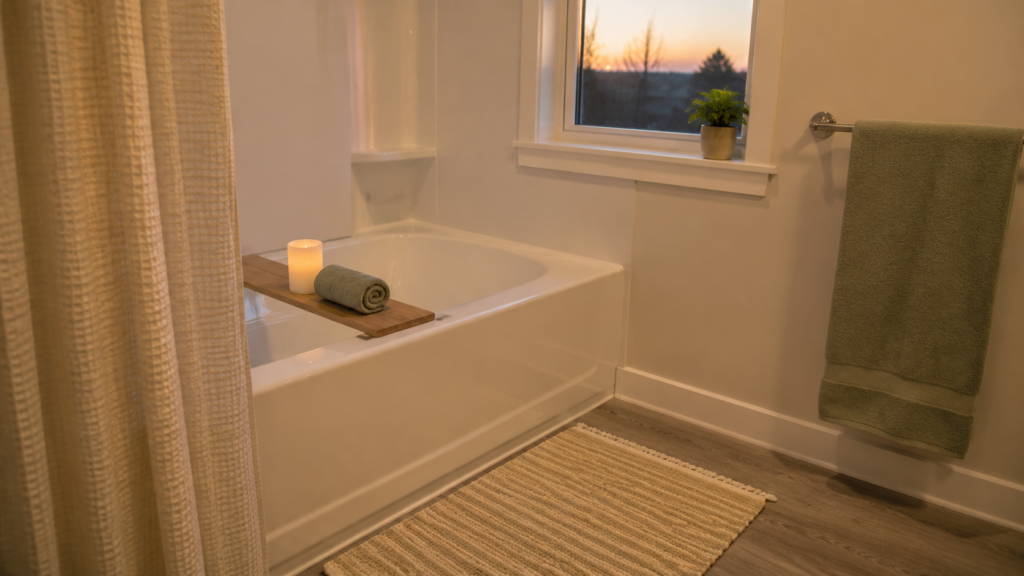
Spa-Inspired Bathroom_soothing

Add One or Two Sensory Details

A spa-inspired bathroom should feel good, but it doesn’t need to smell like twelve competing essential oils. A lighter approach is usually more inviting, especially for guests or family members who are sensitive to fragrance.

A single scented soap, a modest reed diffuser, or a lightly fragranced lotion may be enough. Fresh eucalyptus can look lovely in a shower, but it’s optional and should be replaced before it becomes dry, dusty décor. A small plant can bring life and color, provided your bathroom’s light and humidity suit it. If not, there’s no shame in choosing a realistic faux plant or skipping greenery altogether.

Other low-cost sensory upgrades include:

  • A wooden bath brush or simple washcloths
  • A small stool or tray for holding a book, drink, or bath products during a soak
  • A comfortable robe or pair of washable slippers
  • A speaker for quiet music, podcasts, or absolutely nothing—which is also a valid luxury

Keep surfaces manageable. One plant, one tray, and one useful basket can feel intentional. Ten little objects tend to feel like something that needs dusting.

Plan a Refresh That Matches Your Budget

A calming bathroom update can happen in stages. There’s no need to replace everything at once, especially before a holiday season when your spending may already be focused elsewhere.

With a very small budget, concentrate on cleaning, decluttering, laundering textiles, and rearranging what you own. Decanting isn’t necessary, but grouping items in containers you already have can make the counter look more orderly. A fresh hand soap, a new washcloth set, or a thrifted tray may be all the “new” the room needs.

With a moderate budget, prioritize a shower curtain, bath mat, towels, simple storage, and one lighting or fragrance detail. These items are visible, practical, and likely to make the biggest day-to-day difference.

If you have more room in the budget, consider improvements that solve a real annoyance: better shelving, updated hardware, a mirror with more useful lighting, or a fresh coat of bathroom-friendly paint. Aim for changes that will still serve you after the season ends rather than holiday-specific décor that requires another storage bin in the garage.

Keep the Spa Feeling Going After the Refresh

The less complicated your setup, the easier it is to maintain. A five-minute reset once or twice a week can prevent the room from drifting back into cluttered-counter territory. Hang towels to dry, return products to their designated spots, wipe down the sink, and keep a small supply of cleaning essentials nearby.

After guests leave or the holiday season winds down, use up opened products before buying more. Wash and store any extra guest towels, recycle empty containers, and return seasonal touches to storage only if you genuinely look forward to using them again. A calm bathroom shouldn’t create a new clutter problem in the name of relaxation.

Final Thoughts

Creating a spa-inspired bathroom on a small budget is really about making everyday care feel a little easier. Clean towels, softer lighting, useful storage, and fewer distractions can go a long way, even in the smallest room in the house.

Choose the changes that make your own routine better, whether that means a fresh bath mat, a clearer counter, or simply a few quiet minutes behind a closed door. That counts as a luxury, too.

You Might Also Enjoy

Keep on the Counter
House & Home

What to Keep on the Counter in a Small Kitchen—and What to Store Away

A small kitchen counter can become crowded surprisingly fast. One coffee maker turns into a coffee station, a toaster collects crumbs in the corner, and suddenly there’s nowhere to chop an onion without balancing a cutting board over the sink. The goal isn’t to make your kitchen look like no one cooks there. It’s to make the space work for the way you actually cook.

The best things to keep on the counter are items you use often enough to justify their footprint. Everything else can earn a cabinet, drawer, shelf, or pantry spot. That little bit of editing makes everyday cooking easier, speeds up cleanup, and keeps your kitchen from feeling like a game of appliance Tetris.

Affiliate disclosure: This article contains affiliate links. If you make a purchase through one of these links, I may earn a commission at no additional cost to you. As an Amazon Associate I earn from qualifying purchases.

Start With the Counter Space You Actually Have

Before deciding what stays out, take a realistic look at your usable workspace. A counter next to the stove may be technically available, but if it gets splattered with oil every time you sauté, it’s not the ideal home for a blender base or bowl of fruit. Likewise, the strip beside the sink is often valuable for washing and prep, even if it seems like a convenient place to park dishes forever.

In a small kitchen, it helps to think of the counter in zones:

  • Prep zone: Ideally near the sink, where you can wash produce, chop ingredients, and set out mixing bowls.
  • Cooking zone: The area closest to the stove, useful for utensils and ingredients you need while cooking.
  • Drink zone: Often where a coffee maker, electric kettle, or water filter works best.
  • Landing zone: A small designated place for groceries, mail, or items that need to be put away—not a permanent pile with its own weather system.

Try to preserve at least one clear section for meal prep. It doesn’t need to be huge. Even a cutting-board-sized open area makes weeknight cooking feel much more manageable. If every inch is occupied by appliances and containers, putting together a simple meal becomes unnecessarily annoying.

Keep Daily-Use Appliances Within Reach

Countertop appliances deserve space when they genuinely earn it. The simplest rule is this: If you use an appliance most days or several times a week, keeping it out can make sense. If it comes out twice a year for a specific recipe, it probably doesn’t need front-row seating.

A coffee maker is the classic example. If coffee is part of your morning routine, storing it in a cabinet between uses creates extra steps for little benefit. The same can apply to an electric kettle if you regularly make tea, oatmeal, instant soup, or pour-over coffee.

A toaster may also be worth keeping on the counter, especially in a household where toast, bagels, frozen waffles, or reheated pastries are frequent breakfast players. Leave enough clearance around it, follow the manufacturer’s placement guidance, and empty the crumb tray regularly. Crumbs have an impressive ability to migrate into places they were never invited.

A blender, stand mixer, air fryer, or food processor is more situational. These can be helpful tools, but they take up substantial physical and visual space. Consider keeping one out only if it matches your regular cooking habits:

  • Keep a blender out if you often make smoothies, sauces, soups, or dressings.
  • Keep a stand mixer out if you bake regularly and have a stable corner where it won’t interfere with prep space.
  • Keep an air fryer out if it’s one of your primary cooking tools, not just something you rediscover when you want crispy leftovers.
  • Store a food processor away unless you use it frequently for chopping, shredding, dips, doughs, or sauces.

If you’re uncertain, put an appliance away for two weeks. If you pull it out repeatedly, it has made its case. If you forget it exists, the cabinet was probably the right call.

Keep the Cooking Basics Handy, But Don’t Build a Countertop Store

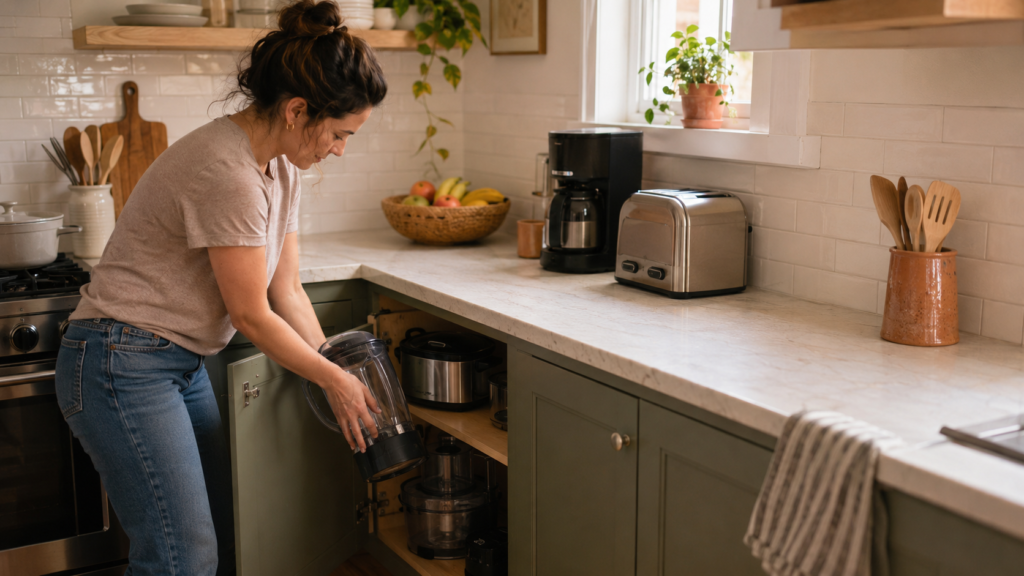
Keep on the Counter_clutter

A few cooking essentials can make your kitchen more functional when they stay close to the stove. A small container of frequently used utensils—such as a spatula, wooden spoon, tongs, and ladle—can save you from rummaging through a drawer while something is sizzling.

Choose a utensil crock or holder that’s easy to wash and large enough that the tools don’t jam together. Overstuffed containers defeat the purpose; you’ll still be digging around for the one turner that isn’t coated in mystery residue from last Tuesday’s pasta night.

A small bottle of cooking oil can also be practical if you use it regularly. Keep it away from direct heat and sunlight when possible, and wipe the outside occasionally. Oil bottles tend to develop a slippery film over time, particularly near a busy range.

Salt and pepper can stay out if you use them constantly, but avoid displaying an entire seasoning collection unless your kitchen has generous counter space. Spices lose quality faster when exposed to heat, humidity, and direct sunlight, so the area above or beside the stove is usually not the best long-term storage spot. A drawer, cabinet, or pantry shelf offers more protection and makes cleaning around the cooktop easier.

The same goes for knife blocks. They can be convenient, but they occupy valuable space and collect dust and crumbs around the slots. If counter space is tight, a drawer insert, a wall-mounted magnetic strip installed safely away from small children, or cabinet-mounted knife storage may be a better fit. Whatever method you use, make sure the blades are protected and dry rather than loose in a drawer.

A Few Food Items Belong Out—With Some Boundaries

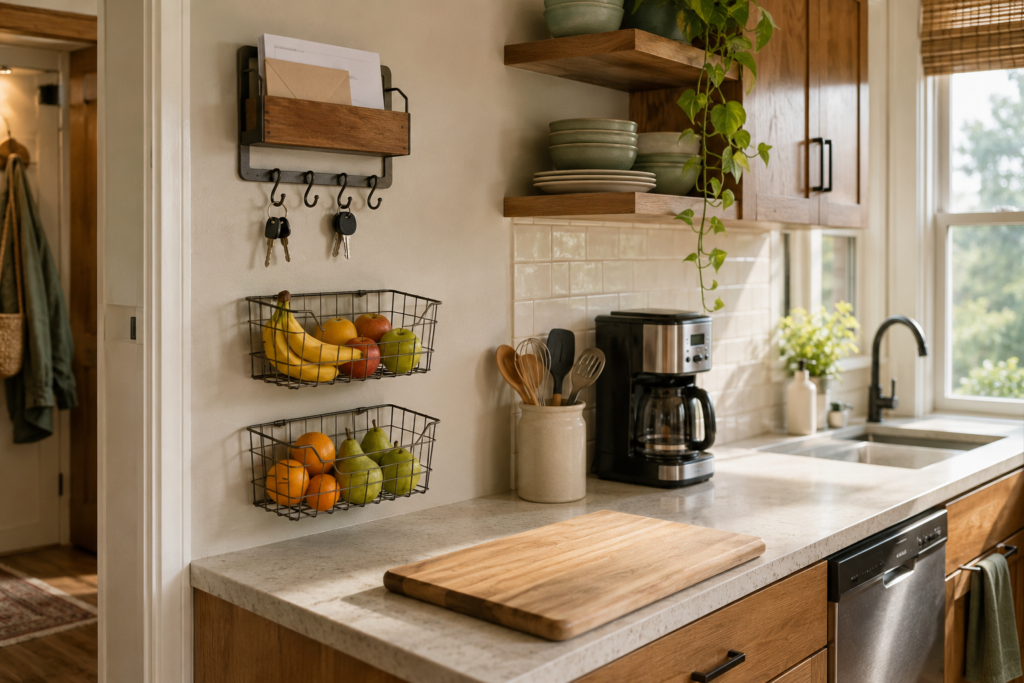
Not all food needs to disappear into the pantry. A fruit bowl can be useful and inviting, especially for produce that can ripen at room temperature, such as bananas, avocados, peaches, pears, and tomatoes. Seeing fruit may also make you more likely to eat it before it becomes an accidental science project.

That said, a fruit bowl or wall-basket isn’t the right answer for every piece of produce. Many fruits last longer in the refrigerator once ripe, and some release ethylene gas that can speed up ripening in nearby items. Bananas, apples, pears, and avocados are common ethylene producers. Separating them from ethylene-sensitive produce can help reduce premature spoilage.

Potatoes, onions, garlic, and winter squash are generally best kept in a cool, dry, dark place with airflow. The counter may work only if it stays relatively cool and out of direct sunlight. Store potatoes and onions separately, as keeping them together can shorten their storage life. A ventilated basket or bin in a pantry or suitable cabinet is usually more practical than a prominent counter display.

Bread can stay on the counter in a bread box or bag if you’ll use it within a few days. Keep it dry and away from heat. For longer storage, freezing bread is often more practical than refrigerating it, which can cause it to stale faster. Sliced bread can usually be toasted straight from frozen, one of those small kitchen wins that feels oddly satisfying.

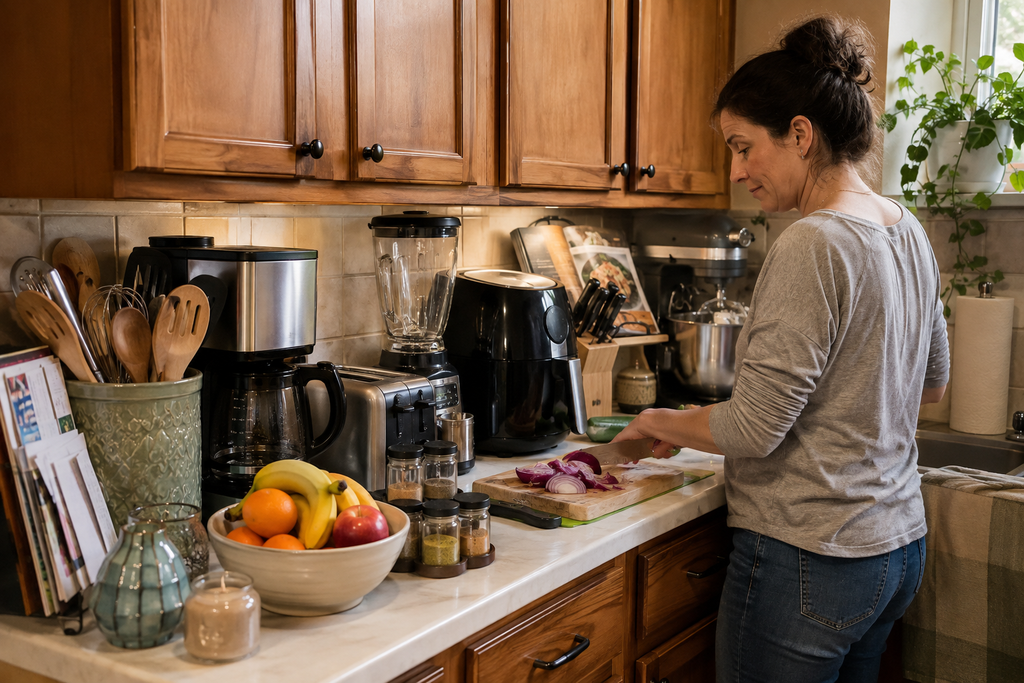
Keep on the Counter_clear the clutter

Store Away the Appliances With Occasional Jobs

Small kitchens benefit from being honest about “someday” tools. A waffle maker, panini press, slow cooker, rice cooker, ice cream maker, and electric griddle may all be useful, but usefulness alone doesn’t mean they need to live on the counter.

Store occasional appliances where you can still reach them without an archaeological dig. A lower cabinet, pantry shelf, or labeled bin works well for heavier pieces. If lifting a bulky appliance from a high shelf feels awkward or unsafe, choose a lower spot instead. Convenience matters, but so does not dropping a slow cooker on your toes.

Before putting an appliance away, let it cool completely, clean it according to its care instructions, and dry all removable parts thoroughly. Trapped moisture can lead to unpleasant odors or mildew, particularly in appliances with lids, seals, or narrow crevices.

It’s also worth keeping cords tidy. A simple hook-and-loop strap, built-in cord wrap, or loose loop secured with a reusable tie can prevent the cabinet from turning into a knot of power cords and grudges.

Move Paper, Packaging, and Decorative Extras Off the Work Surface

Some counter clutter has nothing to do with cooking. Mail, school papers, charging cables, prescription bottles, reusable shopping bags, and unopened packages often land in the kitchen because it’s the center of household traffic. Understandable. Still not helpful when you need room to roll dough.

A small tray can create a temporary landing spot for items that genuinely need attention soon. The key word is temporary. Sort it regularly so it doesn’t become a decorative basket of postponement.

Decor can also take up more room than expected. A candle, oversized vase, cookbook stand, faux plant, framed sign, and decorative tray may each seem harmless, but together they can consume the last usable stretch of counter. In a small kitchen, one or two decorative elements are usually enough. A bowl of fruit, a small plant placed safely away from the stove, or a favorite ceramic utensil holder can add warmth without sacrificing function.

Cookbooks are best stored on a shelf unless you actively use one throughout the week. If you like cooking from a book, pull it out for the recipe and return it when you’re done. That also protects it from splashes, flour dust, and the inevitable sauce drip.

Make Cleaning Easier by Leaving Some Breathing Room

An uncluttered counter isn’t just about appearances. It’s easier to clean thoroughly, which matters when you handle raw meat, eggs, unwashed produce, or messy ingredients. A crowded surface makes it harder to wipe up spills promptly and easier for crumbs, grease, and moisture to collect behind appliances.

Before preparing food, clear away nonessential items. Wash your hands, clean the counter, and use separate cutting boards for raw meat and ready-to-eat foods, or wash boards thoroughly between uses. Don’t put grocery bags, phones, or mail in the middle of your prep area. Those items travel through the world collecting whatever the world has to offer, and your dinner doesn’t need to meet all of it.

For everyday maintenance, wipe the counter after cooking and periodically move countertop appliances to clean underneath them. Check the manufacturer’s instructions before using cleaning products on appliance exteriors, natural stone, wood, or specialty finishes. A damp cloth and mild dish soap are often enough for routine messes, followed by a dry cloth where needed.

Let Your Kitchen Habits Decide

There isn’t one perfect list of what to keep on the counter in a small kitchen. If you bake bread every weekend, you may want a stand mixer within reach. If you mainly make simple stovetop meals, you may get more value from a clear prep area, a utensil holder, and a kettle.

Before an item claims permanent counter space, ask a few practical questions: Do you use it at least weekly? Is it difficult or unsafe to retrieve from storage? Does it make cooking easier enough to justify the space it takes? Can you clean around it without a hassle?

If the answer is mostly no, store it away. That doesn’t mean you made a bad purchase or need to get rid of it. It simply means your counter has a more important job.

Final Thoughts

A small kitchen works better when the counter supports your next meal rather than displaying every tool you own. Keep out the things that make your daily routine smoother, and give everything else a clean, accessible home.

The goal isn’t a bare showroom kitchen. It’s a kitchen with enough room to make coffee, chop vegetables, plate dinner, and maybe set down a grocery bag without triggering a minor avalanche.

You Might Also Enjoy

Pull-Out Cabinet Shelves vs. Shelf Risers
House & Home

Pull-Out Cabinet Shelves vs. Shelf Risers: Which Creates More Usable Space in a Small Kitchen?

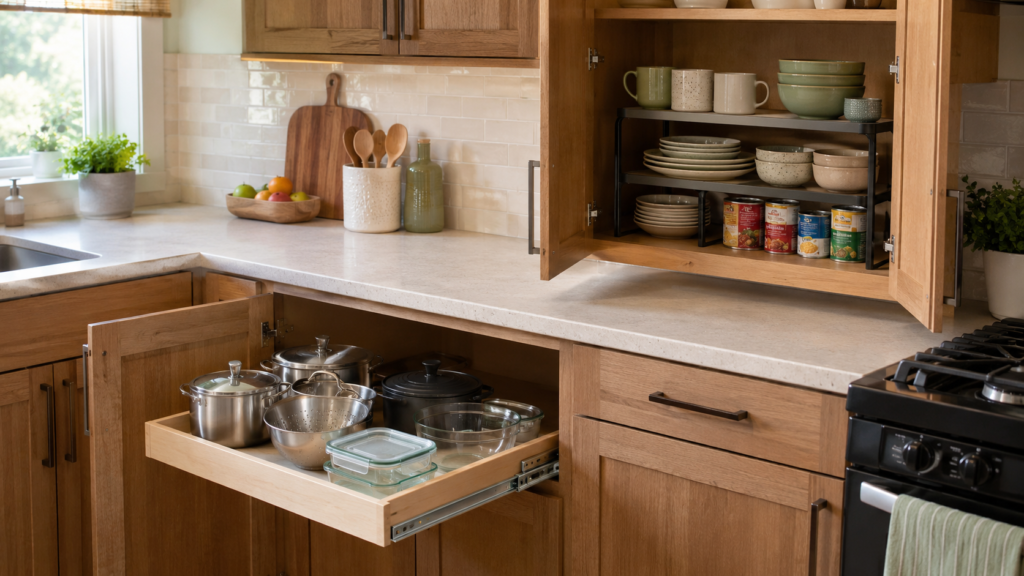
Small kitchens rarely lack shelves; they lack reachable shelves. That’s why pull-out cabinet shelves and shelf risers are so often compared. Both can make a cramped cabinet more useful, but they solve different problems: one improves access to items in the back, while the other creates an extra level for things that would otherwise form a slightly alarming stack.

The better choice depends on what you store, how often you cook, and whether you’re ready to modify your cabinets. Pull-out shelves can turn deep lower cabinets into accessible storage, while shelf risers offer a simpler way to divide vertical space in upper cabinets, pantries, and even on counters. Neither is magic, sadly. But either can stop the “Where did that pan go?” routine.

Affiliate disclosure: This article contains affiliate links. If you make a purchase through one of these links, I may earn a commission at no additional cost to you. As an Amazon Associate I earn from qualifying purchases.

Comparison Overview

Pull-out cabinet shelves are trays or shelves installed inside a cabinet that slide forward on hardware. They are most useful in deep cabinets where canned goods, cookware, small appliances, or food containers tend to disappear behind whatever is in front. By bringing the contents toward you, they reduce reaching, kneeling, and unloading half the cabinet just to find one ingredient.

Shelf risers are freestanding platforms that sit on an existing shelf and create a second tier. They work best for shorter items such as mugs, bowls, plates, canned food, spices, snack boxes, and food-storage containers. They don’t pull anything closer, but they can prevent wasted air space above a short stack of dishes or pantry staples.

Side-by-Side Comparison

CriteriaPull-Out Cabinet ShelvesShelf Risers
Main purposeImproves access to items stored deep inside cabinetsCreates an additional level of vertical storage
Best cabinet locationDeep lower cabinets, pantry cabinets, and hard-to-reach shelvesUpper cabinets, shallow pantry shelves, and open shelving
InstallationUsually requires measuring and mounting hardwareGenerally sits directly on an existing shelf
AccessibilityBrings stored items forward for easier viewing and retrievalMakes stacked items easier to separate, but items in the back may still be hard to reach
Storage strengthsPots, pans, small appliances, dry goods, containers, and heavier everyday items when properly supportedMugs, dishes, canned goods, snack items, spices, and shorter containers
FlexibilityMore permanent once installed, though some systems can be adjusted or removedEasy to move, reposition, or reuse in another cabinet
Impact on shelf heightUses some vertical clearance for the shelf and sliding hardwareRequires enough room above and below the riser to make both levels practical
Cleanup considerationsCrumbs and spills can collect in the tray and around slide hardwareEasy to lift out and wipe down along with the cabinet shelf

Key Differences

Access Versus Extra Vertical Space

The biggest difference is simple: pull-out shelves improve access, while shelf risers improve vertical organization. A pull-out shelf is especially helpful when your cabinet is deep enough for items to migrate toward the back and establish a new life there. Instead of reaching over front-row cookware, you slide the contents toward you.

A shelf riser does not fix a deep-cabinet problem. It can make the front portion of a cabinet more organized, but it won’t bring that forgotten bag of rice forward. Its strength is preventing short items from sitting beneath a large pocket of unused space.

Installation Commitment

Shelf risers are the low-commitment option. Most require no drilling, hardware, or cabinet modifications. You measure your shelf, choose a riser that fits, place it inside, and reorganize. If your mugs turn out to be too tall or your cabinet isn’t as roomy as it looked in your imagination, you can move the riser elsewhere.

Pull-out cabinet shelves demand more planning. You’ll need accurate interior cabinet measurements, including width, depth, door clearance, hinges, and any obstructions. Some installations may be manageable as a DIY project, while others may be better handled by a cabinet professional. The prep matters because a poorly fitted pull-out shelf is just an expensive drawer that refuses to cooperate.

What They Can Store Well

Pull-out shelves suit a wide range of kitchen storage needs. They can make everyday cookware, baking dishes, mixing bowls, dry goods, and food containers easier to access. In lower cabinets, they can be particularly useful for heavier items that are awkward to retrieve from a low, deep shelf.

Shelf risers are better for lighter, stackable, or easily visible items. Think drinking glasses, bowls, canned tomatoes, tea boxes, lunch containers, or rows of spices. They are not always ideal for large pots, tall bottles, or bulky appliances because those items can make the levels feel cramped or unstable.

Space Efficiency Depends on the Cabinet

A riser may create more usable space in an upper cabinet that holds mugs or dishes because it divides open vertical space into two practical levels. If the shelf is tall enough, one riser can make room for two neat rows where there was previously one short stack and a lot of empty air.

In a deep lower cabinet, however, a pull-out shelf may create more usable space even if it does not add another level. A cabinet packed from front to back is not particularly helpful if you can reach only the first few items without crouching and excavating. Pull-outs make the cabinet’s full depth easier to use.

Cabinet Compatibility and Clearance

Shelf risers require enough height to work. A riser that technically fits but leaves only an inch or two above the lower level won’t help much. Before choosing one, measure the cabinet’s interior height and the items you plan to store.

Expandable adjustable stackable kitchen cabinet organizer

Pull-out shelves require different kinds of clearance. The cabinet needs enough interior width and depth for the shelf and its sliding mechanism, and the door must open wide enough for the shelf to extend. Face-frame cabinets, exposed hinges, plumbing, and fixed shelf supports can all affect compatibility. Measuring first is not glamorous, but neither is returning a storage solution that almost fits.

Performance and Everyday Use

Daily Cooking and Meal Prep

If you cook often, pull-out cabinet shelves can make daily kitchen work smoother. Keeping mixing bowls, pans, food containers, or dry ingredients on pull-outs means less reaching and rearranging before dinner. They are particularly useful when you use the same cabinet items several times a week.

Shelf risers work well for frequently grabbed pantry items and dishes. A riser can give breakfast bowls their own level, keep lunch containers from collapsing into a plastic avalanche, or make canned goods easier to scan. They are less useful in a cabinet full of large cookware, where the riser may simply get in the way.

Deep Cabinets and Low Storage

Deep, low cabinets are where pull-out shelves shine. Fixed shelves often force you to choose between storing items in front, where they’re accessible, or using the full depth and accepting that the back section may become a mystery zone. Pull-outs reduce that trade-off.

Expandable Pull Out Cabinet Organizer

Shelf risers can still help in lower cabinets, but only in certain situations. They may work for lightweight pantry goods or short containers if there is enough vertical room. They are usually less practical for heavy Dutch ovens, stacks of pans, or oversized serving pieces that need stable, open storage.

Upper Cabinets and Pantry Shelves

Upper cabinets often favor shelf risers because vertical space is commonly the issue. If one shelf holds short glasses, mugs, or small bowls with a large gap above them, a riser can help the cabinet hold more without making it feel overstuffed.

Pull-out shelves can work in pantry cabinets and some upper cabinets, especially when the shelves are deep. Still, their installation and added structure may not be necessary for a shallow cabinet. In that situation, a riser can provide a quicker, less involved improvement.

Flexibility for Changing Kitchens

Shelf risers are easy to adapt as your kitchen changes. You can move them from a dish cabinet to a pantry shelf or repurpose them outside the kitchen. This flexibility is useful for renters, temporary living arrangements, or anyone still figuring out how their kitchen works.

Pull-out shelves are more of a long-term organizational decision. They can be worthwhile when a cabinet has a clear, ongoing job, such as holding cookware or pantry staples. But if you frequently change cabinet layouts or expect to move soon, a removable riser may make more sense.

Durability and Maintenance

Pull-out cabinet shelves have more components to maintain. The shelf surface should be wiped regularly, especially if it holds dry goods, baking supplies, or containers that may leak. Sliding hardware can collect dust and crumbs over time, so it should stay clear of loose debris to keep the shelf moving smoothly. If a track, mounting point, or drawer mechanism becomes damaged, repairs may require replacement parts or more involved cabinet work.

Shelf risers are generally simpler to maintain because they have no moving parts. Most can be removed, wiped clean, and returned to the cabinet in minutes. Their long-term durability depends on the material, construction, and weight placed on them. Avoid overloading a riser or using it to support items that feel unsteady, particularly glassware or tall stacks of dishes. A simple organizer is helpful only until it becomes a tiny elevated hazard.

Cost and Overall Value

Shelf risers are often the better value when your main issue is wasted vertical space. They require little installation effort and can be moved if your needs change. For a cabinet of mugs, canned goods, or small dishes, a basic riser may solve the problem without turning it into a larger storage project.

Pull-out shelves can justify a higher investment when access is the bigger frustration. If you regularly struggle to reach cookware, pantry goods, or containers in the back of deep cabinets, better access may be more valuable than adding another shelf level. Their value increases when they improve a cabinet you use every day, not one reserved for the once-a-year roasting pan.

Who Should Choose Each Option

The Renter or Low-Commitment Organizer

Shelf risers are usually the better fit if you rent, want to avoid cabinet modifications, or need a solution you can move later. They provide a noticeable storage improvement without permanent installation and can be repositioned as your kitchen setup evolves.

The Frequent Home Cook With Deep Lower Cabinets

Pull-out cabinet shelves are likely the better choice if you cook often and keep pans, bowls, ingredients, or containers in deep lower cabinets. They make those items easier to reach and can reduce the repeated reaching and shifting that fixed shelves tend to require.

The Small-Pantry Household

Shelf risers work well for a small pantry filled with short packaged foods, canned goods, snacks, tea, and jars. They can help you use open vertical space while keeping labels visible. Just avoid creating crowded levels that make items difficult to remove safely.

The Cookware Collector

Pull-out shelves are generally more useful for cookware, bakeware, and heavier kitchen tools, provided the cabinet and hardware are designed to support the load. A riser may help separate lids or small pans in some cases, but it is rarely the most practical answer for a cabinet packed with bulky pieces.

The Upper-Cabinet Space Maximizer

Shelf risers are usually the more sensible option for upper cabinets holding mugs, glasses, bowls, or plates. They can turn a single tall shelf into two accessible zones without requiring a more complex overhead installation.

Final Verdict

Pull-out cabinet shelves and shelf risers create usable space in different ways. Pull-outs make deep storage easier to reach, which can be a major improvement in lower cabinets and heavily used pantries. Shelf risers add vertical levels, making them especially helpful in upper cabinets and for collections of shorter kitchen items.

Choose pull-out cabinet shelves when accessibility is the real problem: items are buried, cabinets are deep, and everyday cooking involves too much reaching or rearranging. Choose shelf risers when you have unused vertical room and want a simple, flexible way to organize lighter items. The best small-kitchen upgrade is the one that fixes the frustration you actually have, not the one that merely looks organized for five minutes.

Frequently Asked Questions

Do pull-out shelves create more space than shelf risers?

Pull-out shelves usually create more usable space in deep cabinets because they make the back area accessible. Shelf risers may create more vertical storage capacity when there is unused height above shorter items.

Are shelf risers safe for dishes and glassware?

They can be, as long as the riser is stable, placed on a level shelf, and not overloaded. Store heavier items on the lower level when possible, and avoid stacking glassware where it could be easily knocked over.

Can pull-out shelves be installed in any cabinet?

Not always. Cabinet width, depth, door clearance, hinges, interior frames, plumbing, and fixed shelves can affect whether a pull-out system will fit and operate properly.

Are shelf risers useful in lower cabinets?

They can be useful for lightweight pantry goods or containers, but they are often less effective in deep lower cabinets or for heavy cookware. Pull-out shelves are usually more practical when access is the main issue.

Which option is easier to clean?

Shelf risers are usually easier because they can be lifted out and wiped down. Pull-out shelves also need regular cleaning, but crumbs and spills may collect around the sliding hardware and inside the cabinet.

You Might Also Enjoy

Standing Desk vs. Traditional Desk
House & Home

Standing Desk vs. Traditional Desk: Which Desk Is Right for You?

When comparing a standing desk vs. traditional desk, the right choice comes down to more than whether you prefer sitting or standing. Your available space, work routine, equipment, budget, and willingness to adjust your setup all matter. A desk is one of those everyday items that can quietly make a room easier to use—or become the place where cables, paperwork, and mystery mugs gather.

Adjustable standing desks let you change your work height, while traditional desks provide a fixed surface designed mainly for seated use. Neither is automatically better. The right desk is the one that fits how you actually work, study, create, plan meals, pay bills, or occasionally open your laptop while pretending you are not also watching a recipe video.

Comparison Overview

Standing desks and traditional desks serve the same basic purpose: giving you a dedicated work surface. The main difference is flexibility. Most standing desks can be raised or lowered to support different working positions, while a traditional desk stays at one fixed height.

For many households, the decision also affects the surrounding room. An electric standing desk needs access to power, and any adjustable model requires enough clearance to move upward safely. A traditional desk is often simpler to place, especially in a small office, bedroom, kitchen corner, or multipurpose room where furniture needs to stay put.

Side-by-Side Comparison

CriteriaStanding DeskTraditional Desk
Work positionSupports sitting and standing when adjustablePrimarily supports seated work
Height adjustmentMay use manual or electric adjustmentFixed height
Setup complexityCan require assembly, power access, and cable planningUsually has a simpler setup
Moving partsAdjustable models include mechanisms that may need occasional attentionTypically has fewer moving parts
Space needsRequires overhead and surrounding clearance when raisedNeeds a consistent footprint
Desk accessoriesMay benefit from monitor arms, cable management, or adjustable accessories at different heightsWorks easily with standard seated office accessories
Budget rangeAdjustable mechanisms can increase the costBasic fixed desks are often the simpler, lower-cost option
Best fitPeople who want position flexibility during the dayPeople who prefer a straightforward, stable seated setup

Key Differences

Adjustability Versus Simplicity

The central difference is obvious but important: adjustable standing desks can change height, while traditional desks cannot. That flexibility is useful if your day includes long stretches of computer work and you want to switch positions without leaving your workspace.

A traditional desk keeps things refreshingly uncomplicated. There is no control panel, crank, lifting column, or question about whether the desktop is high enough for your monitor setup. If you are comfortable working seated and do not need regular height changes, fixed furniture may be all you need.

Room Layout and Clearance

A standing desk needs room to travel upward. That sounds simple until you place it beneath shelves, wall cabinets, a window ledge, or a low ceiling feature. In a compact apartment or kitchen-adjacent workspace, measure the intended location carefully before choosing an adjustable model.

Traditional desks are easier to plan around because their height never changes. They can fit neatly under wall shelves or into a built-in nook without causing a surprise collision later. That predictability is especially helpful in shared rooms where every inch has a job.

Stability at Different Heights

A well-designed standing desk should provide a stable work surface throughout its intended height range, but wobble can become more noticeable when the desktop is raised. A tall monitor, heavy desktop computer, uneven floor, or less-rigid frame can all affect how steady the setup feels.

Traditional desks have the advantage of a fixed, lower work surface. That does not mean every fixed desk is rock-solid—construction and assembly still matter—but there are fewer variables once it is in place. For detailed tasks such as drawing, writing, gaming, or working with small tools, that consistency may be appealing.

Accessories and Ergonomic Fit

Changing the desk height also changes how your accessories are positioned. Your monitor, keyboard, mouse, laptop stand, and task light should remain comfortable to use whether you are seated or standing. Monitor arms and adjustable keyboard trays can make the transition smoother, though they are not essential for every setup.

With a traditional desk, you can arrange one seated workstation and leave it alone. A supportive chair and sensible monitor placement still matter, but you do not have to make the same workstation suit two different heights. Less adjusting can be a real benefit if you value a tidy, low-fuss setup.

Mechanical Features and Long-Term Considerations

Standing desks with lifting mechanisms offer more flexibility but also include more components. Electric models need a nearby outlet and add cords to manage. Manual models avoid the power requirement but may take more effort to adjust. Neither approach is inherently troublesome, but both are worth considering before you buy.

Traditional desks generally rely on straightforward construction: legs, a frame, a desktop, drawers, and perhaps a cable opening. Fewer mechanical components can make them easier to understand, assemble, and maintain over time. Sometimes boring furniture is exactly what you want. Boring furniture rarely asks for troubleshooting.

Performance and Everyday Use

Switching Positions During a Workday

A standing desk is useful when you want to alternate between seated and standing work. That does not mean you need to stand all day, and it does not require turning every email into a fitness event. The practical benefit is choice: you can raise the surface for part of the day, then lower it when you want to sit.

A traditional desk is better suited to a mostly seated routine. It provides a consistent setup without interruption, which can work well for focused computer tasks, handwriting, online classes, or projects that require you to remain in one position for a while.

Managing Technology and Cables

Standing desks require more cable planning because monitor, charger, lamp, and computer cords need enough slack to move safely with the surface. Cable trays, clips, and mounted power strips can keep cords from dangling or catching, but they add another step to the setup process.

Traditional desks simplify cable management because the equipment remains at the same height. If your workspace includes a printer, external drives, speakers, or other connected equipment, a fixed desk can make it easier to keep everything connected and contained.

Working in Small or Shared Spaces

In a dedicated office, a standing desk may be easy to accommodate. In a shared bedroom, dining room, or compact kitchen-adjacent corner, its changing height can be less convenient. The desk needs clear space above it, along with enough room for a chair when the surface is lowered.

Traditional desks work well in rooms that pull double duty. Their fixed profile can sit beneath shelves, beside a dining table, or against a wall without changing the layout each time someone uses the space. If your desk needs to blend into daily household life rather than dominate it, that can be a meaningful advantage.

Durability and Maintenance

Standing desks benefit from occasional basic care. Keep the lifting area clear, stay within the manufacturer’s stated weight capacity, check that fasteners remain secure, and arrange cables so they do not snag during height changes. With electric models, the power connection and control system are also part of long-term ownership. A desk mat or coasters can help protect the desktop from drink rings, scratches, and the inevitable drip from a rushed lunch at the keyboard.

Traditional desks usually need simpler maintenance, such as dusting, wiping up spills promptly, tightening hardware, and caring for the desktop according to its finish. Drawers and hinges may eventually need adjustment, but fixed desks generally have fewer parts to inspect. If easy repairs and minimal upkeep are priorities, a sturdy traditional desk can be the more straightforward long-term choice.

Cost and Overall Value

Standing desks can cost more because adjustable frames and lifting systems add complexity. Paying more may make sense if you expect to use the height adjustment regularly or need the desk to support a larger monitor setup or multiple work tools. The value comes from using that flexibility, not simply owning a desk that goes up and down.

A traditional desk may offer better value when you need a dependable surface for seated work and do not expect to change positions often. The money saved can go toward a comfortable chair, useful lighting, storage, or cable management—items that can improve a workspace just as much as a more elaborate desk frame. A less expensive desk may be all you need if it fits your room, supports your equipment, and feels stable.

Who Should Choose Each Option

The Person Who Wants More Position Flexibility

A standing desk is likely the better fit if you want to change your work position throughout the day. It can suit remote work, study sessions, creative projects, and household administration when you do not want to remain seated for every task. Just make sure you have room for the desk to rise, along with a plan for cords and accessories.

The Seated Worker With a Stable Routine

A traditional desk is a strong choice if you do most of your work while sitting and prefer a set-it-and-forget-it arrangement. It can be especially practical if you use a desktop computer, write by hand, game, sew, or complete detailed work that benefits from a stable surface at one familiar height.

The Small-Space Household

A traditional desk may fit better in a small home office, bedroom, kitchen corner, or shared living area. Its fixed dimensions make room planning easier, and it can often sit beneath shelves or cabinets that would limit a standing desk’s movement.

The Dedicated Home Office User

A standing desk can make sense in a dedicated office where you have enough clearance, power access, and space for a chair and other equipment. If the room is built around work rather than shared with meals, guests, or storage, it is easier to take full advantage of an adjustable setup.

The Budget-Conscious Buyer

A traditional desk is often the more sensible starting point when your budget is limited. Look for a stable design with enough surface area and storage for your actual needs. Height adjustment is useful, but it is not essential for every workspace.

Final Verdict

Standing desks are best for people who value the ability to move between sitting and standing and have enough space for an adjustable workstation. They require more planning around cables, clearance, accessories, and possible mechanical upkeep, but that flexibility can be worthwhile when it matches your daily routine.

Traditional desks remain an excellent choice for seated work, smaller rooms, stable setups, and simpler budgets. Choose a standing desk if adjustable height is a feature you will genuinely use. Choose a traditional desk if consistency, simplicity, and easy placement matter more.

Ultimately, the standing desk vs. traditional desk decision depends on how you work, how much room you have, and whether you will genuinely use the adjustable height.

Frequently Asked Questions

Is a standing desk better than a traditional desk?

Not universally. A standing desk is better if you want adjustable working positions, while a traditional desk is better if you prefer a simple, stable setup for seated work.

Do standing desks require electricity?

Some do. Electric standing desks need power, while manual models may use a crank, lever, or other non-electric adjustment method.

Can you use a regular chair with a standing desk?

Yes, provided the desk can be lowered to a suitable seated height. An adjustable chair can make it easier to create a comfortable seated setup.

Are traditional desks easier to maintain?

Generally, yes. They usually have fewer moving parts, so routine care often involves cleaning the surface and occasionally tightening the hardware.

How much space does a standing desk need?

It needs enough floor space for the desk and chair, plus clear vertical space above the desktop when raised. Measure around shelves, cabinets, windows, and wall décor before choosing one.

You Might Also Enjoy

Organize a Small Pantry
House & Home

How to Organize a Small Pantry Closet When Space Is Tight

When you have only one closet for pantry storage, every shelf has to work a little harder. The goal isn’t to create a picture-perfect row of matching jars; it’s to make everyday food easy to find, easy to put away, and far less likely to disappear behind a half-used bag of rice.

This small pantry organization approach works for renters, apartment dwellers, dorm kitchens, and compact homes. Containers and bins can help if they solve a specific problem, but a more functional closet often starts with sorting what you already have.

Affiliate disclosure: This article contains affiliate links. If you make a purchase through one of these links, I may earn a commission at no additional cost to you. As an Amazon Associate, I earn from qualifying purchases.

Quick Overview

A small pantry closet needs a simple system based on how often you use items, what fits safely, and what your household can realistically maintain. You’ll learn how to empty and sort the closet, create practical food categories, use vertical space wisely, and set up a layout that makes restocking easier.

This guide is best for a small single-door pantry closet that stores dry goods, canned foods, snacks, baking ingredients, or meal staples. If your closet is especially narrow, deep, or difficult to reach, the same basic method still applies; you may simply need fewer categories and more attention to accessibility. The pantry doesn’t need to hold every food item you own. It needs to hold the foods that make daily meals easier.

What You’ll Need

  • A clear nearby surface, such as a table, counter, or clean towel on the floor
  • A damp cloth or all-purpose cleaner suitable for your pantry interior
  • A small bag or box for expired, unwanted, or damaged food
  • Optional baskets, bins, shelf risers, turntables, or clear containers
  • Optional labels and a marker
  • A rough idea of the foods your household uses most often

Before You Begin

Organize a Small Pantry_before

Choose a time when you can leave the closet empty for a little while. This is not a major renovation, but trying to organize around stacks of groceries while someone needs cereal immediately can make the process more annoying than necessary.

Check the shelves for loose hardware, peeling liner, moisture, crumbs, or signs of pests before putting food back. Remove damaged packages, clean up sticky spills, and discard anything that no longer appears safe to eat. Food should be stored in sealed containers or intact packages, especially in a closet exposed to heat, moisture, or curious pets.

It also helps to set realistic expectations before you start. A single small closet has limits. If it currently holds pantry staples, oversized serving platters, water bottles, backup cleaning products, and three years of mystery spice blends, it may need fewer items—not simply more organizers.

Step-by-Step Instructions

Step 1: Empty the Closet Completely

Take everything out of the closet, including items tucked into the back corners and anything balanced on top of other food. Place similar items near one another as you remove them: canned goods in one area, snacks in another, baking supplies together, and so on.

Seeing everything at once reveals what the closet is actually holding. You may discover five open pasta boxes, duplicate spices, or ingredients purchased with excellent intentions and then forgotten. That happens in even the nicest kitchens.

Keep food off wet or dirty surfaces, and return any perishable items to proper storage if they ended up in the closet by mistake. The focus here is pantry-safe food such as shelf-stable cans, grains, snacks, and baking ingredients.

Organize a Small Pantry_during

Step 2: Check Dates, Packaging, and What You Actually Use

Go through each item before deciding where it belongs. Set aside food that is past its safe-use date, packages with tears or signs of pests, and items you know your household will not use. If unopened food is still suitable to eat and accepted by a local food donation program, place it in a separate donation box rather than returning it to the closet out of guilt.

For the remaining food, group duplicates together. This makes it easier to spot multiple open packages and decide whether they can be safely consolidated. If you transfer or combine food, avoid mixing products with different ingredients or cooking instructions, and keep any useful date and preparation information.

There is no need to throw away perfectly good food simply because it looks untidy. The point is to reduce the closet to useful, safe items that earn their space.

Step 3: Clean and Assess the Closet Space

Wipe crumbs, dust, and sticky spots from the shelves. Let the closet dry fully before restocking it, particularly if you plan to use bins or shelf liners that could trap moisture underneath.

Next, look at the closet itself. Notice how many shelves it has, how much vertical height each shelf offers, and whether the door opens wide enough for pull-out bins. A deep closet has different challenges than a narrow one. Deep shelves tend to hide food in the back, while tall shelves often waste usable space above short cans and boxes.

Think about access, too. Items used every day should not require reaching above shoulder level, moving a heavy stack, or kneeling on the floor. If someone in your household has limited reach, grip strength, or mobility, keep their most-used foods on the easiest shelf to access.

Step 4: Create a Few Useful Food Categories

A small pantry closet works best with broad categories rather than lots of tiny, complicated zones. Choose categories based on how your household cooks and eats. For example, your closet might include:

  • Breakfast foods
  • Snacks
  • Pasta, rice, and grains
  • Canned and jarred meal ingredients
  • Baking supplies
  • Tea, coffee, or drink mixes
  • Quick lunch or dinner staples

Not every pantry needs every category. Someone who rarely bakes may need only one small baking section, while a household that packs lunches may need a larger snack area. Give space to the foods that support your actual routines, not the version of you who makes homemade bread every weekend in a sunlit kitchen.

Try to keep each category within one shelf zone, bin, or section. These visual boundaries make putting groceries away much simpler later.

Simple Houseware 3-Tier Stackable Can Organizer Rack Hold 36 Cans

Step 5: Assign Shelf Space by Frequency and Weight

Place your most-used items on the shelf that is easiest to reach. For many people, that is around eye or waist level. Daily breakfast foods, coffee supplies, snacks, or cooking staples usually belong here.

Put heavier items, such as canned goods, large jars, and bags of flour, on a lower shelf. This keeps the pantry safer and prevents an upper shelf from becoming a precarious canned-food avalanche. Lighter, less frequently used items can go on higher shelves, provided you can still remove them safely.

Keep backstock modest in a small pantry closet. One spare box of a staple may be practical; six backups can quickly crowd out foods you need this week. If you have additional storage elsewhere, reserve this pantry for open packages and items currently in use.

Step 6: Use Simple Organizers Only Where They Help

Organizers can make a small pantry closet more functional, but they are not mandatory. Start by noticing what is difficult to see, reach, or keep together.

A shallow basket or bin can hold snack packets, seasoning envelopes, or baking decorations so they do not drift across the shelf. If you have a deep pantry, a turntable may help with small jars, condiments, or oils, allowing you to reach items in the back without unloading the front. Shelf risers can create a second level for cans or short jars when there is unused vertical space.

Clear containers are helpful for loose dry goods such as flour, rice, oats, or cereal if the original packaging is bulky or hard to reseal. Make sure each container is food-safe, closes properly, and is labeled with the item name. If you transfer food, keep any necessary cooking instructions and date information from the original package.

Avoid buying organizers before you know the pantry’s trouble spots. A collection of beautiful bins that do not fit your shelves is just clutter with better posture.

Airtight Food Storage Containers with Lids

Step 7: Put Food Back With Labels Facing Forward

Return food category by category. Place frequently used items toward the front and less-used items behind them. Keep like items together, but do not force everything into rigid lines. A little flexibility helps when package sizes change.

Turn labels toward the front whenever possible. It takes only a few extra seconds and prevents the familiar experience of picking up four identical-looking cans before finding the tomatoes. For items in bins or opaque containers, add a simple label such as “Snacks,” “Baking,” or “Pasta.”

If multiple people use the kitchen, make the labels obvious rather than overly clever. “Breakfast” will remain helpful long after “Morning Magic” loses its charm.

Step 8: Create a Simple Restocking Routine

Once the pantry is organized, make it easy to keep that way. When you unpack groceries, place new items behind older ones whenever practical. This helps you use older food first without turning pantry management into a part-time job.

After cooking or grabbing a snack, return items to their category instead of setting them on the nearest open shelf. If a category starts overflowing, treat it as useful information: that food may need more space, another category may need less, or you may be buying more than the pantry can comfortably hold.

A quick check every few weeks is usually enough. Look for nearly empty staples, open packages that need sealing, and foods that have migrated away from their designated area.

Helpful Tips

  • Keep a small “use first” area for open packages and foods nearing their best-by or use-by dates.
  • Store packets and small pouches upright in a bin or small box so they remain visible instead of getting buried.
  • Use the closet door only if it can safely support an appropriate organizer and still close fully. Avoid overloading it with heavy jars or cans.
    Over The Door Pantry Organizer
  • Decant only the foods that regularly create mess or take up awkward space. Original packaging is often perfectly fine.
  • If your shelves are deep, keep backup items toward the back and everyday items toward the front.
  • Consider storing rarely used appliances, party supplies, or serving dishes somewhere else if they are taking over the area designated for food.
  • Leave a little open space. An overfilled pantry is hard to maintain because every new grocery item becomes a tiny game of shelf Tetris.

Common Mistakes to Avoid

  • Buying containers before measuring the pantry. Check shelf height, width, and depth first so organizers fit without wasting space.
  • Organizing food without sorting it. Bins cannot solve expired items, duplicates, or foods nobody plans to eat.
  • Putting heavy cans on high shelves. Store heavier items low where they are safer and easier to lift.
  • Creating too many categories. A small pantry closet needs simple zones that are easy to remember.
  • Hiding everyday staples behind backstock. Keep active-use foods within easy reach and reserve the back for extras.
  • Ignoring open packages. Use clips, containers, or resealable bags to keep dry goods fresh and prevent spills.
  • Treating the system as permanent. Grocery habits change, so adjust your categories when the pantry stops working well.

Final Thoughts

The best way to organize a small pantry closet is to make the space support your real meals and routines. A clear system matters more than matching containers, perfect labels, or shelves that look untouched by human life.

Once each category has a home and the most-used items are easy to reach, the pantry will feel larger simply because you can finally see what you have. That is the kind of pantry organization that earns its keep.

Frequently Asked Questions

Can I organize a small pantry closet without buying anything?

Yes. Start by removing food you cannot use, grouping similar items, placing heavy foods low, and keeping everyday staples at the front. Containers and bins can help with specific problems, but they are not required for a functional system.

What should go on the top shelf of a small pantry closet?

Use the top shelf for lightweight items you do not need every day, such as backup snacks, specialty baking ingredients, or seasonal foods. Avoid storing heavy cans, large glass jars, or anything difficult to remove safely.

Are clear containers necessary for a small pantry?

No. Clear containers are most useful for loose dry goods or packages that do not reseal well. If packaged food is easy to identify, stays fresh, and fits neatly, leaving it in its original packaging is often the simplest option.

How often should I reorganize the pantry?

A full reorganization is usually needed only when your household routines change or the current setup no longer works well. A brief check every few weeks for expired food, nearly empty staples, open packages, and misplaced items can keep the system manageable.

You Might Also Enjoy

Stuff We Keep Buying
House & Home

The Stuff We Keep Buying for Our Homes—and Probably Don’t Need

There are things in my house I genuinely need.

A refrigerator.

A bed.

A coffee maker. Very important.

And then there are the things I apparently believed would transform my life when I put them in my shopping cart. You know what I’m talking about. The stuff we keep buying.

The organizer that was going to fix the junk drawer.

The kitchen gadget that performs one incredibly specific task.

The decorative basket that now contains…other decorative things.

Somehow, our homes keep collecting stuff that’s supposed to make life easier, prettier or more organized.

Sometimes it does.

And sometimes we eventually realize we’re buying stuff to organize the stuff we already bought.

If your cabinets are full, your closets are packed, and yet another “must-have” home product is calling your name, these might be worth skipping.

1. Kitchen Gadgets That Only Do One Thing

You know these.

The avocado slicer.

The banana slicer.

The special tool that removes strawberry stems.

The tiny appliance designed exclusively to make one food you apparently believed you’d start eating four times a week.

Some single-purpose kitchen tools are fantastic if you actually use them. But plenty end up buried behind the mixing bowls because a knife, spoon or pan already does the same job.

Before buying another kitchen gadget, ask:

Would I use this often enough to give it permanent cabinet space?

Because cabinet space is valuable real estate.

And the strawberry probably wasn’t that difficult.

2. More Storage Bins Before We Get Rid of Anything

This one is sneaky because buying organizers feels productive.

Look at us!

We’re getting organized!

Except sometimes we’re not organizing.

We’re purchasing attractive containers for things we don’t need.

Before buying another set of matching bins, pull everything out of the space and decide what actually belongs there.

Then buy storage—if you still need it.

Otherwise, you may end up with beautifully labeled containers full of things nobody has touched since 2018.

That’s not organization.

That’s clutter with excellent branding.

3. Decorative Pillows That Spend Half Their Lives on the Floor

Stuff We Keep Buying_pillows

I like throw pillows.

I’m not coming for your throw pillows.

But there is a point where a sofa stops being somewhere to sit and becomes a pillow storage facility.

If everyone entering the room has to relocate six pillows before sitting down, perhaps the sofa has reached capacity.

Keep the ones you love.

Keep enough to make the room comfortable.

But when the nightly routine involves removing an entire decorative bedding installation before you can get into bed?

We may have crossed a line.

4. Cleaning Products for Every Individual Surface

Kitchen cleaner.

Bathroom cleaner.

Glass cleaner.

Stainless-steel cleaner.

Appliance cleaner.

Cabinet cleaner.

Special cleaner for the cleaner cabinet.

Okay, maybe not that last one.

Different surfaces absolutely can require different care, and manufacturer instructions matter. But many households accumulate bottles bought for one specific problem and never use them again.

Before buying another specialty product, check what you already own and whether it’s appropriate for the surface you’re cleaning.

You may not need twelve bottles under the sink.

And if you do need something specialized, at least you’ll know you’re buying it for an actual job rather than because the bottle promised REVOLUTIONARY SHINE.

5. Organizers for Drawers We Barely Open

Not every drawer needs a system.

Sometimes it’s okay for the batteries to just…live in a drawer.

Social media has convinced us that every cabinet should open to reveal identical containers, matching labels and objects arranged according to height and color.

Beautiful?

Absolutely.

Necessary?

Nope.

Organize the places that cause problems in your everyday life.

If you can already find the tape when you need it, the tape drawer is doing fine.

Leave it alone.

6. Seasonal Decor We Don’t Even Love Anymore

Stuff We Keep Buying_christmas stuff

Holiday decorations have an interesting ability to multiply while they’re in storage.

Every year another wreath appears.

Another pumpkin.

Another Christmas sign.

Another plastic storage tub gets carried into the garage.

And because it’s seasonal, we can go years without really asking whether we still like any of it.

When you decorate this year, pay attention to what stays in the box.

If you’ve skipped something for the last three Christmases, Easters or falls, there’s a decent chance you’re storing it out of habit rather than affection.

You don’t have to decorate every surface just because you own enough stuff to do it.

7. Matching Sets When We Only Needed One Piece

Towels.

Food-storage containers.

Cookware.

Bedding.

Kitchen utensils.

Sometimes the set is genuinely the better deal.

Other times we buy twelve pieces because we needed three—and then spend the next decade storing the other nine.

Before automatically grabbing the set, compare the price of buying only what you’ll actually use.

Because “but it came with six!” isn’t much of a bargain if four of them never leave the cabinet.

8. Trendy Decor We Like Mostly Because We Keep Seeing It

This happens to all of us.

You see something once.

Cute.

You see it ten times.

Interesting.

You see it forty-seven times on Pinterest, Instagram and every store display within a 20-mile radius.

Apparently I need one.

Maybe you genuinely love it.

Or maybe your brain has simply been subjected to an extremely effective marketing campaign.

Give trendy purchases a little time before buying them. If you still love the thing after the initial EVERYBODY HAS THIS wave passes, great.

Bring it home.

If you forget about it three days later?

You just saved money.

9. Duplicate Items Because We Can’t Find the One We Own

Scissors.

Tape.

Phone chargers.

Batteries.

Measuring tapes.

Screwdrivers.

Food-storage containers.

Sometimes we’re not buying too much.

We just can’t find our stuff.

So we buy another one.

And another.

Then one glorious Saturday we clean out a cabinet and discover that we apparently own seven pairs of scissors.

Before replacing a basic household item, do a quick search of the places where it logically—and illogically—might be hiding.

The missing screwdriver may simply be enjoying an extended vacation in the junk drawer.

10. “Someday” Hobby Supplies

Someday I’m going to make candles.

Someday I’m going to bake elaborate cakes.

Someday I’m going to scrapbook.

Someday I’m going to grow herbs indoors, learn calligraphy, make homemade pasta and become the sort of person who owns a pottery wheel.

Trying new hobbies is wonderful.

Buying an entire hobby before discovering whether you actually like doing it is expensive.

Start small.

Borrow equipment when possible. Buy beginner supplies. Try the activity a few times.

Then upgrade when you know you’ve found something you’ll keep doing.

Otherwise “future hobby” has a funny way of becoming “current closet problem.”

11. Backup Items for Things That Rarely Break

Having backups of essentials makes sense.

Toilet paper?

Yes.

Light bulbs?

Sure.

The exact shampoo you use every day when it’s on sale?

Reasonable.

But sometimes the backup mentality spreads to things that don’t need backups.

We buy another serving platter because we might need it.

Extra mugs in case fourteen unexpected coffee drinkers arrive simultaneously.

Three unopened versions of something that takes two years to use.

There’s preparedness.

And then there’s running a small warehouse from your linen closet.

12. Things We Buy Because a Room Feels “Empty”

This may be the biggest one.

An empty wall doesn’t automatically need art.

An open corner doesn’t automatically need a chair.

A clear countertop doesn’t automatically need decor.

A shelf doesn’t have to be full.

Sometimes the room is finished.

We’re just uncomfortable with empty space.

Before buying something to fill a spot, live with the space for a while.

If you eventually find something you love that belongs there, wonderful.

But don’t buy a random object simply because there’s room for a random object.

Empty space is allowed to exist.

The Question to Ask Before Bringing Something Home

I’m not interested in turning this into a minimalist challenge where we own one spoon and experience spiritual enlightenment because the countertop is empty.

I like stuff.

Most of us do.

Our homes contain things that make life easier, things that make us comfortable and things that serve absolutely no practical purpose but make us happy.

Those things have value too.

The goal isn’t to stop buying anything for your home.

It’s to stop automatically buying things because they’re trendy, on sale, supposedly life-changing or filling an empty spot.

Before buying, try asking:

Where will this live?

What problem will it solve?

Do I already own something that does this?

Would I still want it if it weren’t on sale?

And my favorite:

Do I actually want this—or do I want the life the advertisement made me imagine I’d have after buying it?

Ouch.

That last one gets me too.

Final Thoughts

A comfortable home doesn’t have to be an empty home.

And a beautiful home doesn’t have to contain only things that are practical.

Keep the ridiculous mug that makes you laugh.

Keep Grandma’s serving bowl even if you use it twice a year.

Keep the blanket everybody fights over and the decorative thing that serves no earthly purpose except that you love looking at it.

The problem isn’t owning stuff.

It’s accumulating things we don’t use, don’t love and sometimes don’t even remember buying.

So the next time a clever organizer, adorable seasonal decoration or revolutionary kitchen gadget tries to jump into your cart, give it a minute.

Maybe it’s exactly what your home needs.

Or maybe you can go home, open a cabinet and discover you already own two.

You Might Also Enjoy

Making Your Home Look More Dated
House & Home

10 Things Making Your Home Look More Dated Than It Really Is

Have you ever walked into a house, learned when it was built, and thought:

Wait. Seriously?

Sometimes a 30-year-old house looks fresh and current while a much newer home somehow feels like it hasn’t changed since everybody had a landline in the kitchen.

And it isn’t necessarily because the house needs remodeling.

Often, it’s the little things.

A light fixture. A window treatment. Cabinet hardware. Something hanging on the wall that you stopped noticing approximately twelve years ago.

The good news is that many of the things making your home look more dated are also some of the easiest things to change.

Before you start dreaming about knocking down walls, take another look at these ten.

Affiliate disclosure: This article contains affiliate links. If you make a purchase through one of these links, I may earn a commission at no additional cost to you. As an Amazon Associate, I earn from qualifying purchases.

1. Your Window Treatments Belong to Another Decade

Curtains can quietly date an entire room.

We’re not talking about curtains simply because they’re old. We’re talking about very recognizable styles that immediately announce the era they came from.

Think:

  • Heavy swag valances
  • Puffy balloon shades
  • Layers of fabric covering most of the window
  • Very ornate curtain rods and finials
  • Curtains that are too short for the window
  • Old vertical blinds with missing or crooked slats

Sometimes simply removing an elaborate valance and letting more of the window show changes the entire room.

If you’re replacing curtains, simple panels hung higher and wider than the window can make the window appear larger and allow more natural light into the room.

You don’t have to choose plain white curtains, either.

Current doesn’t have to mean colorless.

See Sheer Linen Curtains on Amazon

2. Your Light Fixtures Are Time Capsules

This may be one of the fastest ways to guess when a house was last updated.

Builders install thousands of perfectly functional light fixtures that stay right where they are for decades.

And eventually nobody who lives there even sees them anymore.

Take a fresh look at:

  • Entryway chandeliers
  • Dining-room fixtures
  • Bathroom vanity lights
  • Ceiling fans
  • Flush-mount hallway lights
  • Kitchen pendants

You may discover that one fixture is doing an impressive amount of work making your home look more dated.

And don’t get hung up on one particular finish.

Brass can look fantastic. So can black, nickel, chrome, bronze and mixed metals.

It’s usually the overall design of the fixture, not simply the color of the metal, that tells the story.

3. Everything in the Room Matches

Remember when bedroom furniture came as an entire matching set?

Bed.

Two nightstands.

Tall dresser.

Long dresser.

Mirror.

Possibly an armoire large enough to conceal a small family.

And every piece had exactly the same finish and detailing.

Matching furniture isn’t inherently bad, but a room filled with one complete set can feel more like a furniture showroom from a particular era than a space that evolved naturally.

You don’t need to replace it all.

Try breaking up the set.

Move one nightstand somewhere else. Add a different bedside table. Replace the matching mirror. Mix in a painted, upholstered, metal or natural-wood piece.

A little contrast can make the furniture you already own feel much more intentional.

4. Your Cabinet Hardware Is Telling on You

Cabinets are expensive.

Hardware isn’t.

That’s why knobs and pulls are one of my favorite places to look before deciding a kitchen or bathroom needs a giant makeover.

Tiny shiny knobs, ornate pulls, worn finishes, or hardware that strongly reflects a past decorating trend can make otherwise perfectly good cabinetry feel older.

Replacing hardware can completely change the personality of the cabinets without touching the doors themselves.

Just measure the existing holes before buying replacements.

Otherwise your “quick Saturday update” becomes:

Why am I drilling 37 cabinet doors?

Nobody wanted that project.

See Cabinet Hardware on Amazon

5. Your Walls Have Too Many Little Things on Them

One small framed picture.

Another beside it.

A plaque.

A decorative word.

Three family photos.

Something metal with scrollwork.

And somehow a tiny shelf got involved.

None of those things is necessarily dated by itself. But lots of small, unrelated pieces scattered across every available wall can make a room feel busy and pull it toward an older decorating style.

Try removing some of them temporarily.

Then consider grouping favorite pieces into a deliberate gallery wall or replacing several tiny decorations with one larger piece.

You may discover the room didn’t need new decor.

It needed fewer things competing for attention.

6. Your Bathroom Mirror Is Still Wearing Its Builder Outfit

Making Your Home Look More Dated_BATH MIRROR

You know the mirror.

Huge rectangle.

Glued directly to the wall.

No frame.

Usually accompanied by a row of lights above it.

There’s nothing wrong with a builder-grade mirror. It performs its mirror duties faithfully.

But it can make a bathroom immediately reveal its age.

Depending on how yours is installed, you may be able to frame the existing mirror rather than remove it. Another option is replacing it with one or two framed mirrors that better fit the vanity.

Pair that with updated lighting and suddenly the same vanity may look completely different.

No sledgehammer required.

7. One Old Flooring Choice Is Dominating Everything

Flooring covers a lot of visual territory.

So when it’s strongly associated with a particular period—busy sheet vinyl, heavily patterned carpet, dated tile combinations—it can overwhelm updates you’ve made everywhere else.

Unfortunately, flooring also isn’t always a “spend $42 Saturday morning” project.

So don’t assume replacement is your only option.

A well-sized area rug can change the visual balance of a room. Professionally cleaning carpet may revive something that simply looks tired. Hardwood may be refinished rather than replaced.

And if the floor is in good condition and you like it?

Keep it.

We’re updating a home, not auditioning it for approval from strangers on the internet.

8. Your Switch Plates and Outlets Have Turned That Mysterious Shade of Beige

Making Your Home Look More Dated_fresh paint

You painted the walls.

You changed the curtains.

You hung new artwork.

And there they are:

Twenty-seven-year-old yellowed switch plates.

Once you notice them, they’re surprisingly hard to unsee.

Cracked, painted-over, yellowed, mismatched, or visibly worn covers can make freshly updated walls look unfinished.

Replacing basic cover plates is inexpensive and can make the entire wall look cleaner.

If the actual switches or receptacles are old, damaged, loose, unusually warm, discolored, or otherwise concerning, that’s different. Have a qualified electrician evaluate them rather than treating an electrical issue as a decorating project.

We’re fixing ugly, not decorating our way around a fire hazard.

9. Your Decor Is Shouting the Year You Bought It

Every decade leaves evidence.

Sometimes lots of evidence.

There were Tuscan kitchens. Roosters. Wallpaper borders. Chevron everything. Giant decorative clocks. Word art. Mason jars on absolutely everything. Farmhouse signs explaining that kitchens are for eating and homes are for living.

And eventually today’s biggest trends will date themselves too.

That’s why you don’t need to purge everything that isn’t currently fashionable.

If you still love something, keep it.

The dated feeling usually occurs when an entire room is committed to a single, highly recognizable trend from a particular moment.

Mixing older favorites with simpler pieces, natural materials, personal objects and things collected over time tends to age much better than buying an entire “look” at once.

10. You’ve Been Looking at the Same Room for So Long You Can’t See It Anymore

This one isn’t technically decor.

But it may be the most important item on the list.

You stop seeing your own house.

That strange light fixture?

Normal.

The valance you’ve disliked since 2014?

Invisible.

The chair shoved into a corner because there wasn’t anywhere else to put it?

Apparently it lives there now.

Try this:

Take a photo of the room.

Then look at the photo instead of the room.

It’s bizarre how quickly you’ll notice things you’ve walked past every day for years.

You may immediately spot a crowded corner, undersized artwork, dated fixture, furniture arrangement or decorative piece that never bothered you in person.

Better yet, leave the room for a while and come back with one question:

If I were decorating this room today, what would I change first?

Start with that.

Don’t Accidentally Replace “Dated” With “Trendy”

There’s a trap hiding in articles like this.

You start noticing older things in your home, decide everything must go, and replace it all with whatever happens to be trending right now.

Congratulations.

You may have just scheduled another dated-house problem for 2031. 😂

Instead of chasing every trend, use them selectively.

Keep things you genuinely love.

Choose larger or expensive pieces because they work for your home—not because they’re currently everywhere online.

Then have fun with trends through things that are relatively easy to change:

  • Pillows
  • Throws
  • Artwork
  • Lamps
  • Hardware
  • Paint
  • Smaller decorative pieces

Your home doesn’t need to look like it was decorated yesterday.

It should look like it belongs to you today.

Final Thoughts

If your house feels older than it actually is, don’t immediately assume you need new cabinets, new flooring, new furniture and a contractor who arrives carrying a clipboard and a frightening estimate.

Look at the small stuff first.

The curtains.

The lights.

The hardware.

The mirror.

The things hanging on the walls.

Those details can have an outsized effect on how current a room feels—and many of them can be changed without spending much money.

And remember: dated isn’t the same as old.

An antique table you adore isn’t automatically making your house look dated.

Neither is dark wood, brass, floral fabric, vintage art or anything else you genuinely love.

A home feels current when the things inside it feel chosen rather than simply left there.

That’s a much better goal than trying to make your house look like everybody else’s.

You Might Also Enjoy

Little Home Upgrades
House & Home

12 Little Home Upgrades That Make Everyday Life Surprisingly Better

Not every home improvement needs a contractor, a demolition crew, or six months of wondering why you ever started.

Some of the best upgrades are ridiculously simple.

These are the little home upgrades you install, replace, move, or add—and then wonder why you lived without them for so long.

A light that turns on exactly where you need it. An outlet where you’re always hunting for a charger. A drawer that no longer requires getting on your knees and excavating three frying pans to find the one in the back.

None of these will get you a dramatic HGTV reveal.

But they might make an ordinary Tuesday noticeably less annoying.

And sometimes that’s the better upgrade.

Affiliate disclosure: This article contains affiliate links. If you make a purchase through one of these links, I may earn a commission at no additional cost to you. As an Amazon Associate, I earn from qualifying purchases.

1. Put Outlets With USB Ports Where You Actually Charge Things

If your phone charger currently requires an extension cord, a power strip, and the removal of a lamp, we can do better.

Replacing a standard outlet with one that includes built-in USB charging can eliminate adapters and cord clutter in the places where everybody naturally charges devices.

Good spots include:

  • Beside the bed
  • Near the sofa
  • Kitchen charging areas
  • Home offices
  • Guest rooms

USB-C is especially worth considering as more devices use it.

You can also get outlet extenders and charging stations if you don’t want to replace an electrical receptacle.

The point isn’t creating a futuristic smart house.

It’s being able to charge your phone without crawling behind furniture.

Small victory. Still counts.

5 Outlet Extender with 4 USB Ports

2. Add Under-Cabinet Lighting

This is one of those upgrades that seems decorative until you have it.

Then you realize you’ve apparently been chopping onions in a cave.

Under-cabinet lights illuminate the part of your kitchen where you’re actually working instead of relying entirely on ceiling fixtures behind you.

They can also make the kitchen feel warmer at night when you don’t want every overhead light blazing.

And you don’t necessarily need an electrician. Plug-in and rechargeable versions make this a realistic upgrade even for renters.

Under Cabinet Lighting

3. Install Motion-Sensor Lights in Dark Closets and Cabinets

You open the hall closet.

It’s dark.

You reach inside anyway.

Something falls on you.

Excellent.

Small rechargeable or battery-operated motion lights are fantastic in places that never had adequate lighting:

  • Closets
  • Pantries
  • Under sinks
  • Deep cabinets
  • Stairways
  • Laundry areas
  • Garage storage

Open the door, light comes on.

It’s an embarrassingly small improvement that can make you happy every single time it happens.

Motion Sensor Light

4. Add Pull-Out Shelves to Deep Lower Cabinets

There are things living in the back of your kitchen cabinets that haven’t seen daylight since 2019.

Pull-out shelves bring the back of the cabinet to you.

Instead of kneeling on the floor and removing the colander, stockpot and three lids to reach something hiding in the back, you slide the shelf out.

They’re especially handy for:

  • Pots and pans
  • Small appliances
  • Food-storage containers
  • Pantry items
  • Cleaning supplies

You don’t necessarily need to replace your cabinets, either. Retrofit pull-out organizers are available for many existing cabinet sizes.

Your knees will approve.

Pull Out Cabinet Organizer

5. Put a Drop Zone Beside the Door You Actually Use

Not the beautiful front entry nobody enters through.

The door everybody really uses.

If your family comes through the garage carrying keys, backpacks, purses, mail, sunglasses and assorted evidence of the outside world, give those things somewhere to land.

A simple drop zone might include:

  • Hooks
  • A small shelf
  • Baskets
  • A mail tray
  • Shoe storage
  • A key holder

This isn’t just an organization upgrade.

It’s a “where are my keys?” prevention system.

Key and Mail Organizer

6. Replace One Annoying Showerhead

There are few household disappointments quite like standing underneath a showerhead that produces approximately nine drops of water.

You don’t have to renovate the bathroom to improve your shower.

Replacing an old showerhead can improve spray patterns, adjustability and the overall experience considerably. Handheld models can also make rinsing the shower, washing pets and other cleaning jobs easier.

Just check your local water-use requirements and the specifications before buying.

It’s a relatively inexpensive upgrade you can appreciate every single day.

High Pressure Handheld Shower Head

7. Add Soft-Close Hardware Where Things Slam

Once you’ve had soft-close drawers, a regular drawer feels surprisingly aggressive.

BANG.

Well, good morning to you too, silverware drawer.

Depending on your cabinetry, you may be able to retrofit existing doors and drawers with soft-close hinges, dampers, or slides rather than replacing the cabinets themselves.

It’s especially nice in kitchens, bathrooms and anywhere somebody gets ready while another person is sleeping.

Will soft-close cabinets change your life?

No.

Will you become irrationally annoyed by cabinets without them afterward?

Possibly.

Soft Close Drawer Slides

8. Install a Better Closet System

Many closets aren’t actually too small.

They’re just terribly designed.

One rod stretched across an empty box wastes an enormous amount of usable space.

Adding a second hanging rod, shelves, drawers, baskets or adjustable components can turn the same closet into something considerably more useful.

And don’t automatically buy an elaborate closet system.

First look at what you own.

If you have lots of shoes, prioritize shoe storage. If you mostly wear folded clothes, add shelves or drawers. If dresses make up half your wardrobe, don’t install double rods everywhere.

Build the closet around your stuff—not somebody else’s Pinterest closet.

Wall Mounted Closet System

9. Put a Full-Length Mirror Where You Actually Get Dressed

A full-length mirror is one of those things you don’t think much about until you live in a house without one.

Then you’re standing on the other side of the room trying to see your shoes in a bathroom mirror that stops at your waist.

You don’t need floor space for a big leaning mirror, either. The back of a bedroom, bathroom, or closet door can be the perfect spot for one—especially in a smaller room.

It’s useful for the obvious reason: you can actually see your whole outfit before you leave the house.

But a well-placed mirror can also bounce light around a darker room and make a small space feel a little more open.

If you’ve got an unused door and approximately five minutes, this may be one of the easiest upgrades on the entire list.

And once you get used to having one, you’ll probably want one in every house after that.

Full Length Mirror Over the Door

10. Replace Bad Power Strips With a Real Charging Setup

Look behind your television or desk.

Actually…

Maybe don’t. 😂

If it’s an octopus of cords, adapters and mystery cables, a better cable-management and charging setup can make a surprisingly big difference.

Use appropriately rated surge protection where needed, shorten unnecessarily long cords when possible, label cables you can never identify, and mount a power strip rather than letting it flop around on the floor.

It’s not glamorous.

But the next time you need to unplug the printer and don’t accidentally disconnect the entire internet, you’ll understand why it made the list.

Under Desk Cable Management 

11. Put Hooks in the Places Where Things Already Land

This may be the cheapest upgrade here.

If towels constantly end up on the bathroom floor, maybe you need another hook.

If your robe lives on a chair, put a hook beside the bed.

If reusable grocery bags pile up near the garage door, hang them there.

If headphones are permanently draped over your desk, give them a hook underneath it.

Pay attention to the places where things naturally accumulate.

Sometimes your house is practically telling you where the hook belongs.

Over the Door Hanger

12. Add Dimmers to the Lights You Use Most

There are times when you need to see everything.

And there are times when nobody needs the kitchen illuminated like an operating room.

Dimmers let the same room work differently throughout the day—bright for cooking or cleaning, softer for dinner or winding down in the evening.

Bedrooms, living rooms, dining areas and kitchens are obvious candidates.

Just make sure the switch, fixture, and bulbs are compatible, and hire an electrician if you’re not comfortable doing electrical work.

This is one of those small upgrades that doesn’t add more stuff to your home.

It simply makes the home you already have feel better.

Smart Dimmer Switch

The Best Home Upgrades Fix Something That Bugs You

Here’s the easiest way to decide which little home upgrade is worth doing first:

What annoys you every day?

Not what looks impressive online.

Not what somebody says every modern home “must have.”

What makes you mutter under your breath?

The dark pantry?

The cabinet you hate reaching into?

The pile of backpacks by the garage door?

The showerhead you have personally insulted on multiple occasions?

Start there.

A $25 improvement that solves a problem you encounter twice a day can be more satisfying than a $2,500 improvement you barely notice.

Final Thoughts

The little inconveniences in a house are easy to tolerate because none of them seem important enough to fix.

So we keep crawling under desks looking for outlets.

We keep digging through dark cabinets.

We keep moving the same pile of stuff off the kitchen counter.

And then one Saturday you spend twenty minutes fixing the problem and think:

Why didn’t I do this three years ago?

These little home upgrades are my favorite kind.

They don’t necessarily make your house dramatically prettier or increase its value by thousands of dollars.

They just make living there easier.

And considering how much time we spend at home, that’s a pretty good return on twenty minutes and a screwdriver.

You Might Also Enjoy

Scroll to Top